Dynamics 365 Business Central
Last updated: August 11, 2026
PREREQUISITES
The user must have the administrator permissions to enable the connexion
The user must use the Online version of Business Central, the "On Premise" version is not supported by the connexion
Depending on your use case, the user might have to install the extension and some additional configuration (see extension section below)
CONNECTION
Step 1: Choose a name for your connection

Step 2: Choose whether to enable the analytical accounting data exchange (OPTIONAL)

Step 3: Deferral Codes (OPTIONAL)
If this option is visible, the integration with Business Central supports deferral codes when creating sales and/or purchase invoices. Select Active to enable this support. Once activated, an additional dropdown menu will appear on the next page of the setup process, allowing you to select the deferral template to apply when creating invoices that require revenue or expense deferral.

Step 4: Click "Authorise" to finalise the connection.
AUTHENTIFICATION
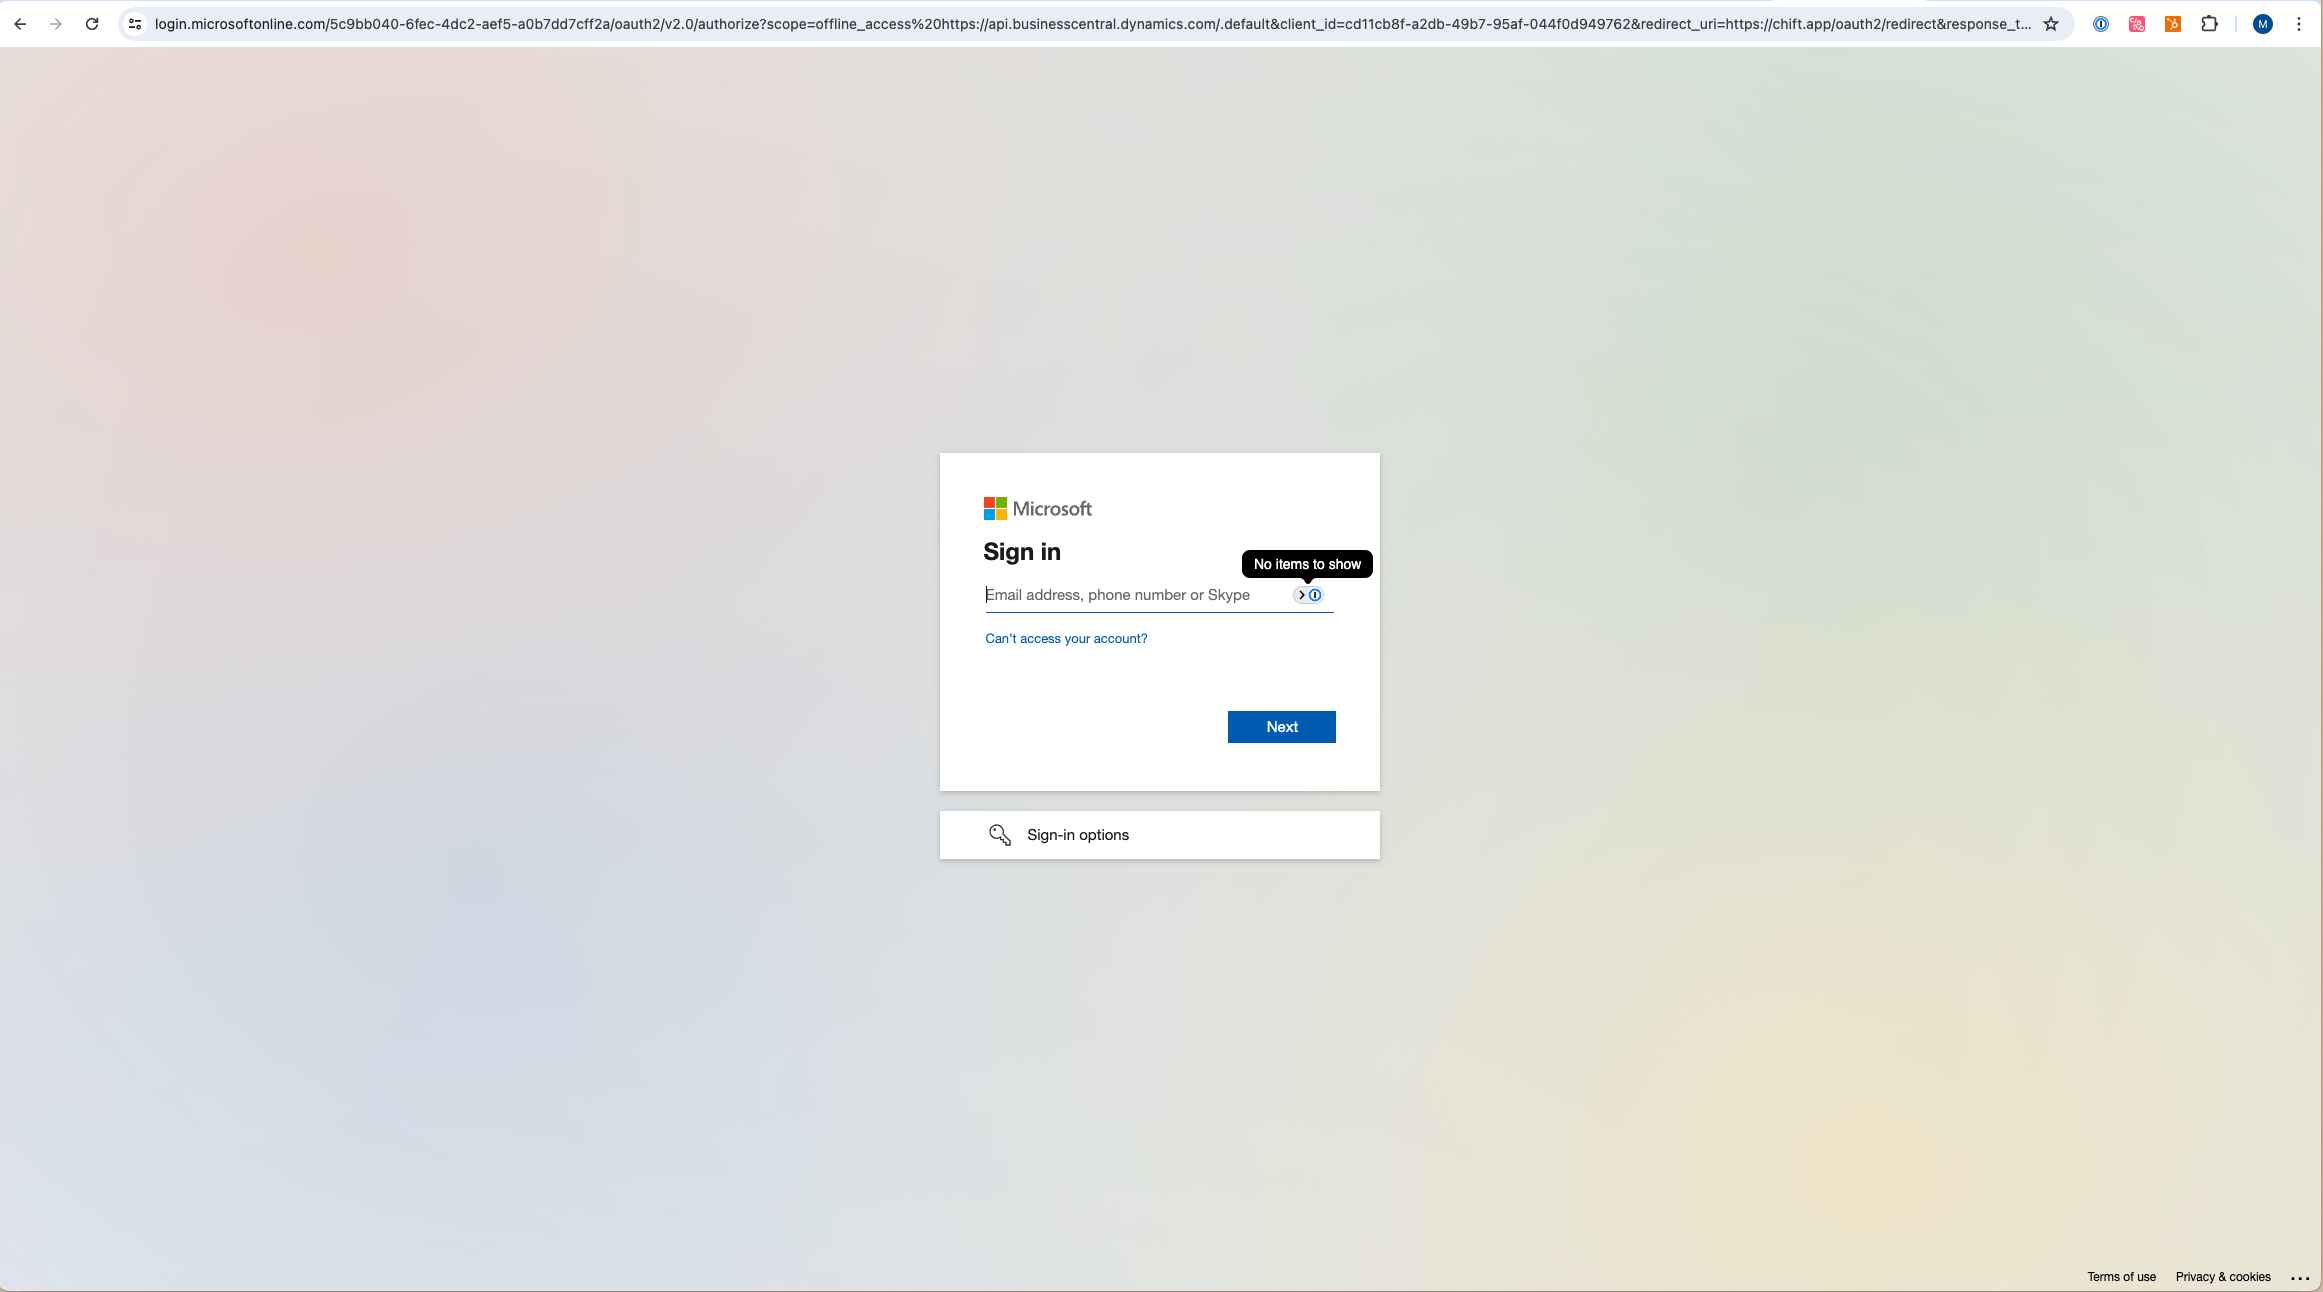
You will be redirected to a Microsoft Dynamics login page to authenticate your account.
CONFIGURATION
Step 1: Select the environment you wish to connect

Step 2: Select the company you'd like to activate the integration for

Step 3: Select the deferral template to use when recording deferred revenues and/or expenses on created invoices (OPTIONAL)

Step 4: Click "Submit" to finalise the integration configuration

EXTENSION
The Chift extension for Dynamics 365 Business Central is designed to expose additional data that is not available through Business Central's standard API. It does not modify or create new behaviour within Business Central but enhances the existing capabilities by providing access to more data and functionalities. The extension is only available when you have access to the Microsoft AppSource. The extension file cannot be shared for on-premise installations neither environments not having access to the Microsoft AppSource.
Installation
The Chift extension can be easily installed from the Microsoft AppSource store. Follow these steps to install the extension:
Navigate to the Chift extension page on Microsoft AppSource.
Click on the "Get it now" button.
Follow the on-screen instructions to complete the installation.
The installation process is straightforward and typically requires just one click.
Troubleshooting
If the user activating/using the connector lacks sufficient permissions, you may encounter this error:
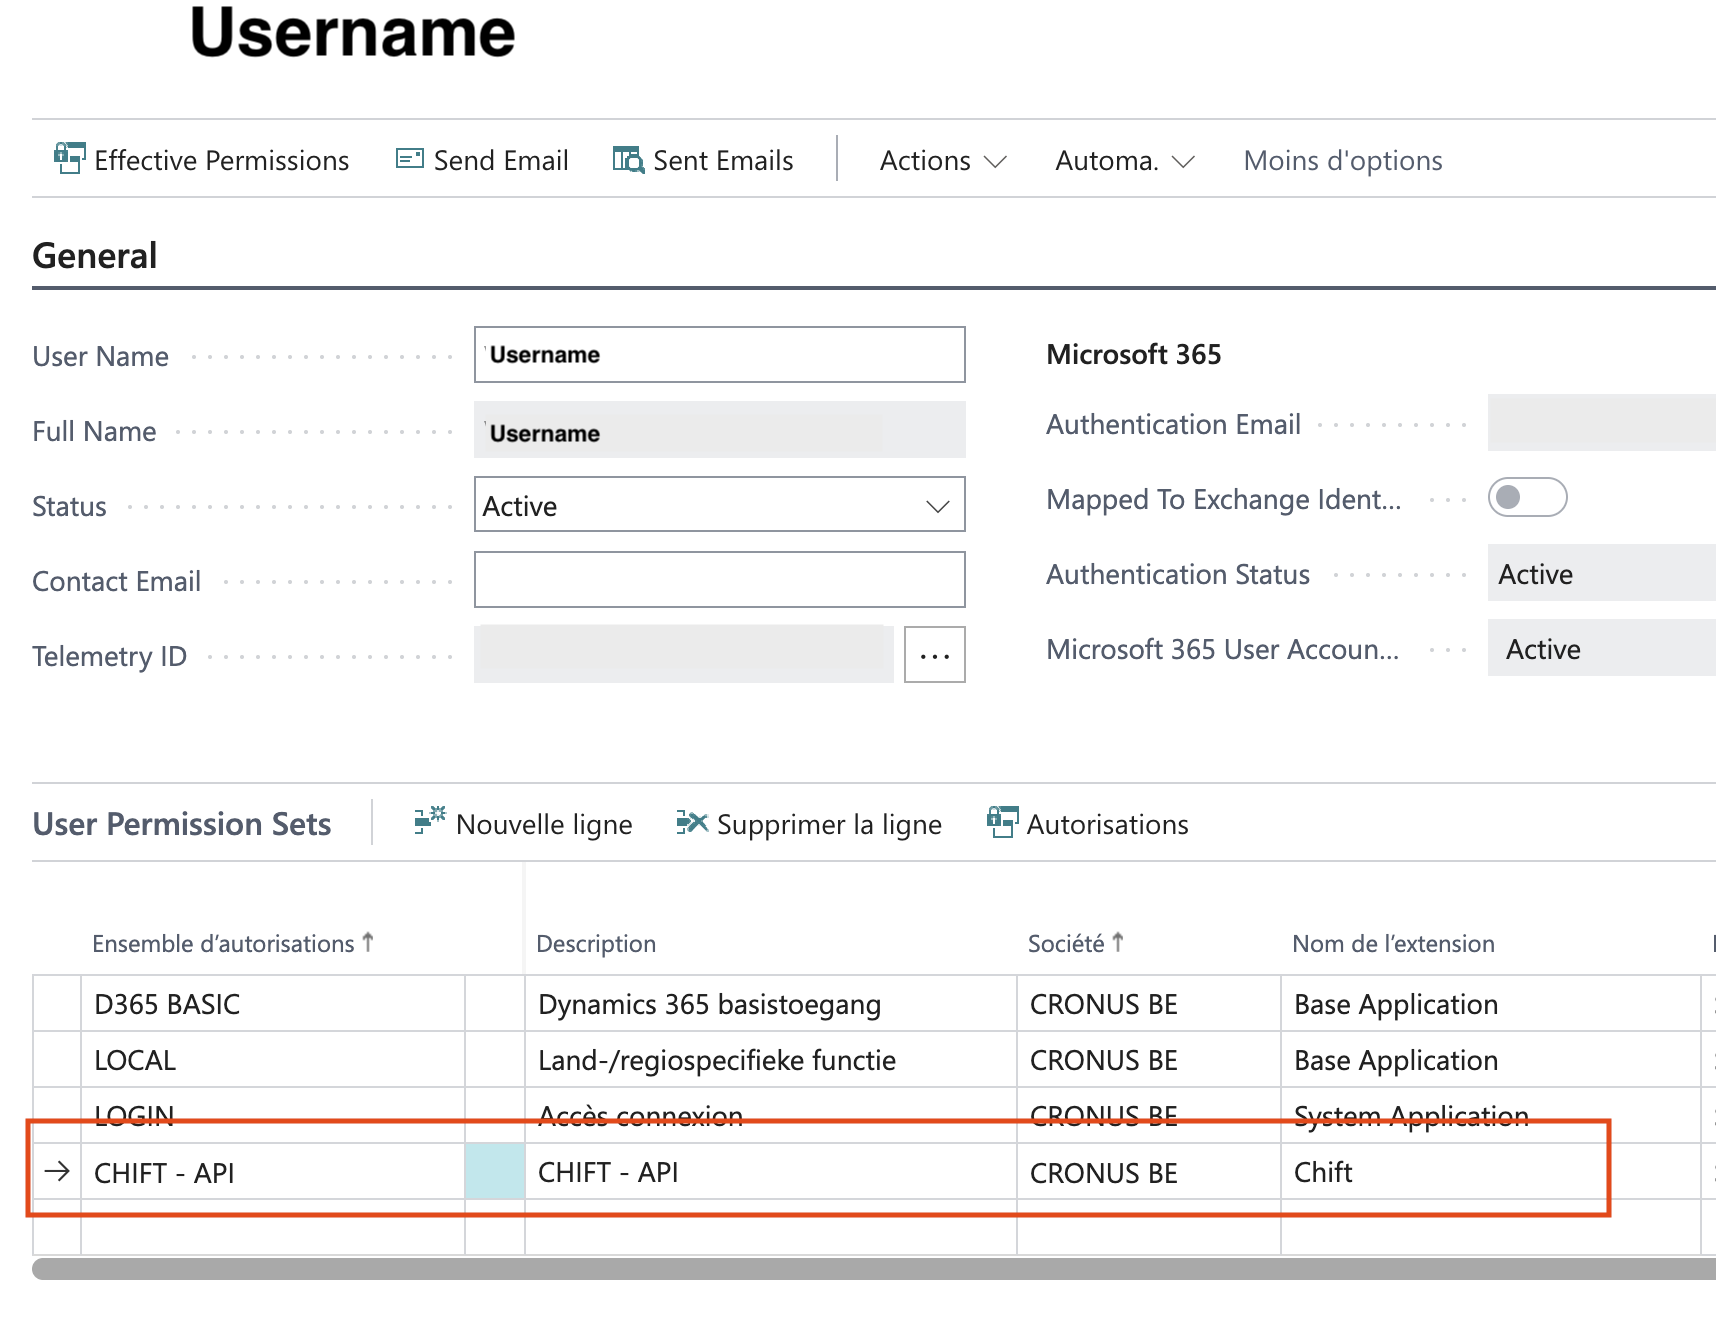
Could not read extension version using the current account. Please add the "Chift - API" permission set to your user.
To fix this, assign the "Chift - API" permission set to the affected user:
Compatibility
Available with Business Central version 23 and higher. The extension is only available when you have access to the Microsoft AppSource. The extension file cannot be shared for on-premise installations on environments not having access to the Microsoft AppSource.
Update
The extension evolves over time to add new features. To update the extension to benefit from the last version you need to follow the steps below:
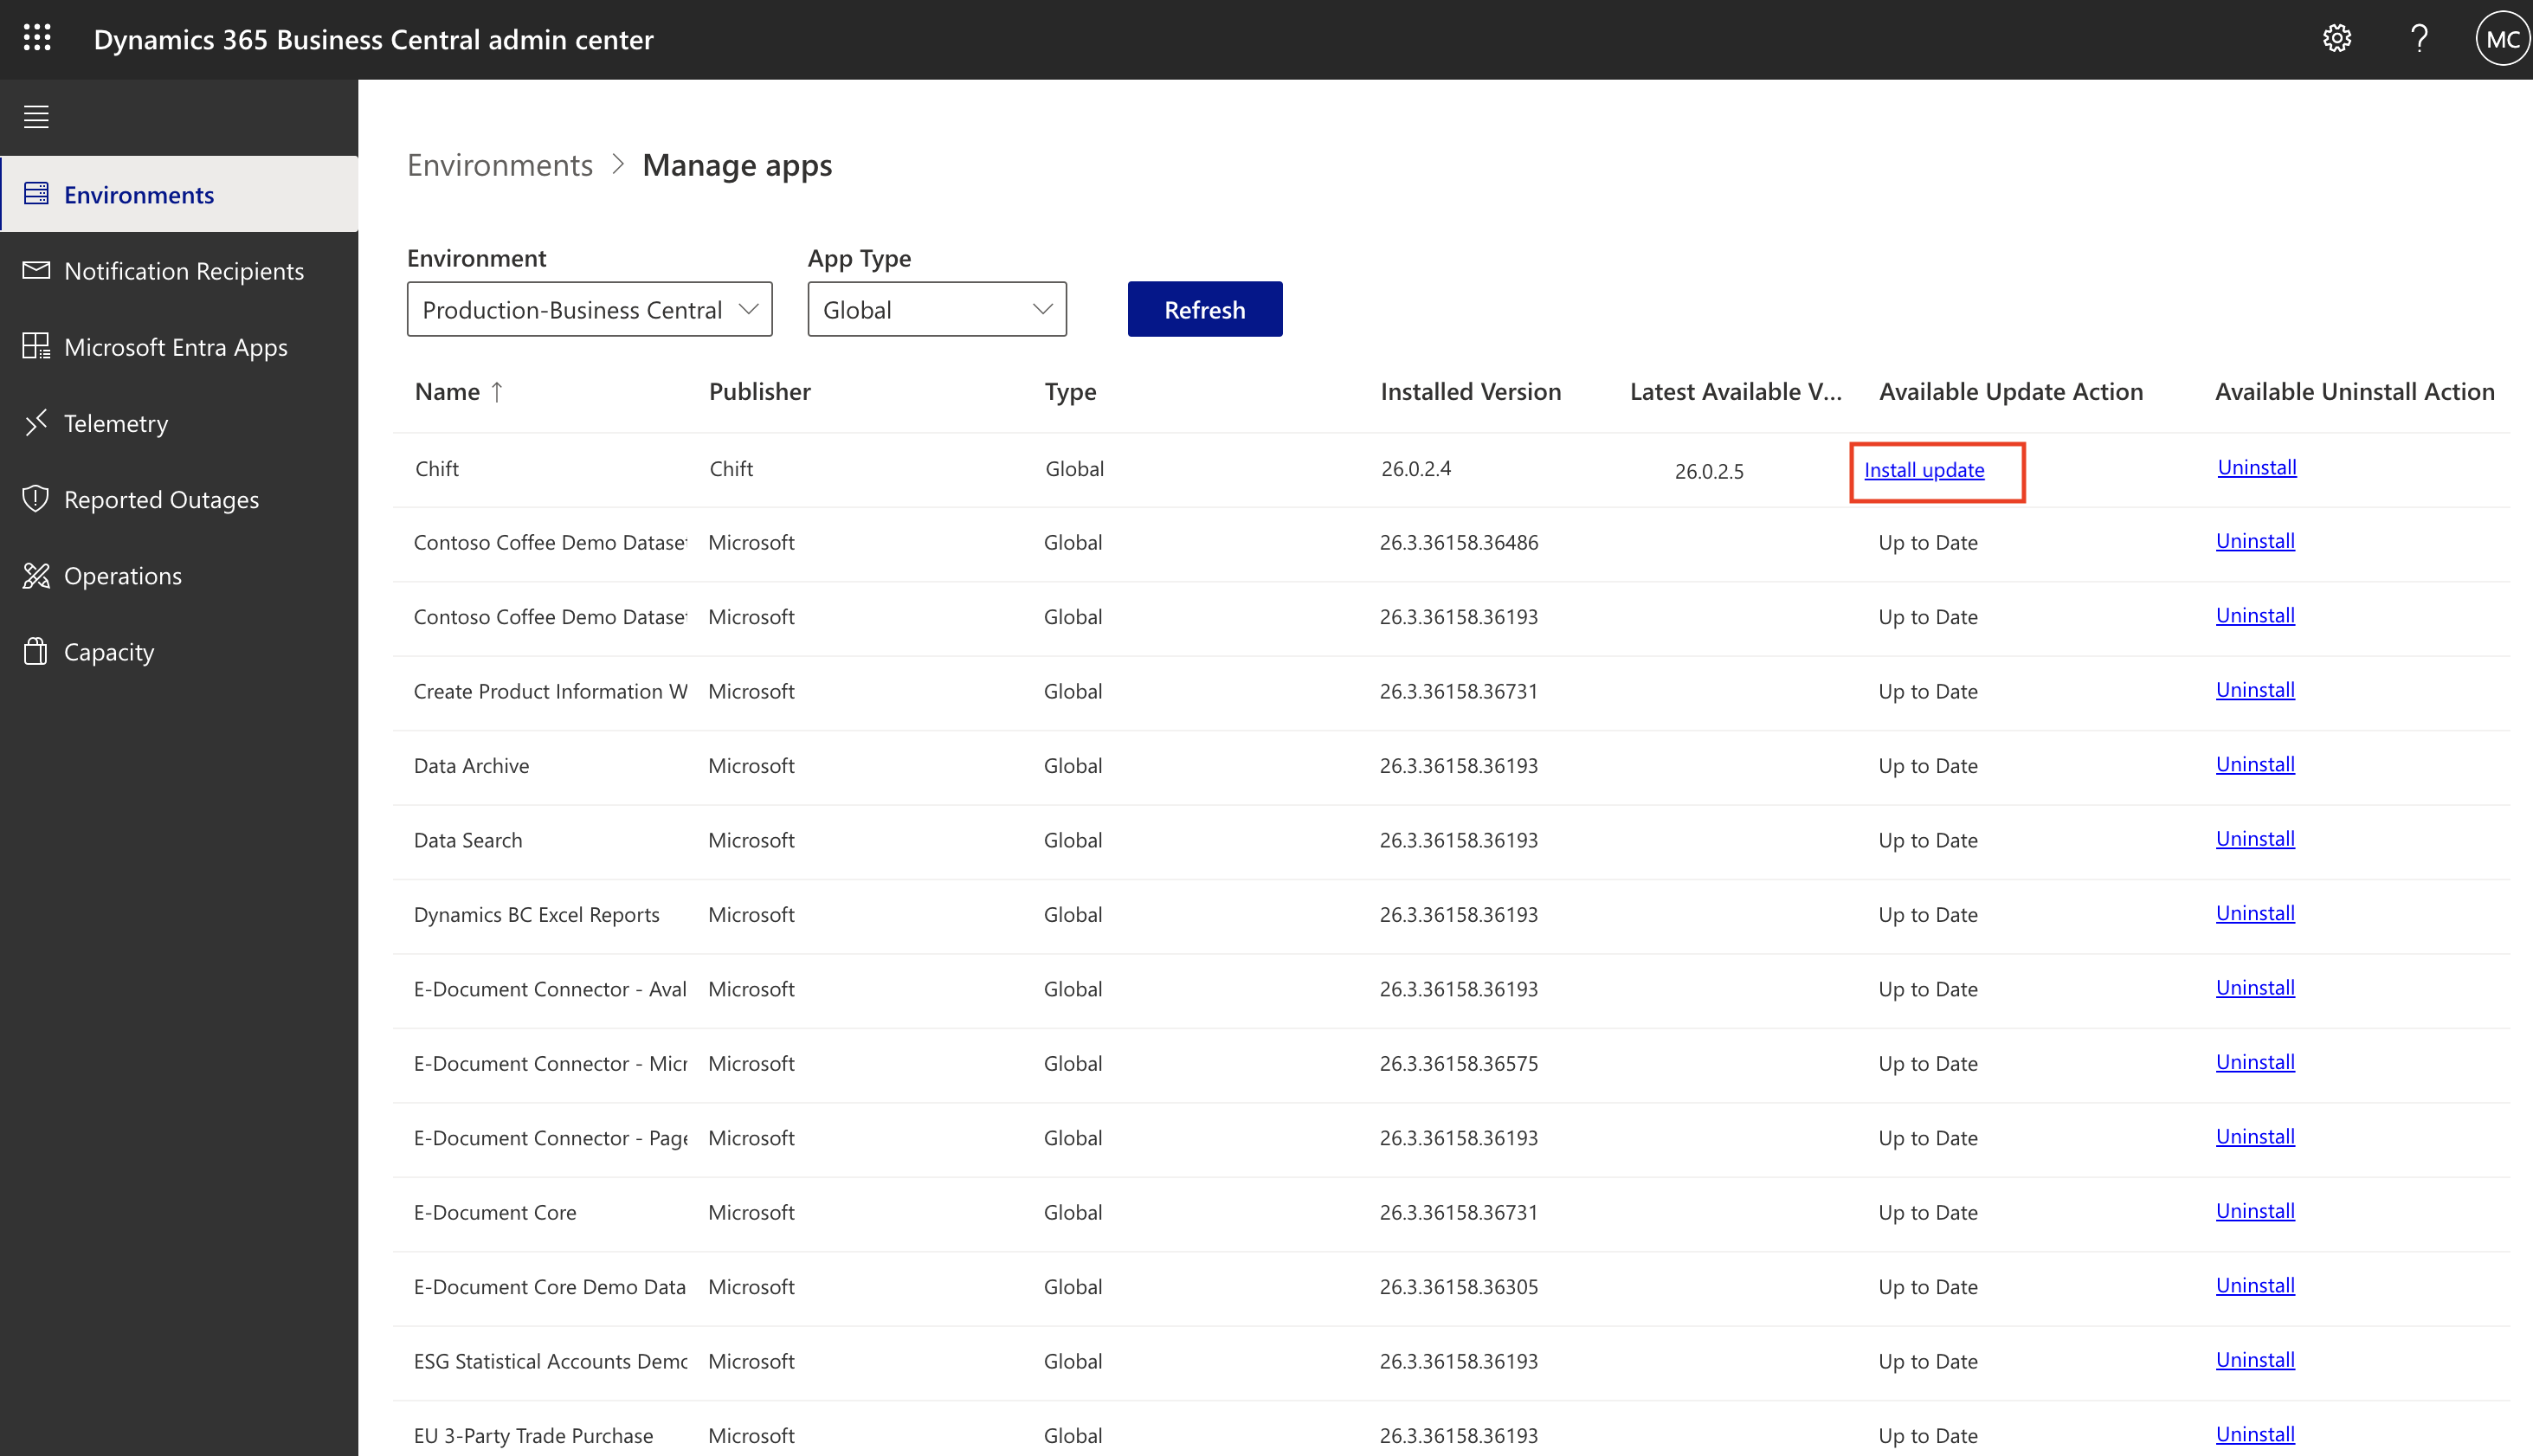
Go to the "Admin Center"
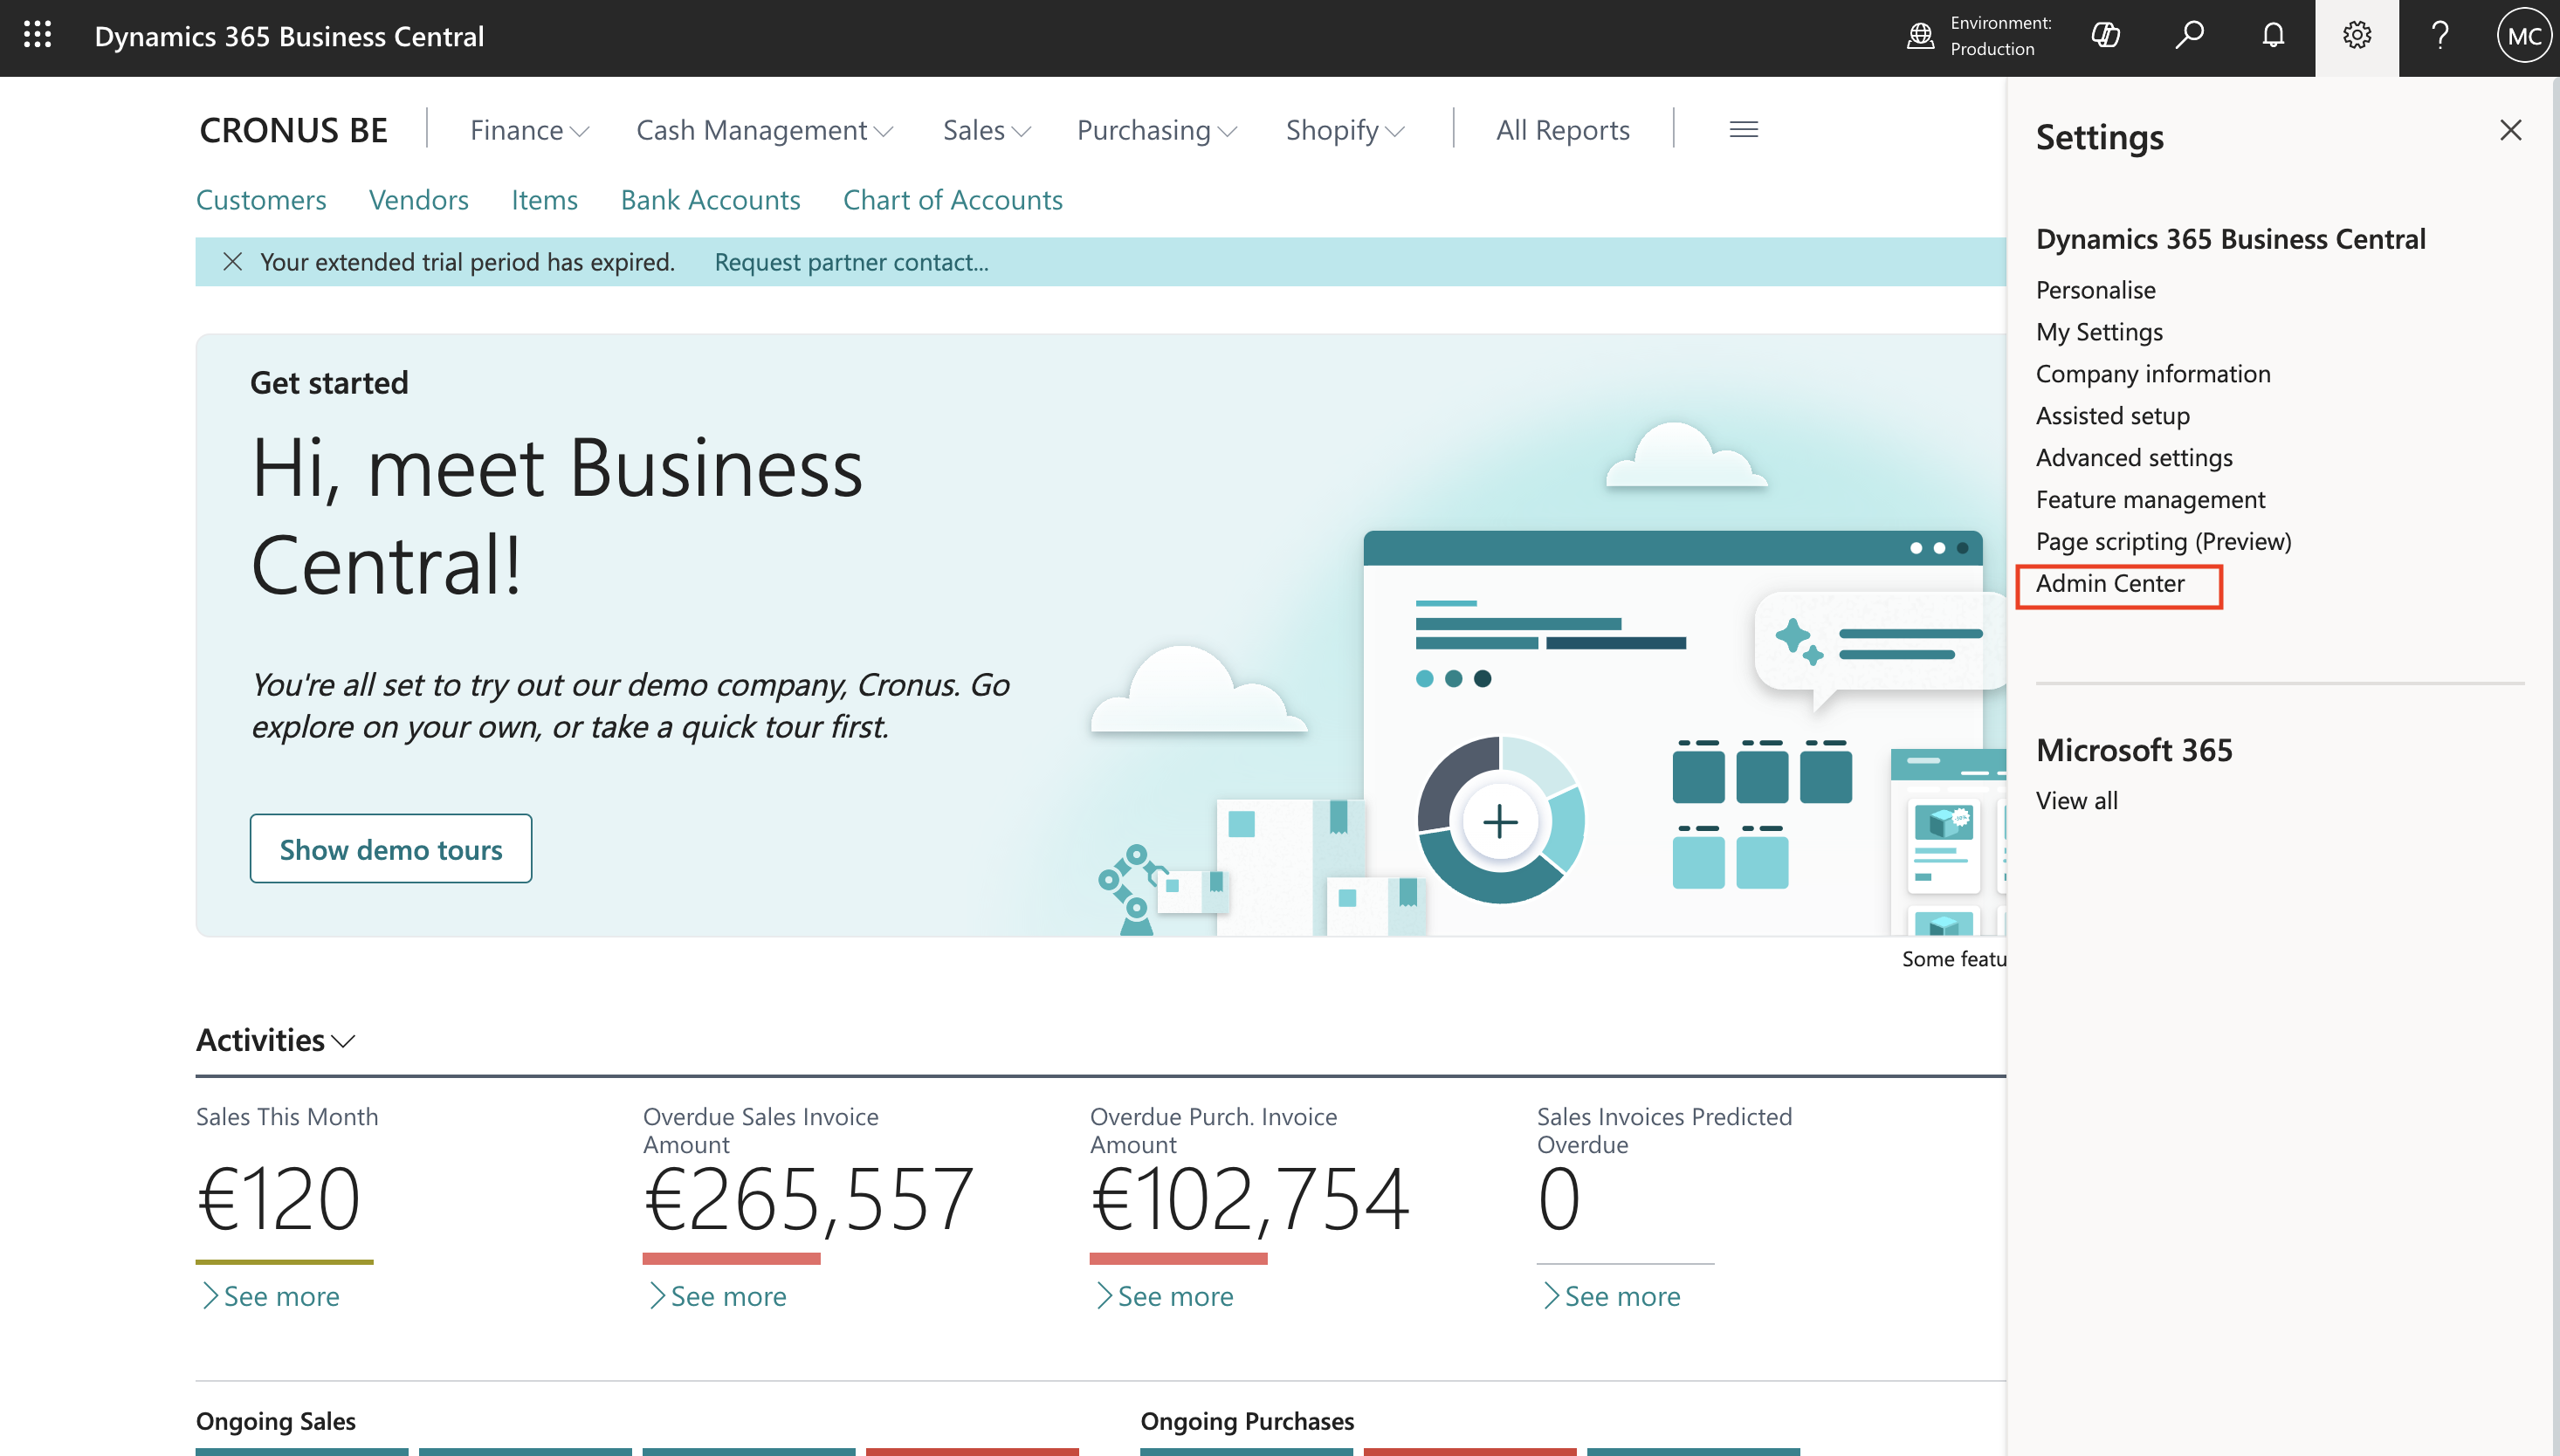
Select the environment in which you want to update the extension
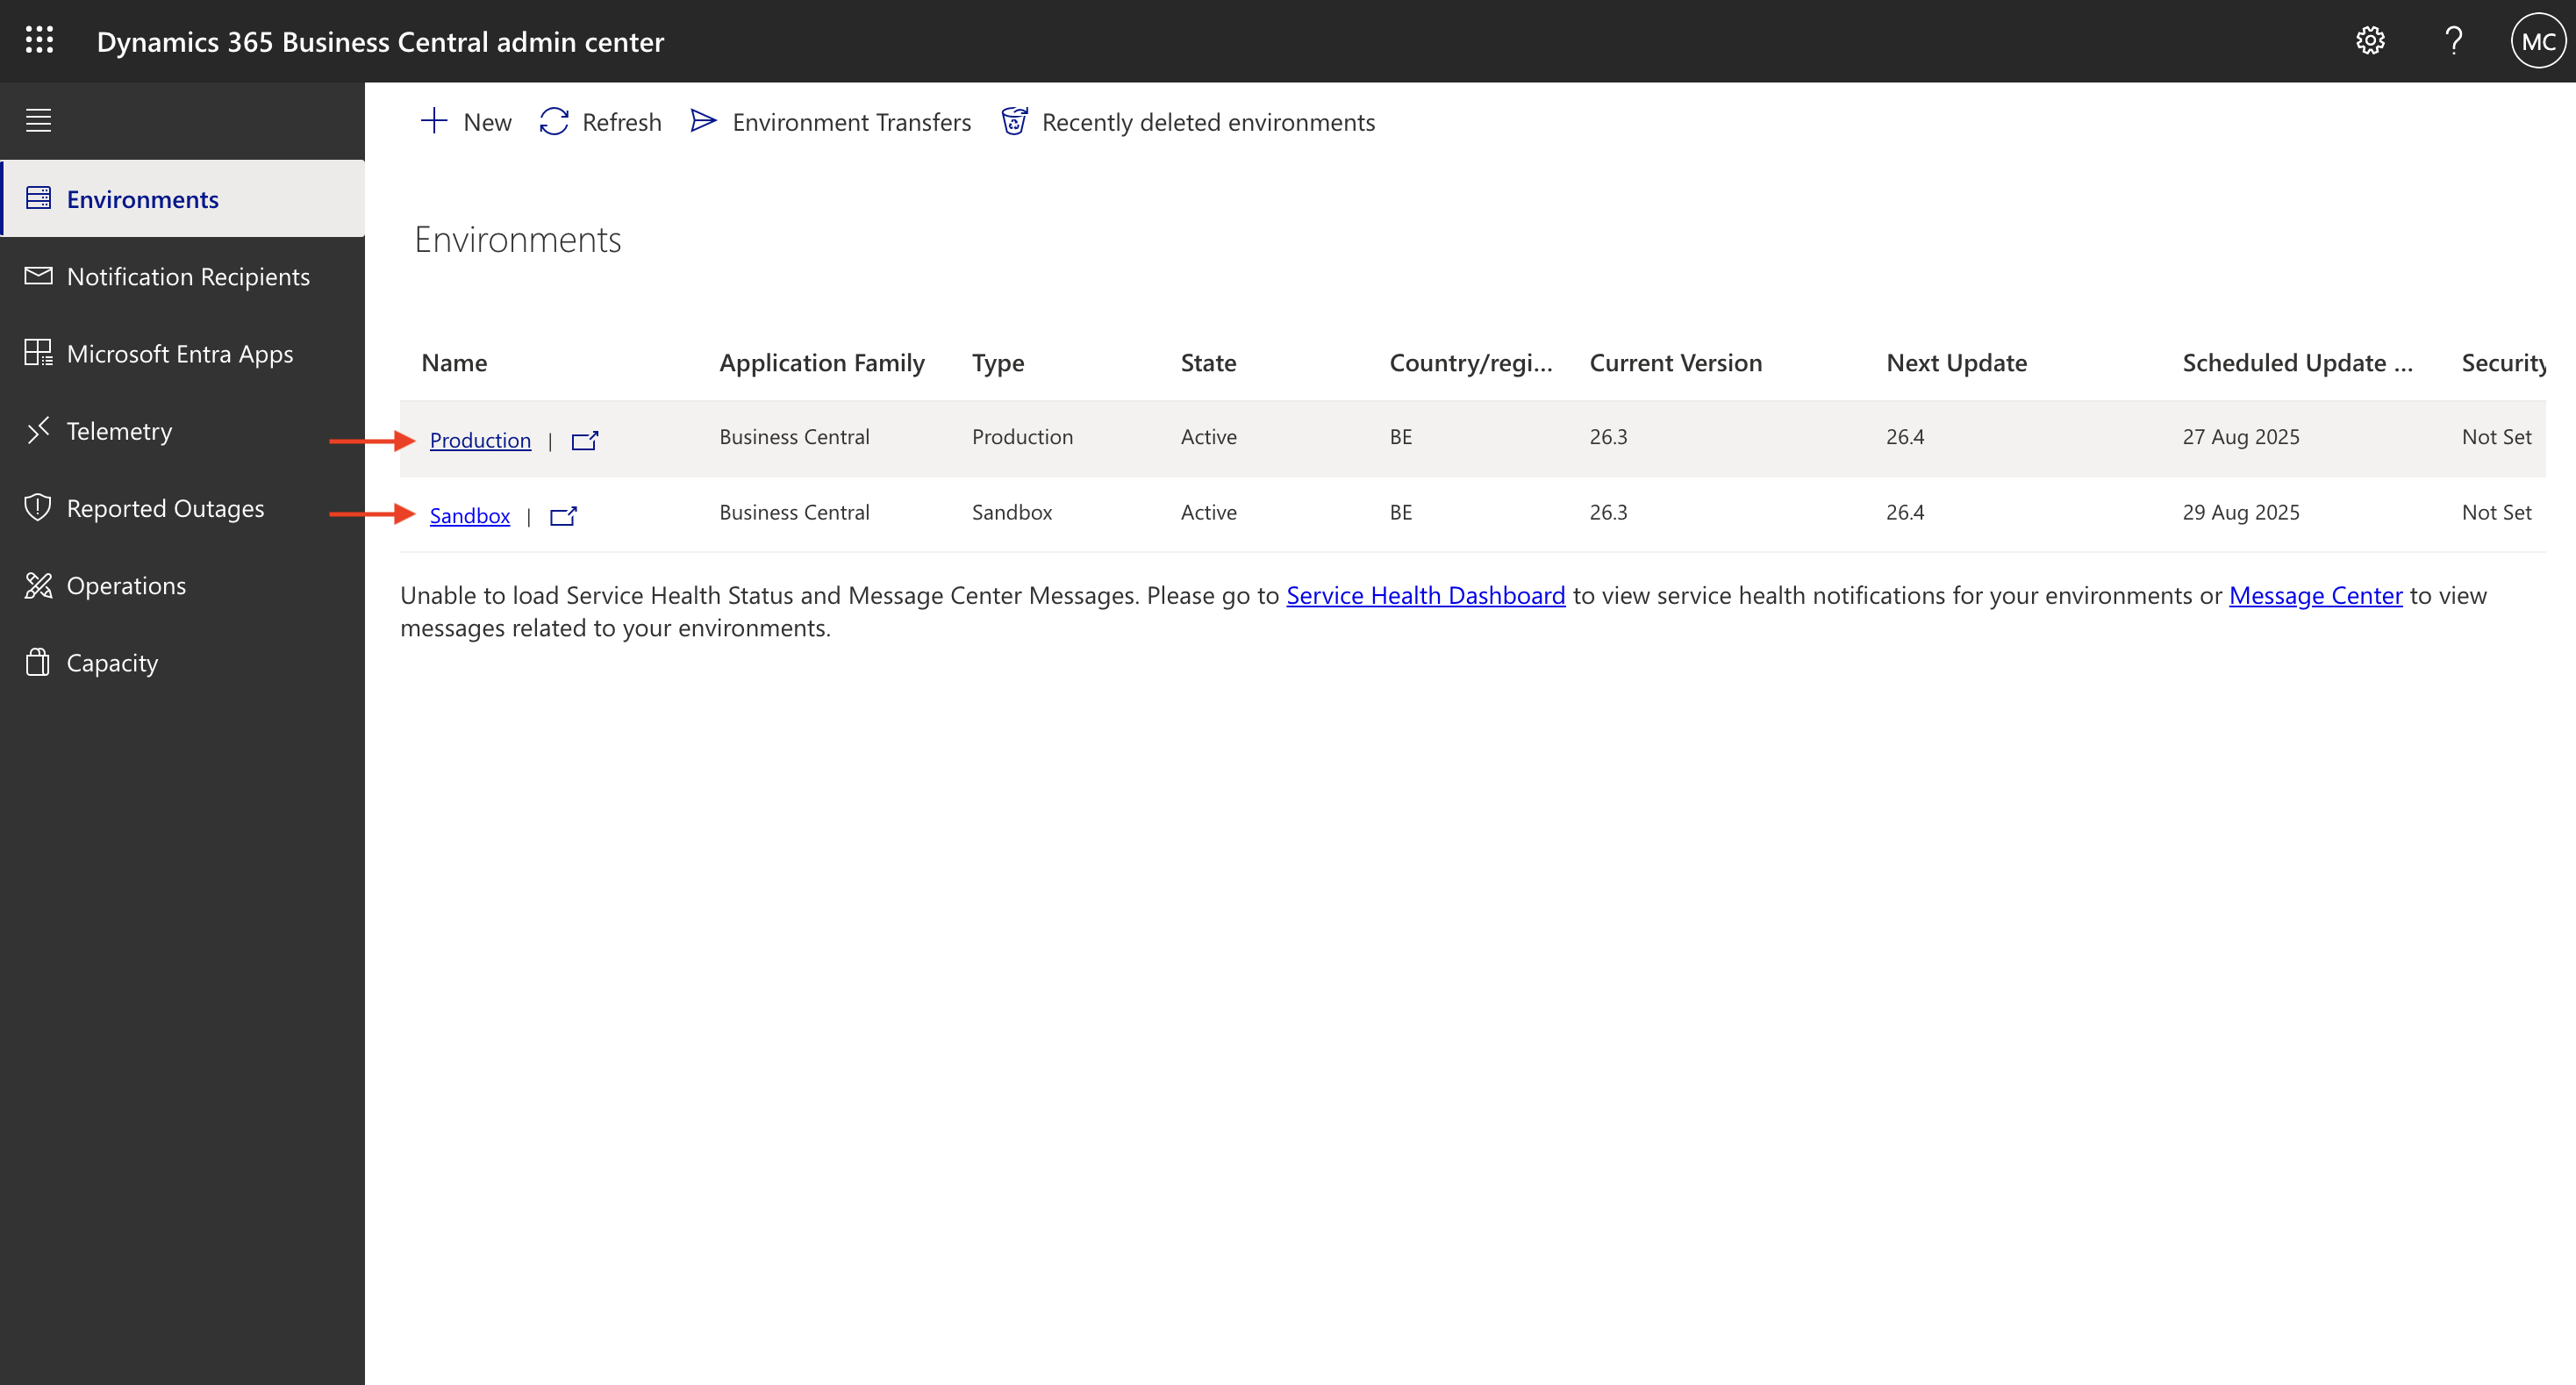
Go to the "Apps" menu
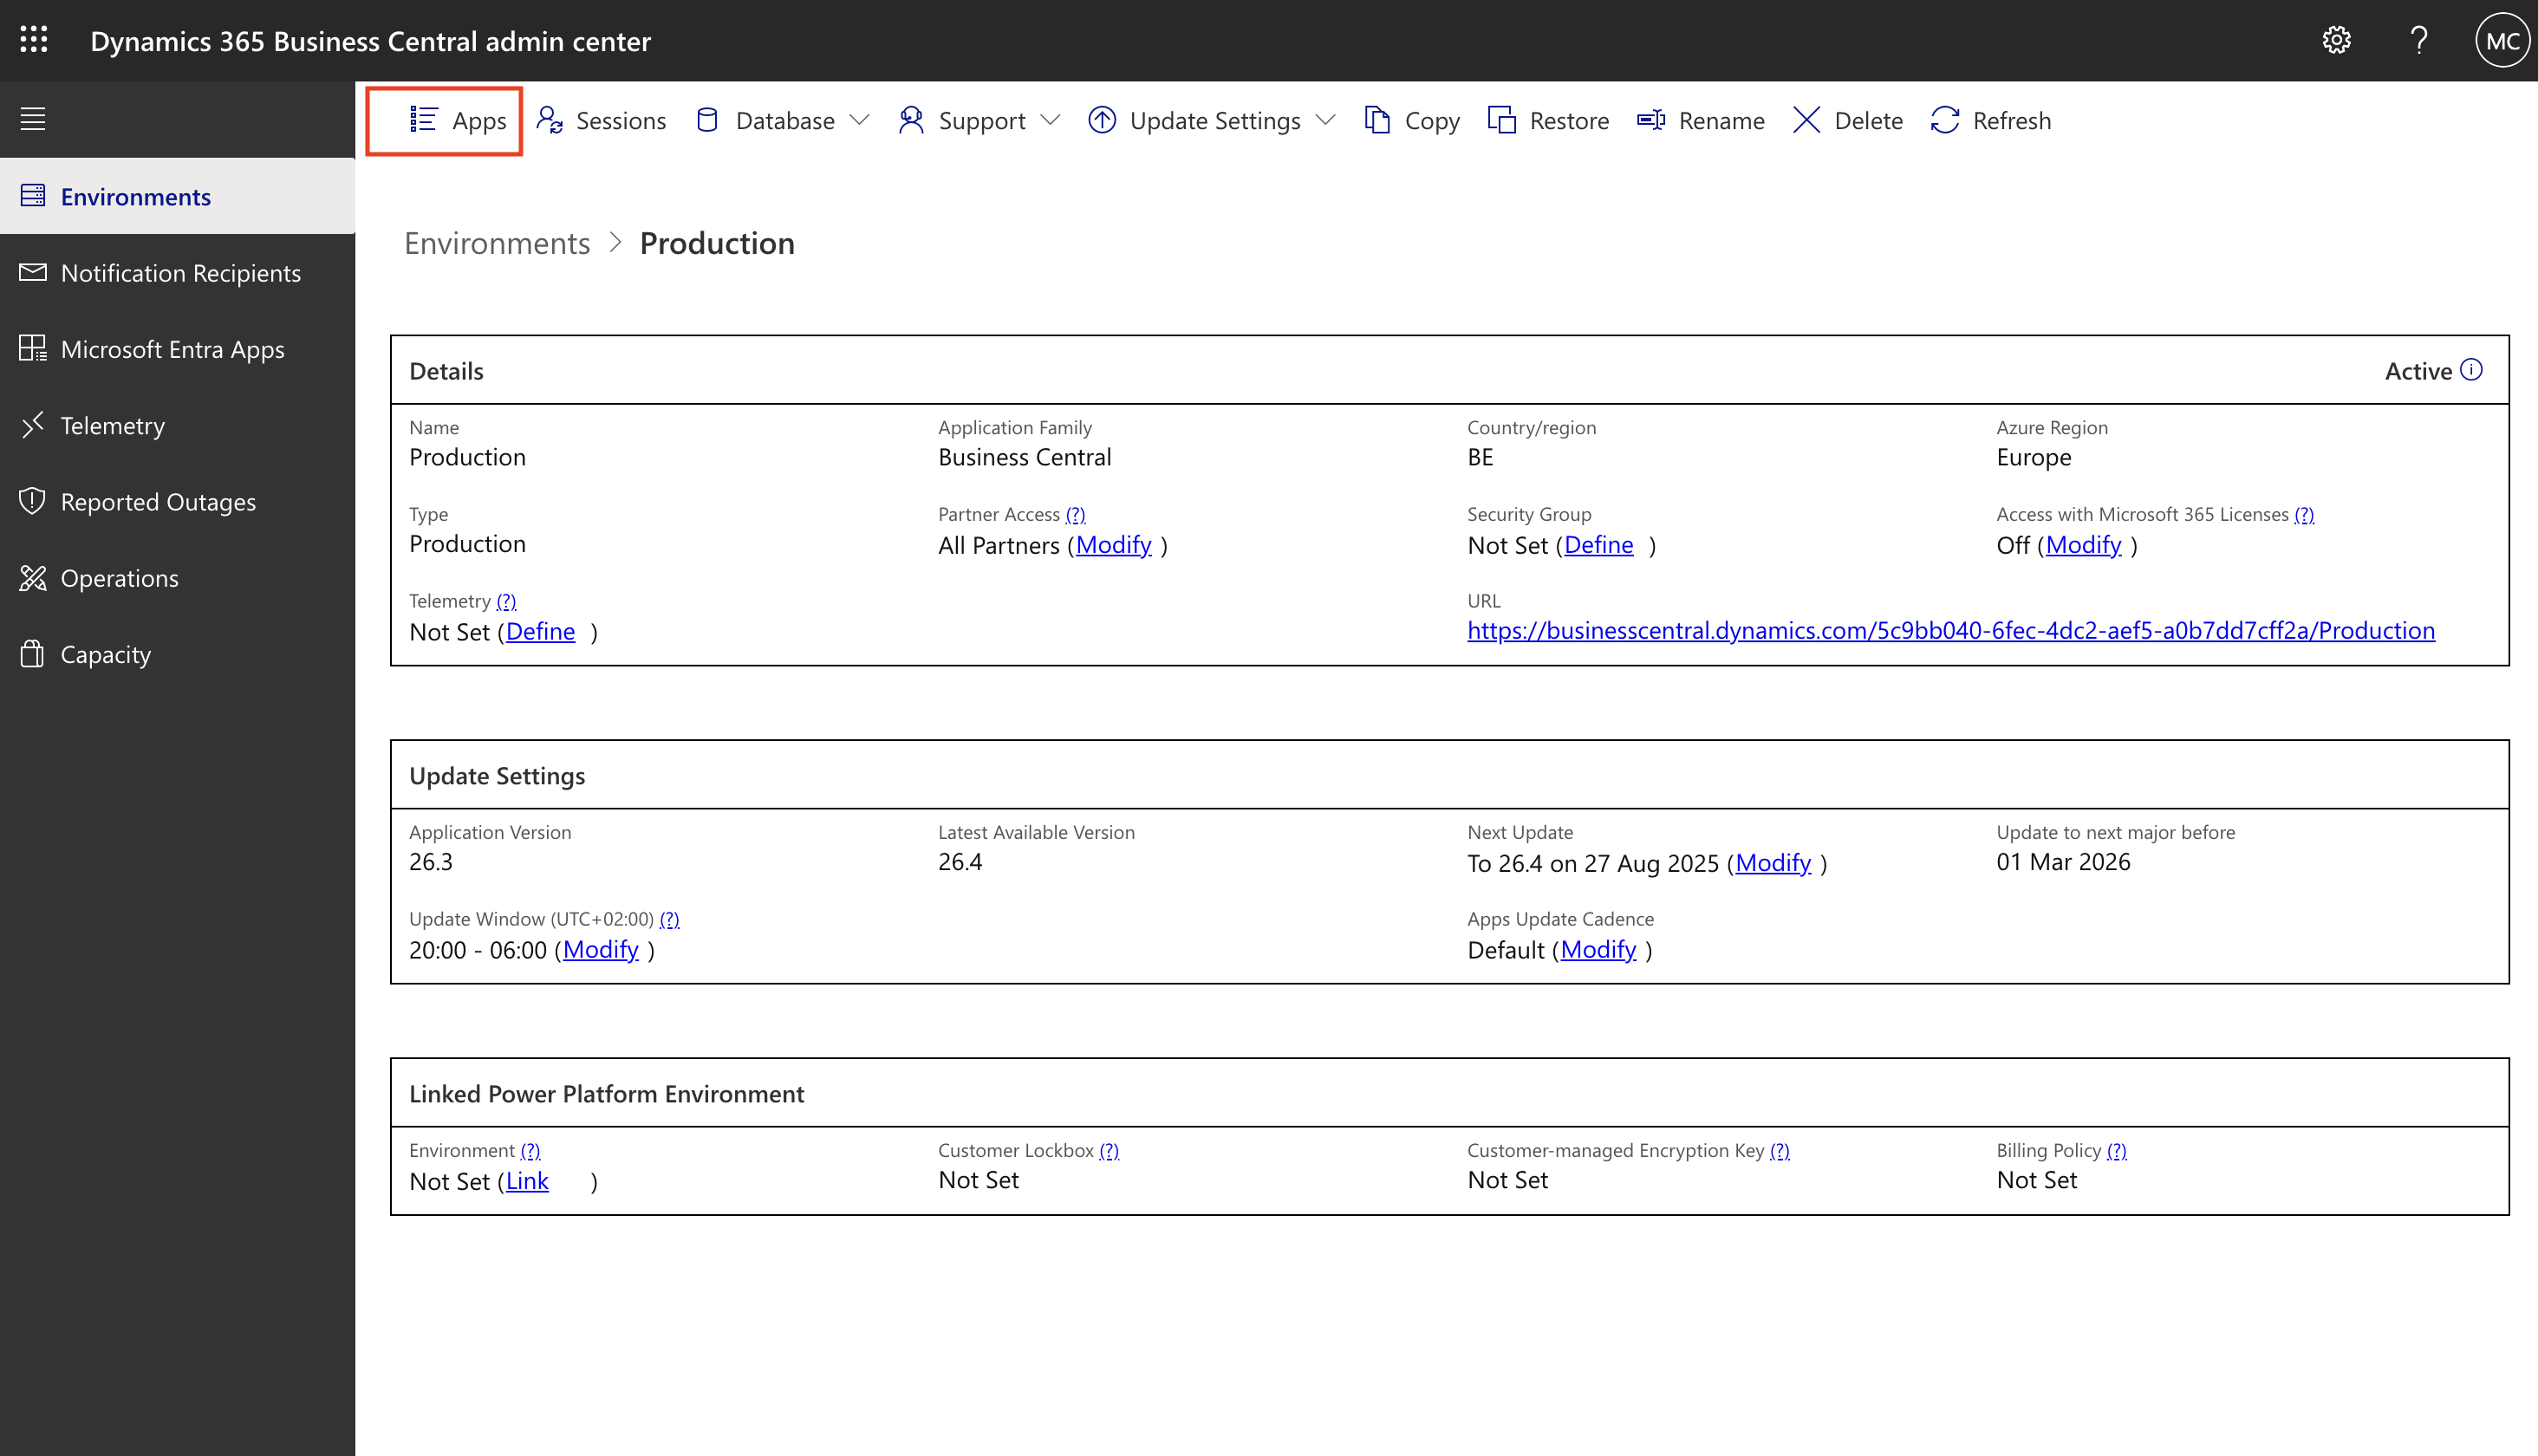
Select App Type "Global" and click on "Install Update" on the Chift extension (if any update is available)
BANK ENTRIES
Posting bank entries in Business Central requires a correct setup at two levels:
Bank accounts
General journal templates
Bank accounts
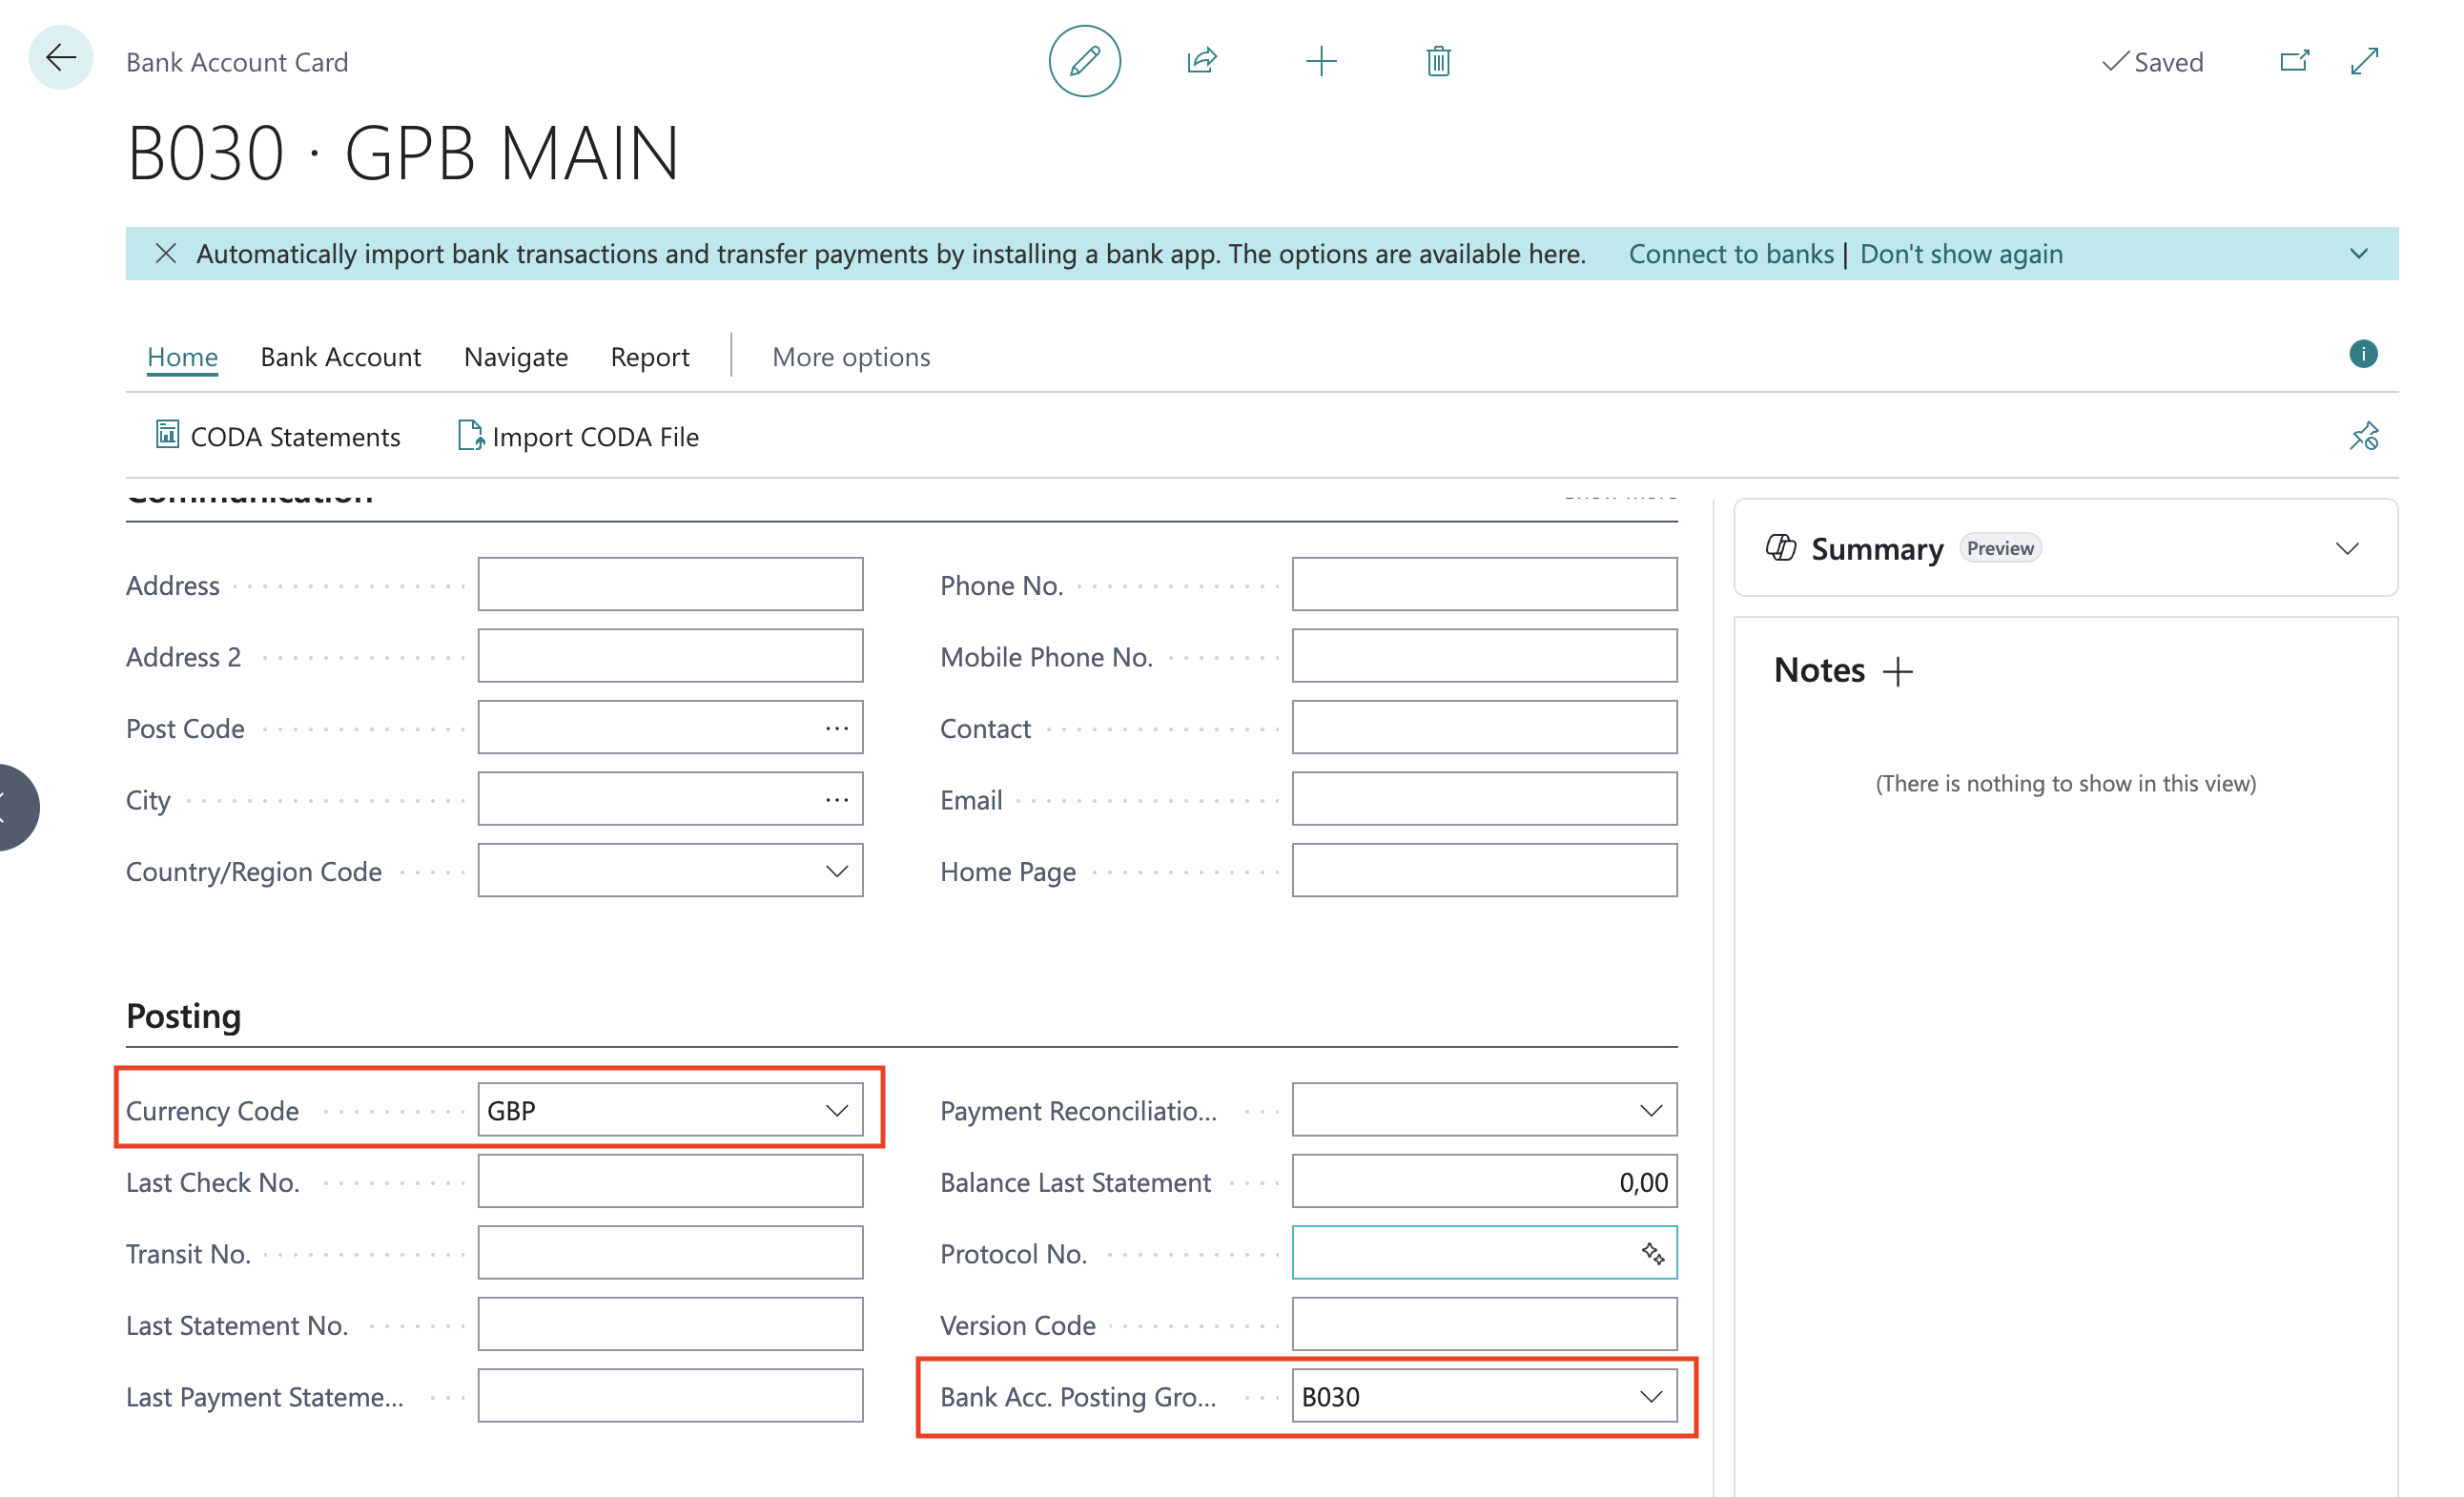
For each bank account you want to post entries to, you need to:
Set the correct currency on the bank account card
Assign a Bank Account Posting Group — this determines which General Ledger account will be impacted when entries are posted
General journal templates
Each bank account also needs a dedicated journal template that will be used to create the related bank entries as journal lines.
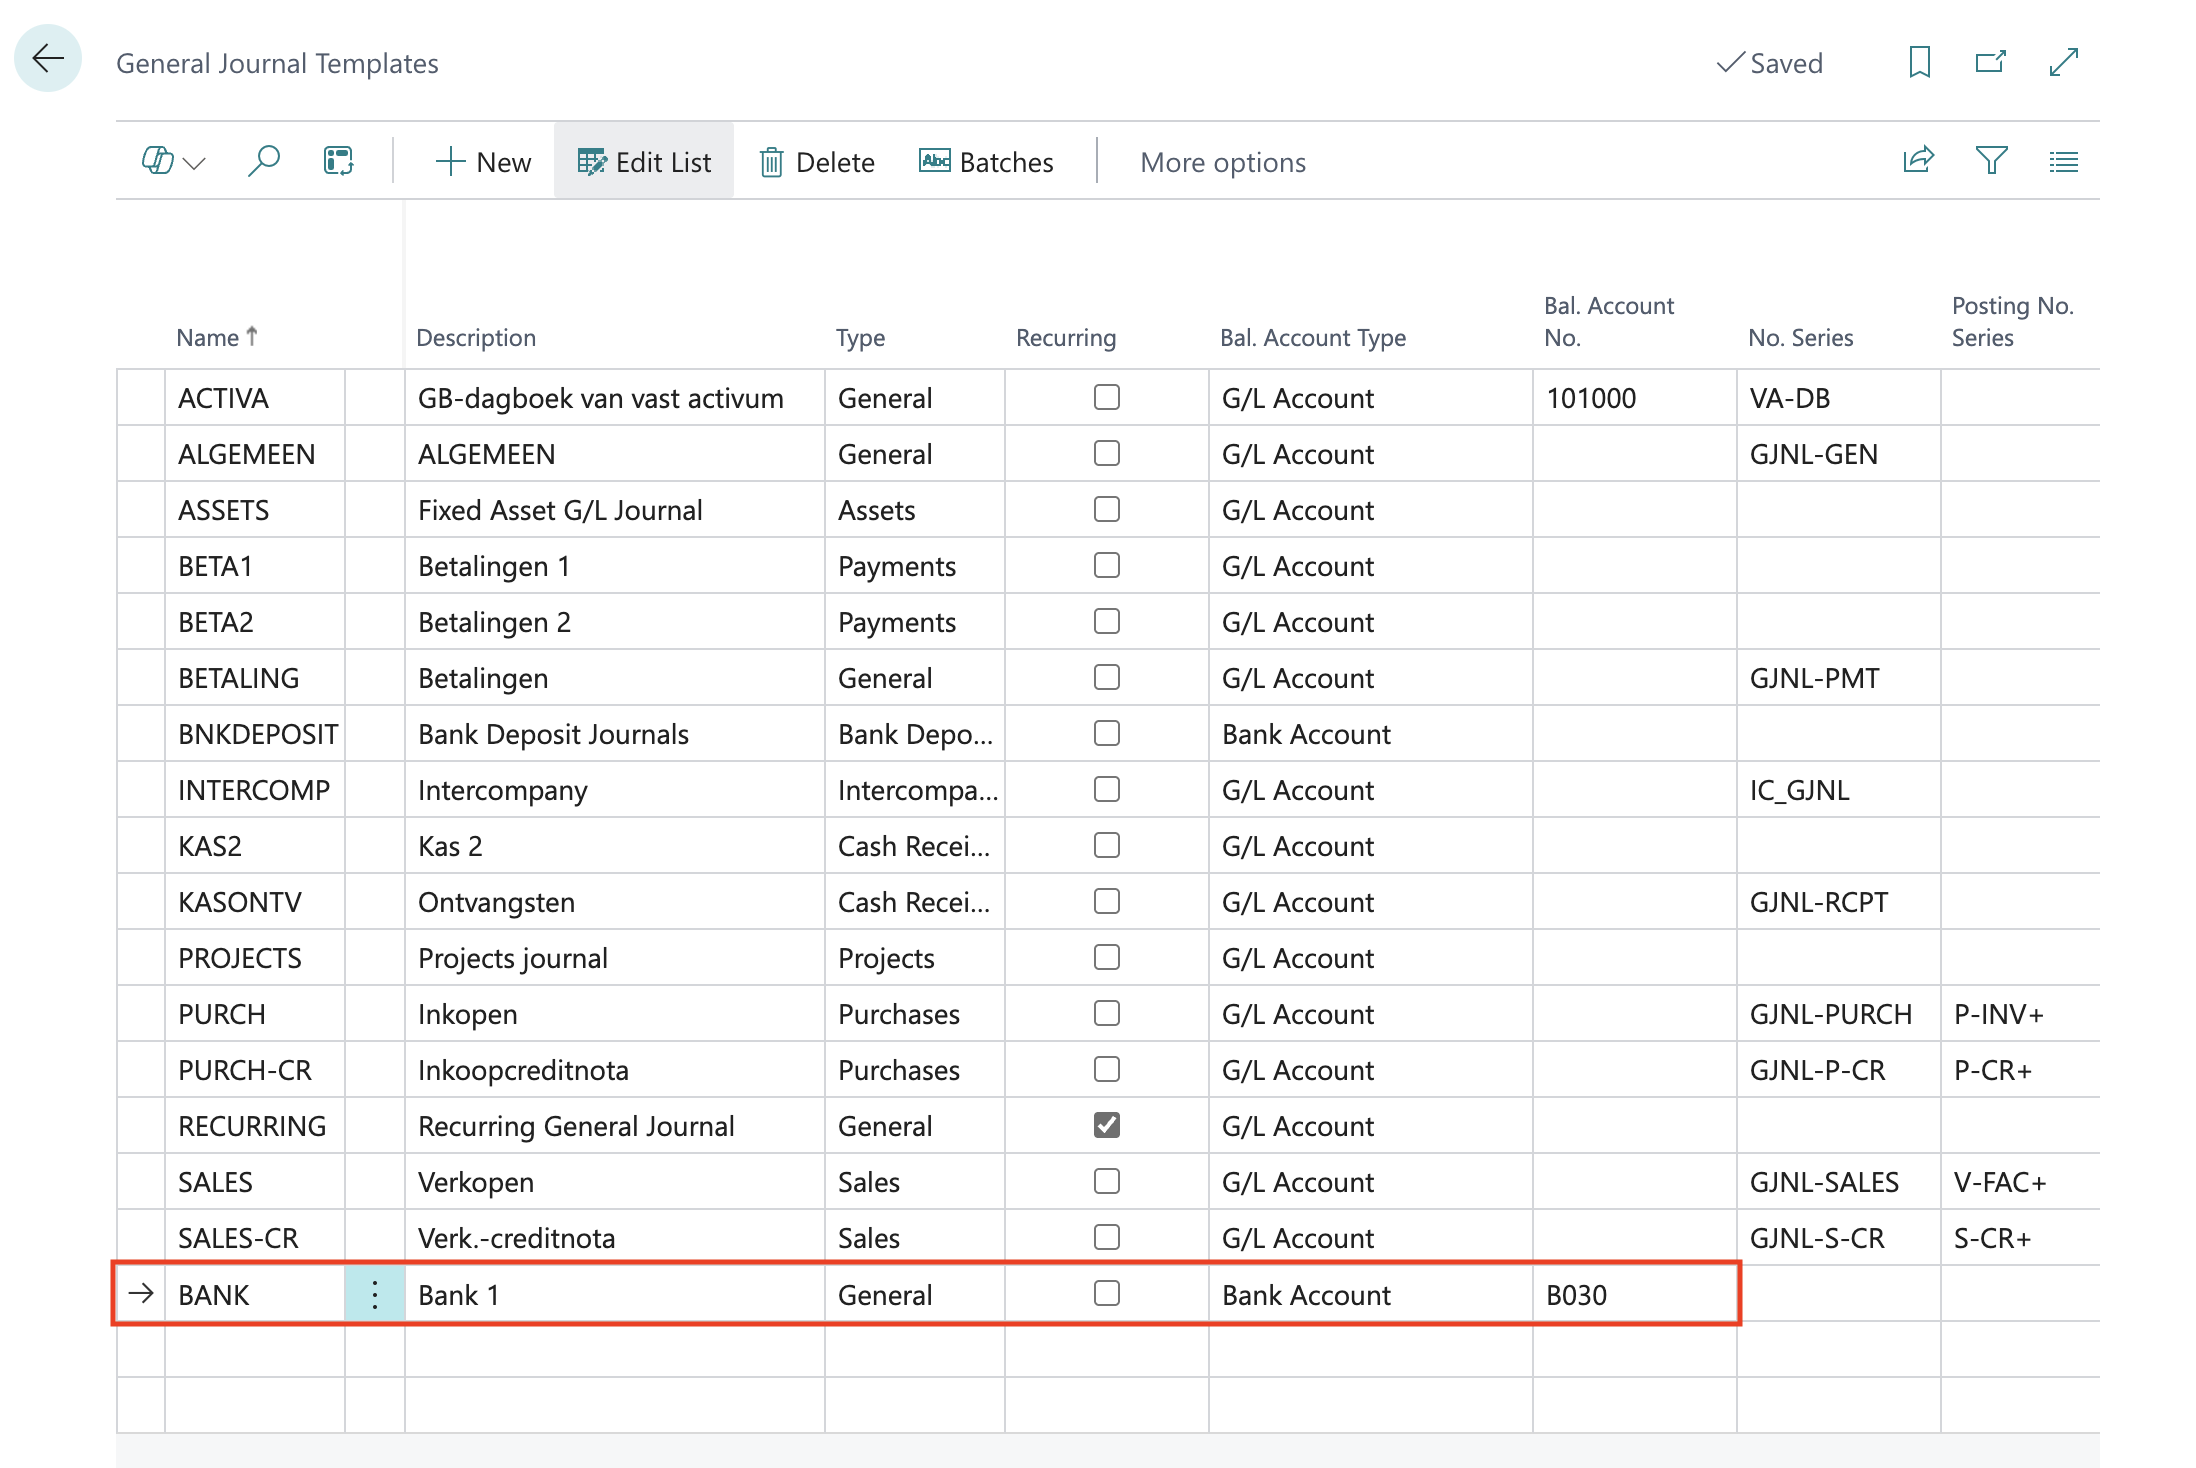
Go to General Journal Templates and open or create the template you want to use. You need one journal template per bank account.
The journal template must be configured as follows:
Type → General
Bal. Account Type → Bank Account
Bal. Account No. → the bank account code (e.g.
B030)
Generated entries
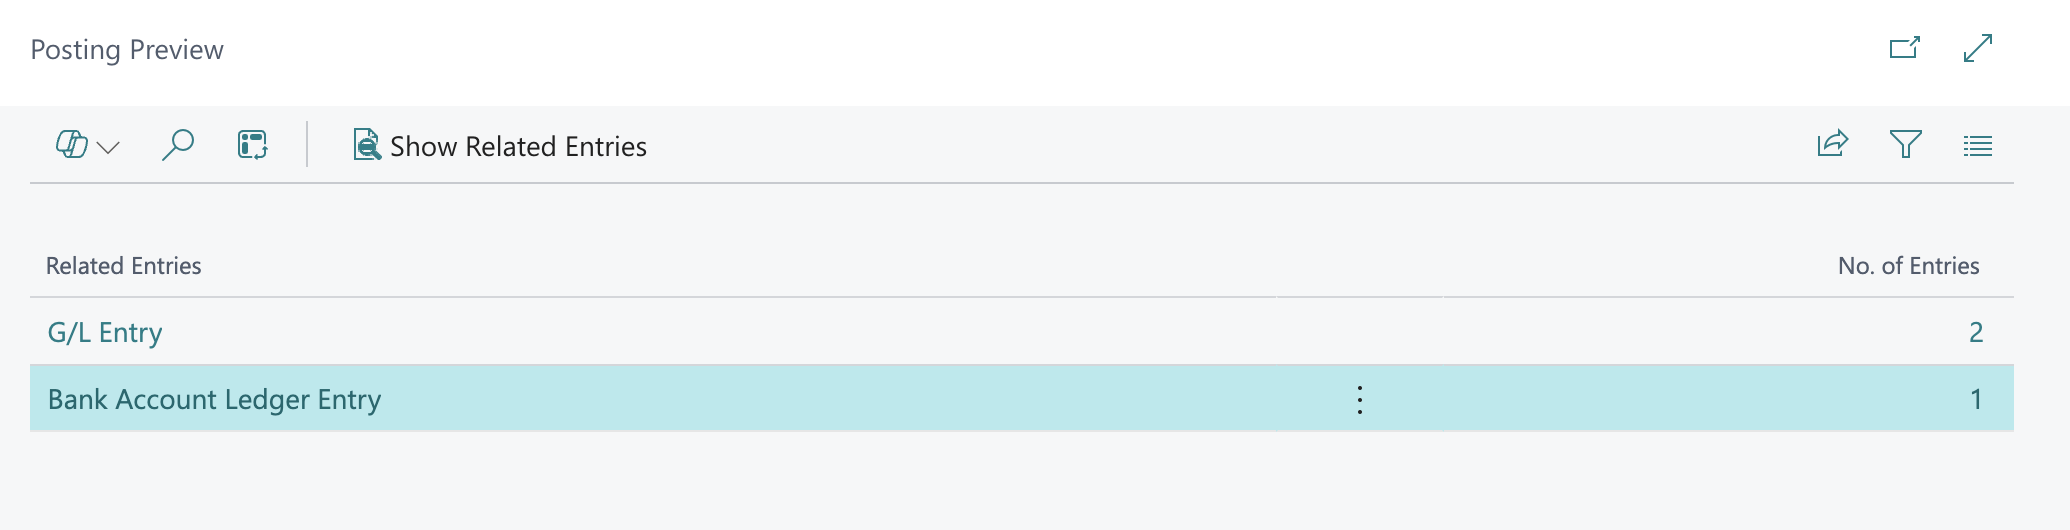
When journal lines are posted with the setup above, each journal line generates the following entries:
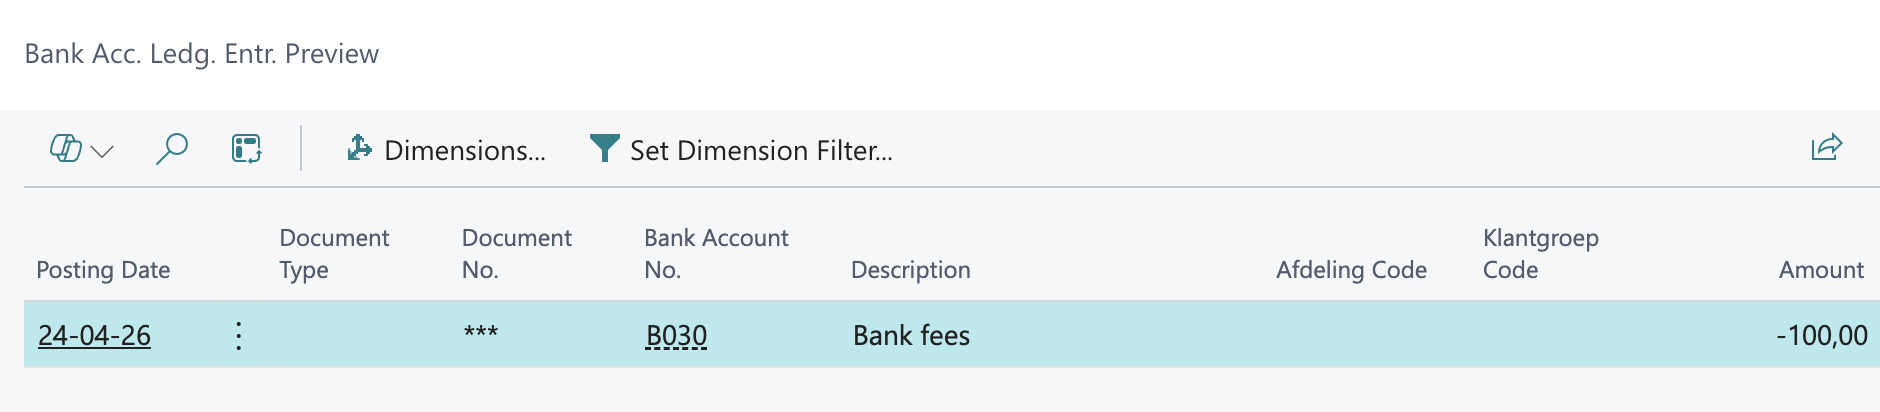
1 Bank Account Ledger Entry
recorded against the bank account
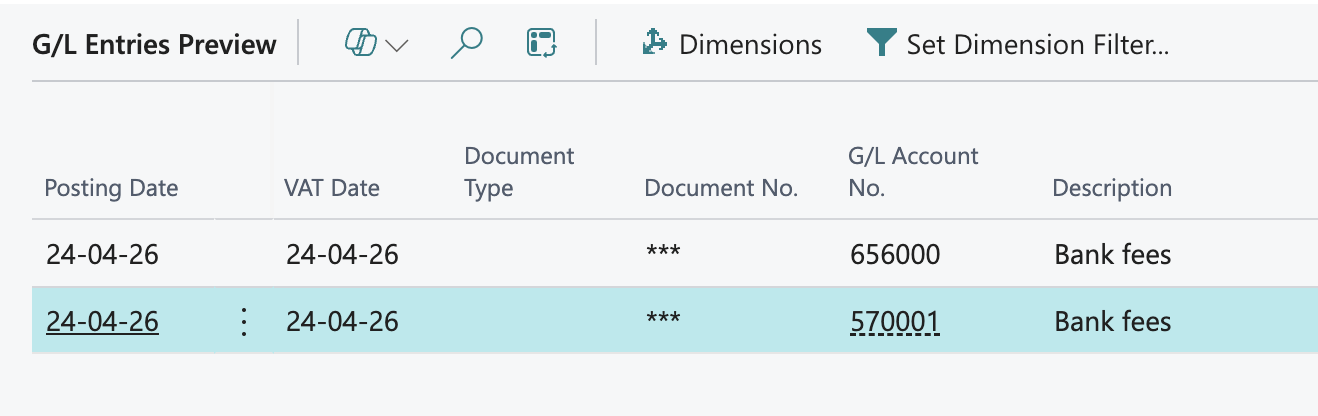
2 General Ledger Entries per journal line
1 entry on the GL account defined in the Bank Account Posting Group linked to the bank account
1 entry on the other account specified on the journal line itself
Optionally, if a customer or vendor is used on the journal line:
1 Customer Ledger Entry
1 Vendor Ledger Entry
CUSTOMER & VENDOR SETUP
Suppliers creation
Supplier reference:
By default Business central will automatically assign a code/reference to a newly created supplier/vendor. The code/reference is defined based on the "No. Series" linked to the suppliers/vendors. This can be found in the "Purchases & Payables Setup":
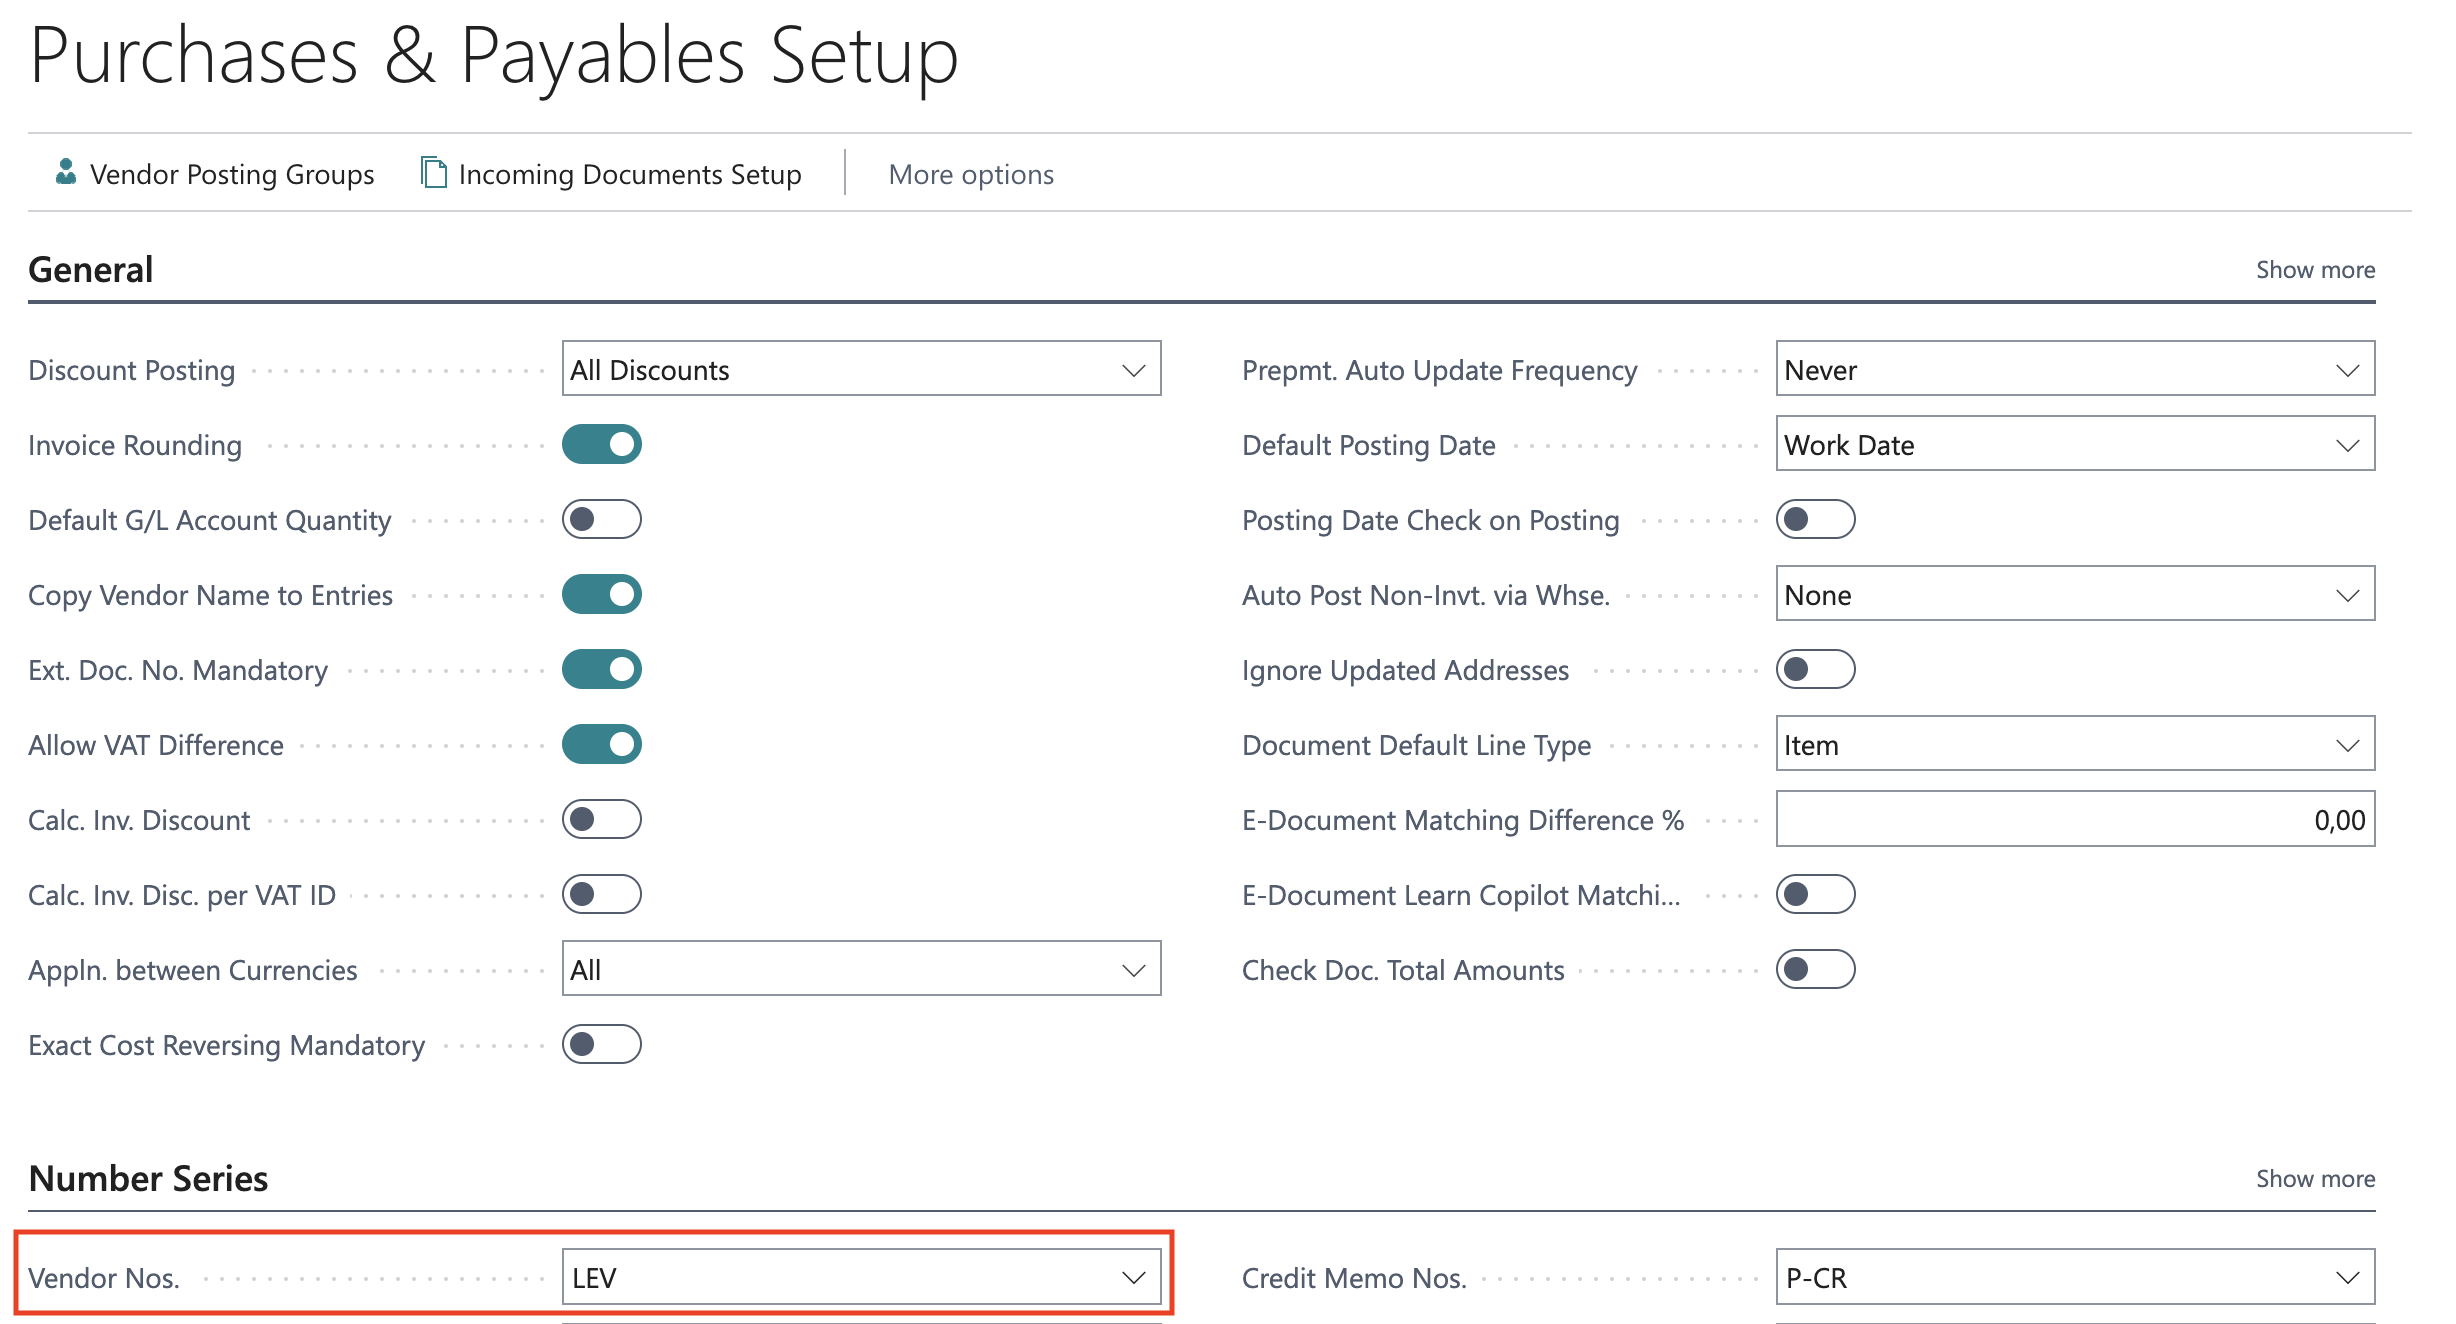
If you want to be able to define the code/reference of the newly created supplier by API you need to check the "Manual Nos." configuration on the number serie:

Posting groups:
Creating a supplier invoice requires posting groups to be setup on the supplier. Business Central does not allow Chift to set the Posting Group when creating a vendor. This needs to be configured manually or set using templates.
To create a template :
Navigate to “Configuration templates” from within your Busines Central app
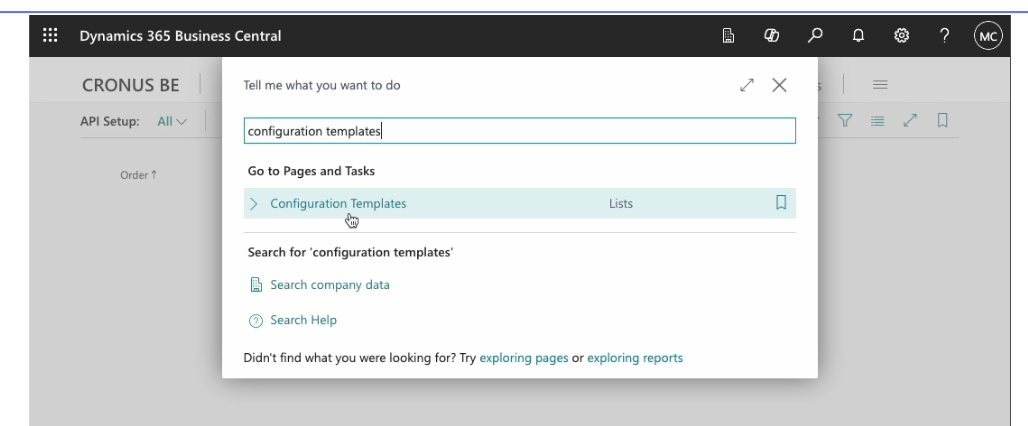
Create a new template by clicking on “ + New”
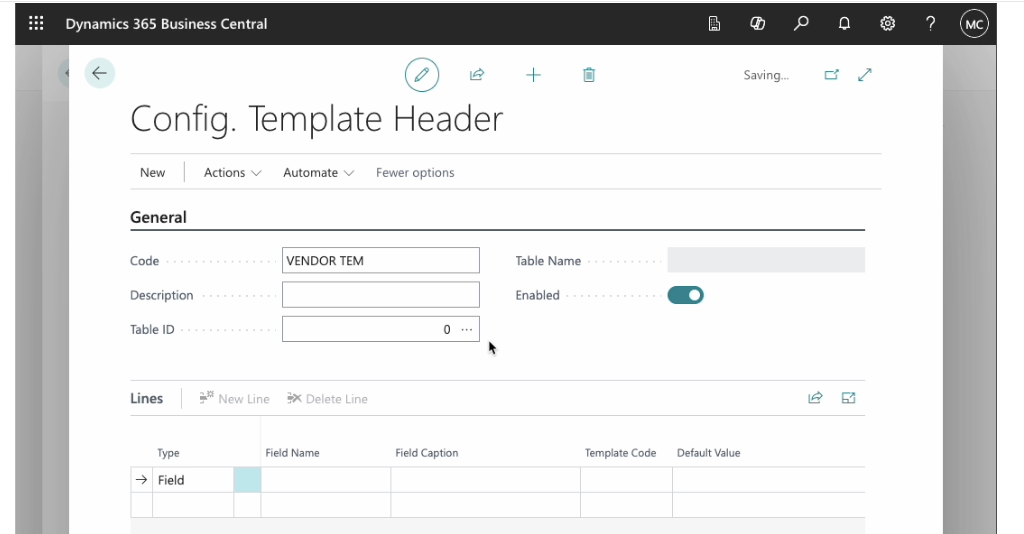
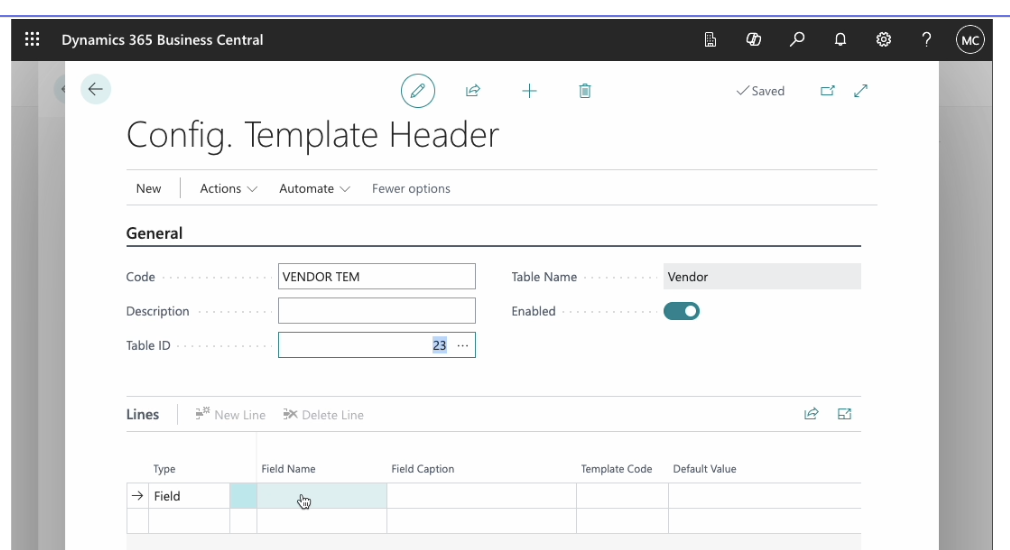
Set the “Table Id” field to “Vendor” (23)
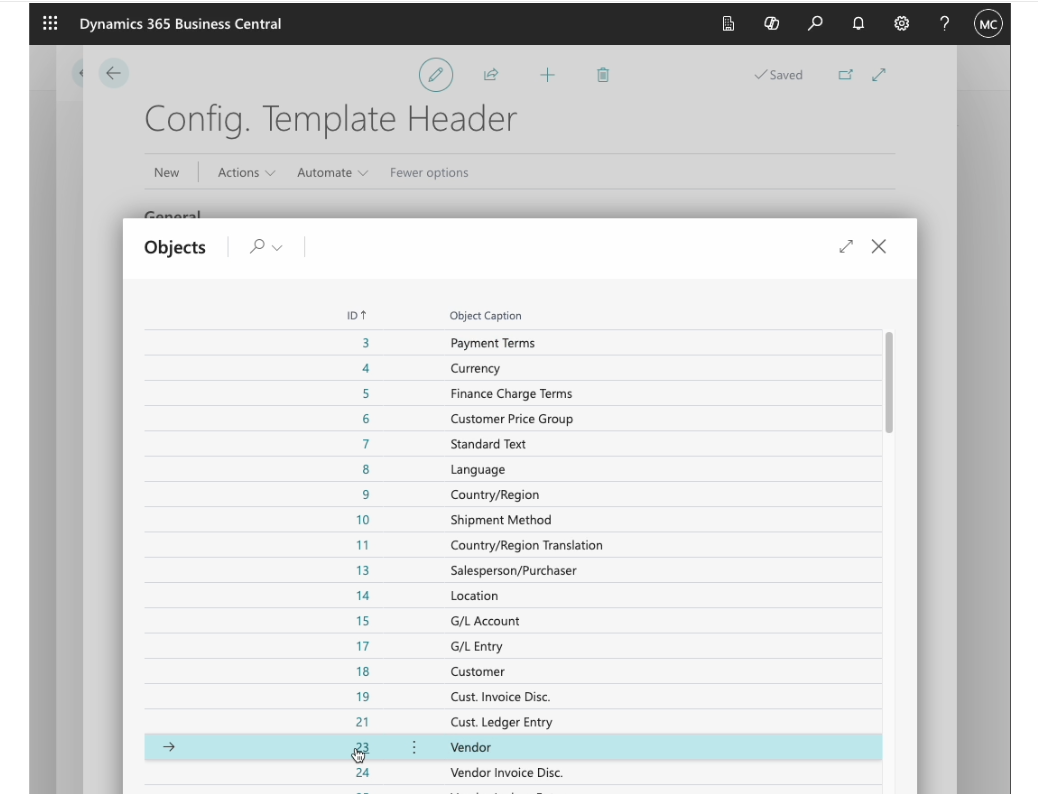
Start adding fields to default by clicking on the first empty cell in the “Field Name column”
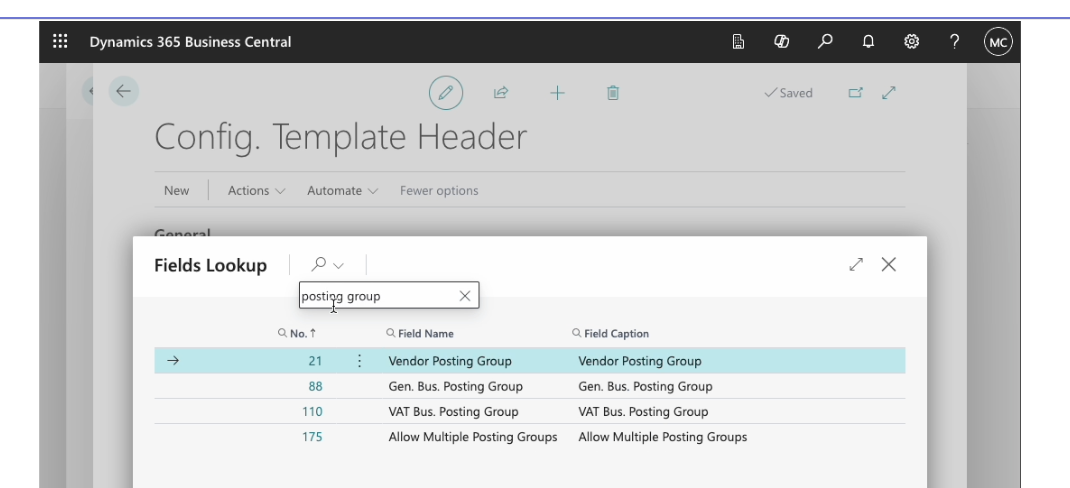
Search for the fields linked to “Posting Groups”
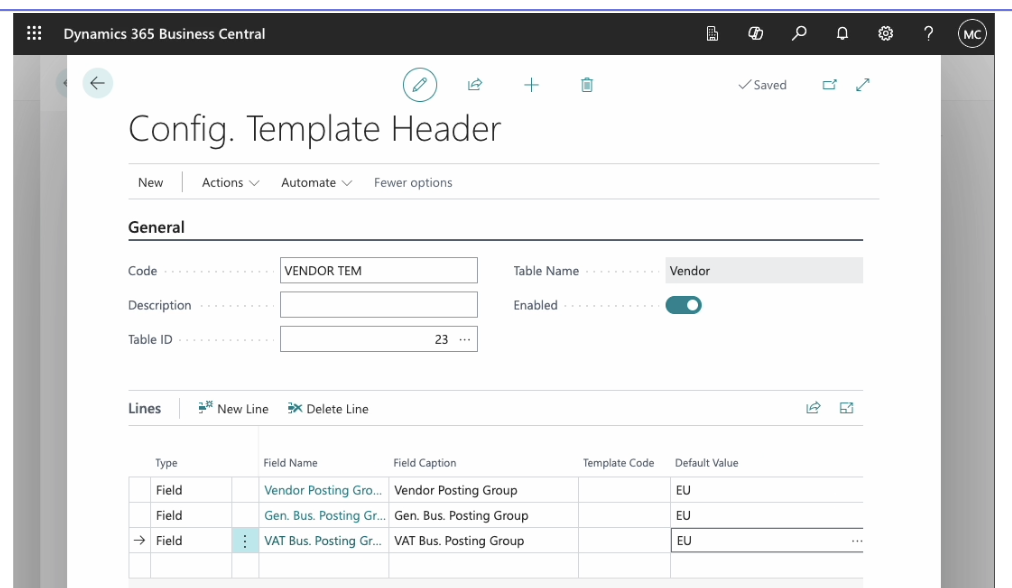
Make sure the following fields are filled in with the correct default value : “Gen. Bus. Posting Group” , “VAT Bus. Posting Group”, “Vendor posting Group”
To use the template when creating a vendor from the API, you need to add the template to the API Setup (see "API Setup" below).
Customers creation
Customer reference:
By default Business central will automatically assign a code/reference to a newly created customer. The code/reference is defined based on the "No. Series" linked to the customers. This can be found in the "Sales & Receivables Setup":
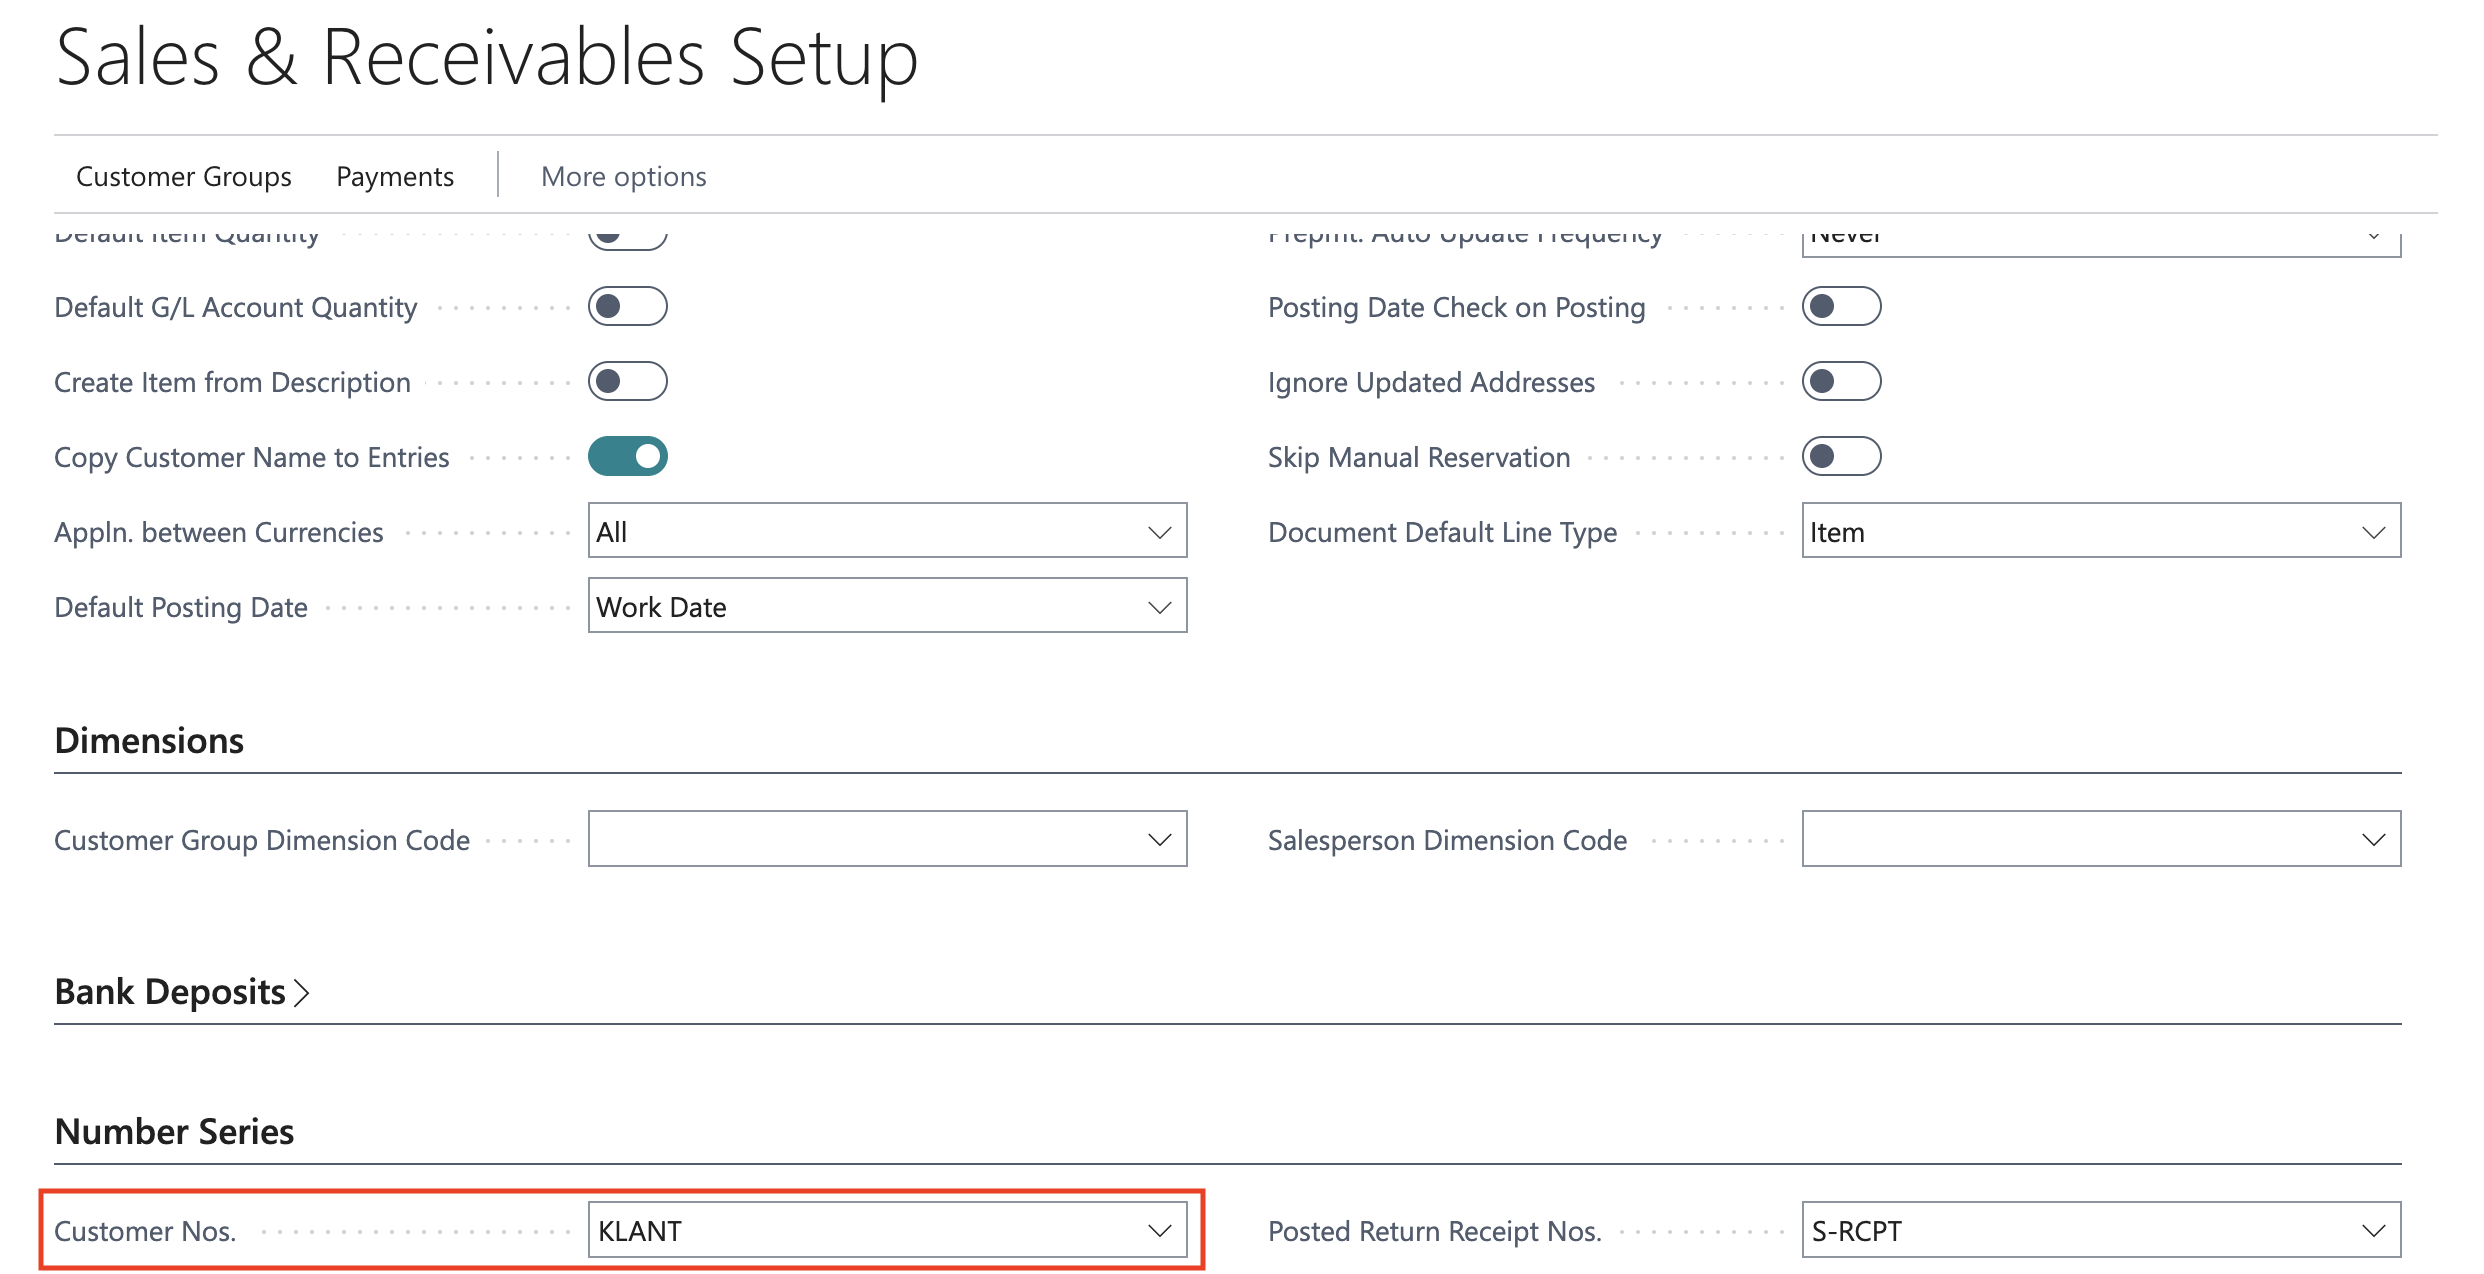
If you want to be able to define the code/reference of the newly created customer by API you need to check the "Manual Nos." configuration on the number serie:

Posting groups:
Similarly, when you wish to create customers and invoices via the API, the following template need to be configured :
Navigate to configuration templates, and create a new template
Set the “Table Id” field to “Customer” (18)
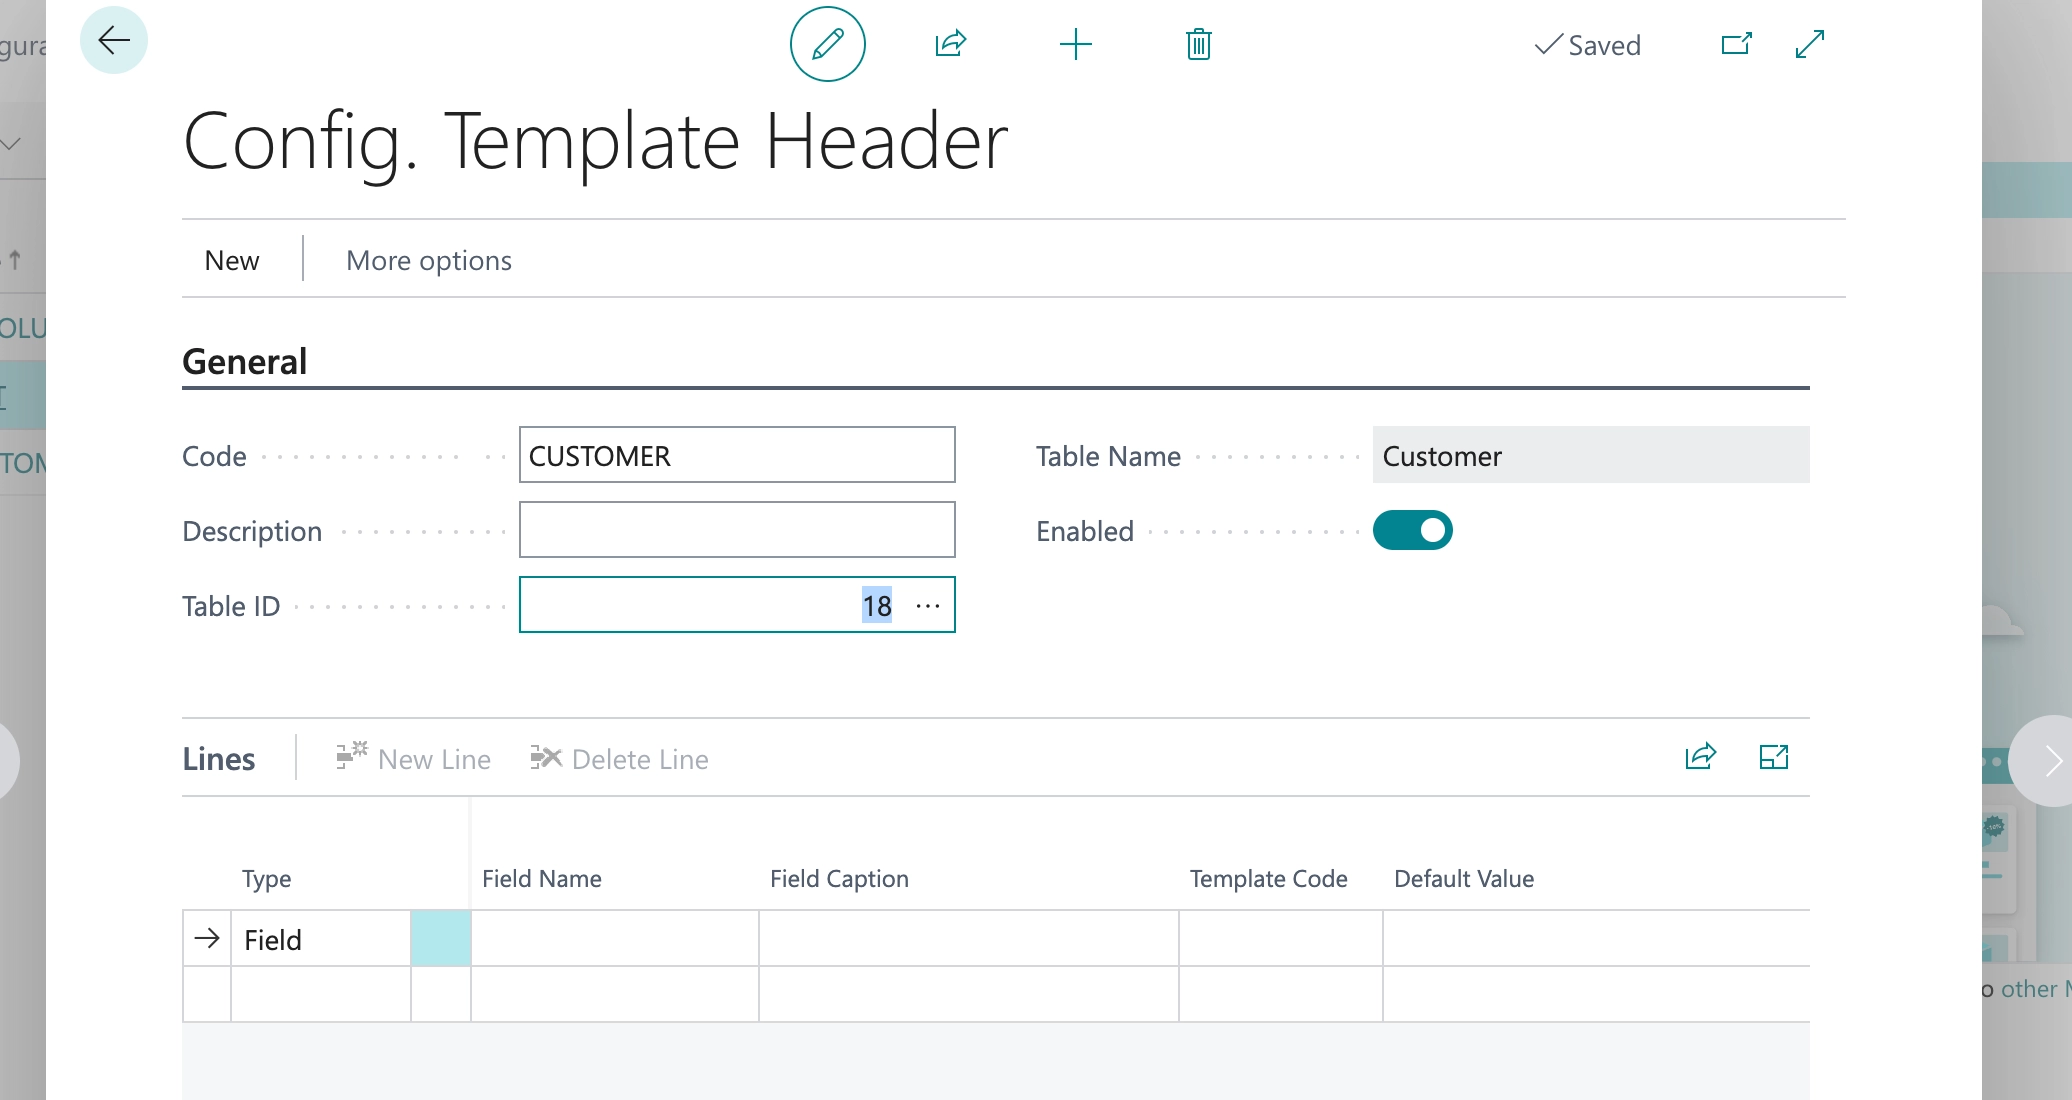
Add the fields :Customer Posting Group, Gen. Bus Posting Group, Payment Terms Code & Payment Method Code, and their default value
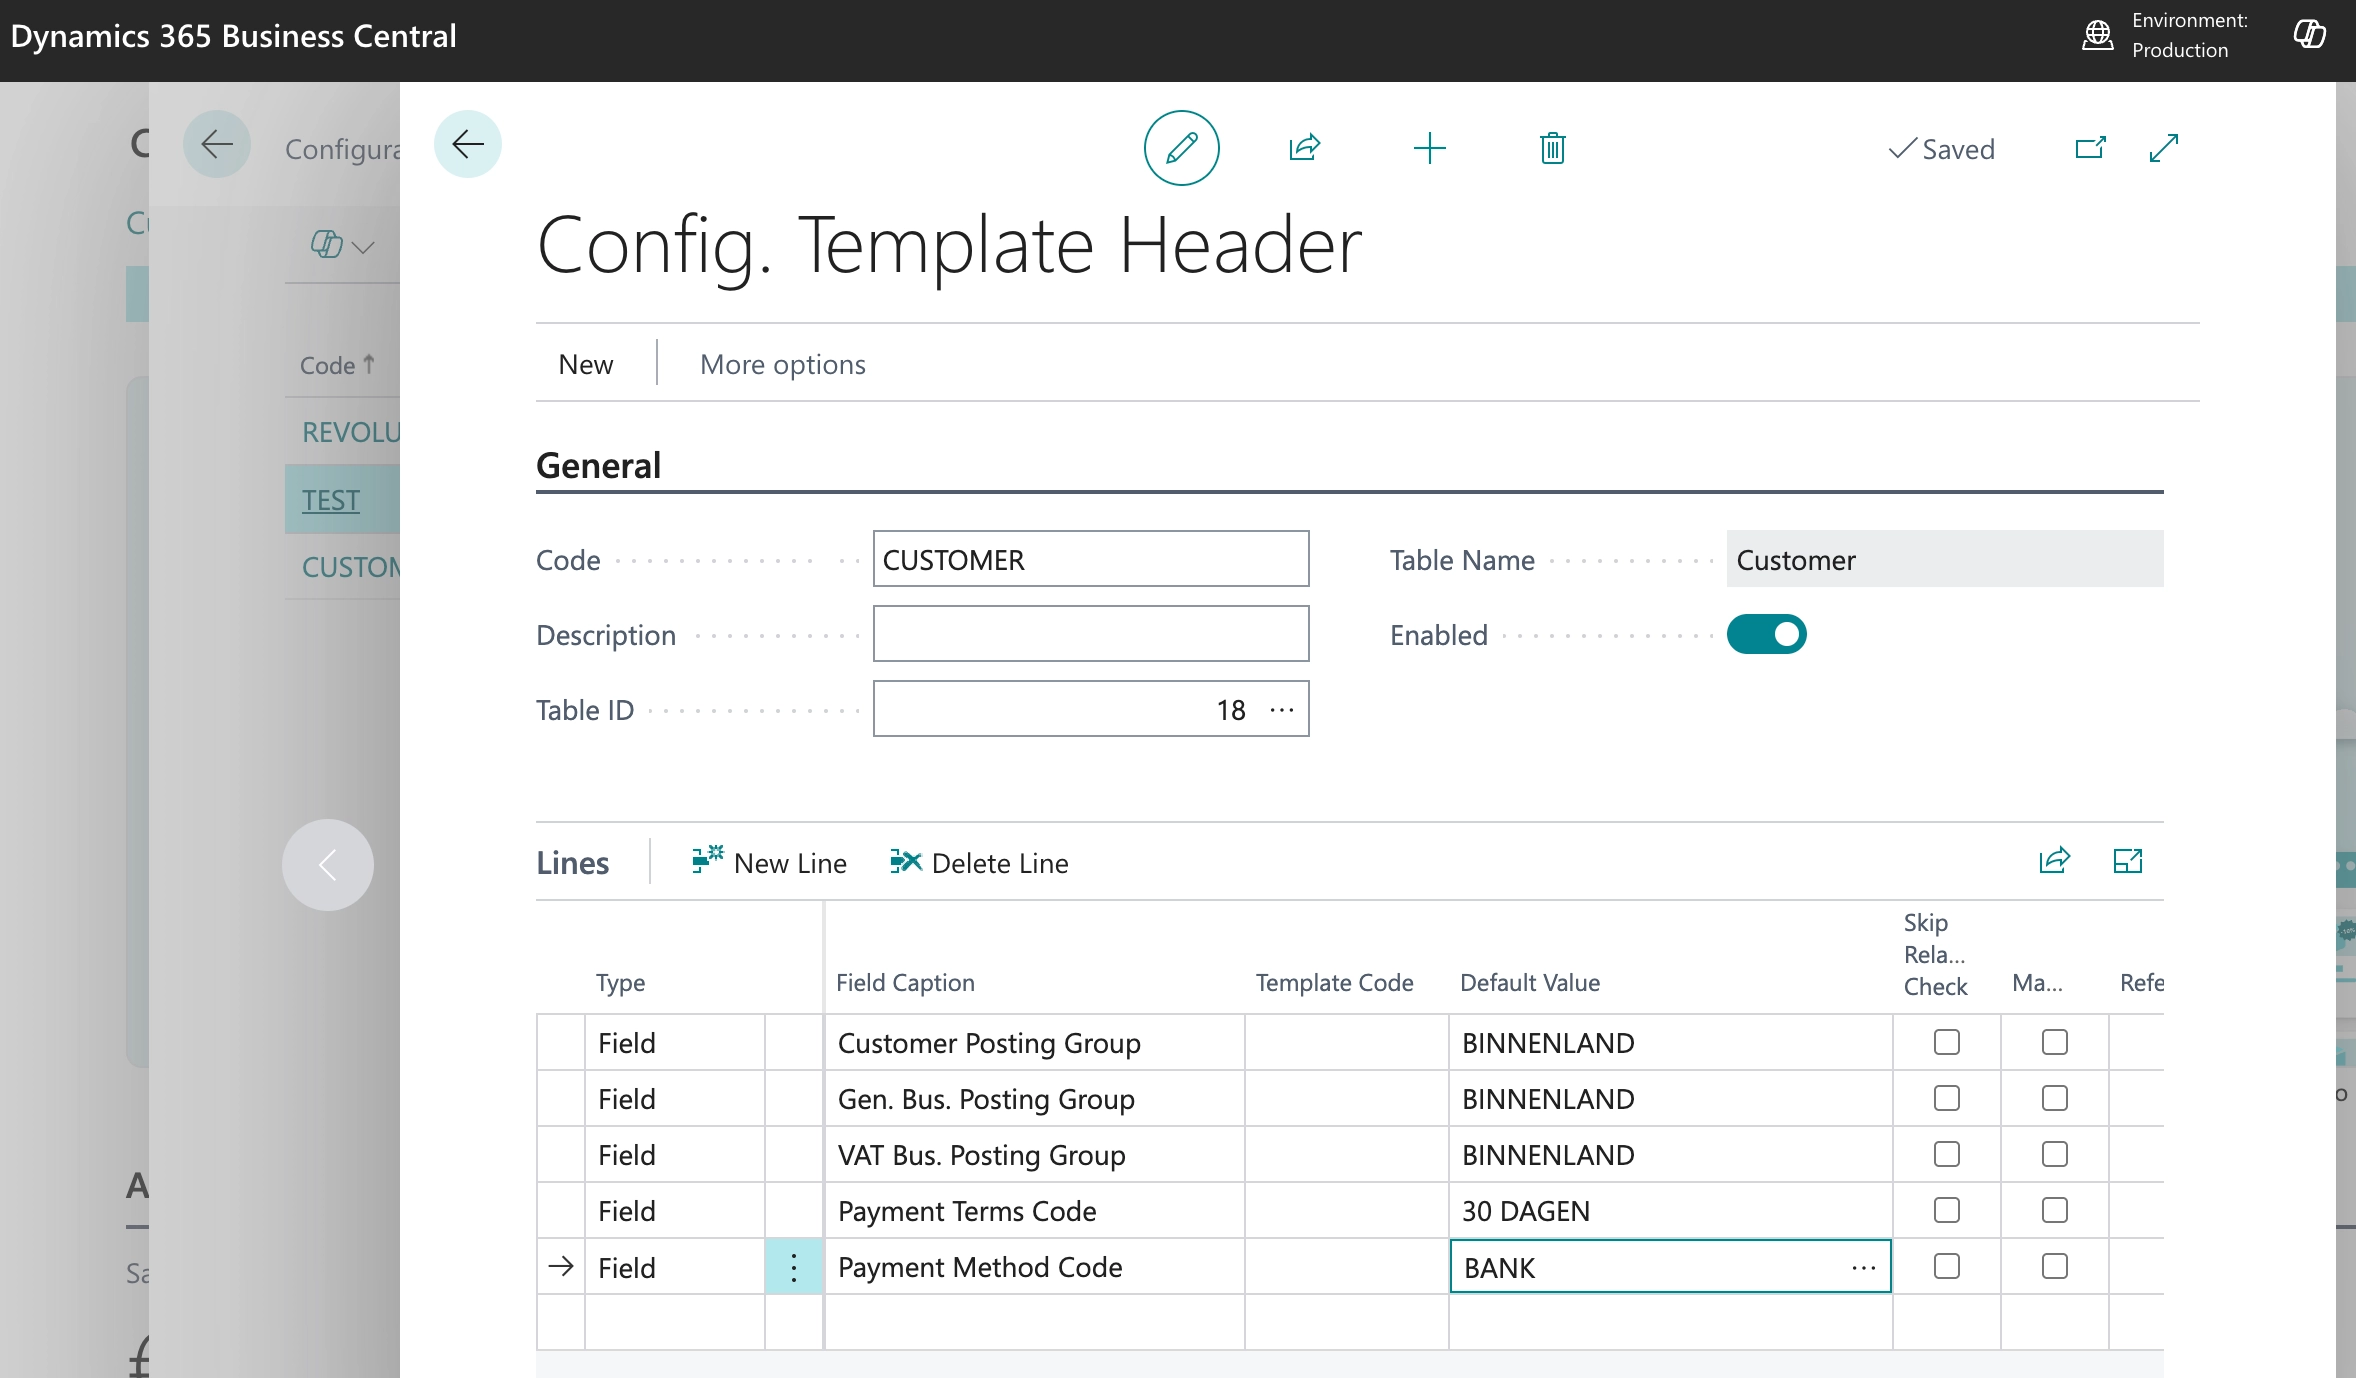
The "Payment Method Code" and "Payment Terms code" is only mandatory for ES customers
API Setup
Link the configuration template(s) to an API Setup to automate the use of that template
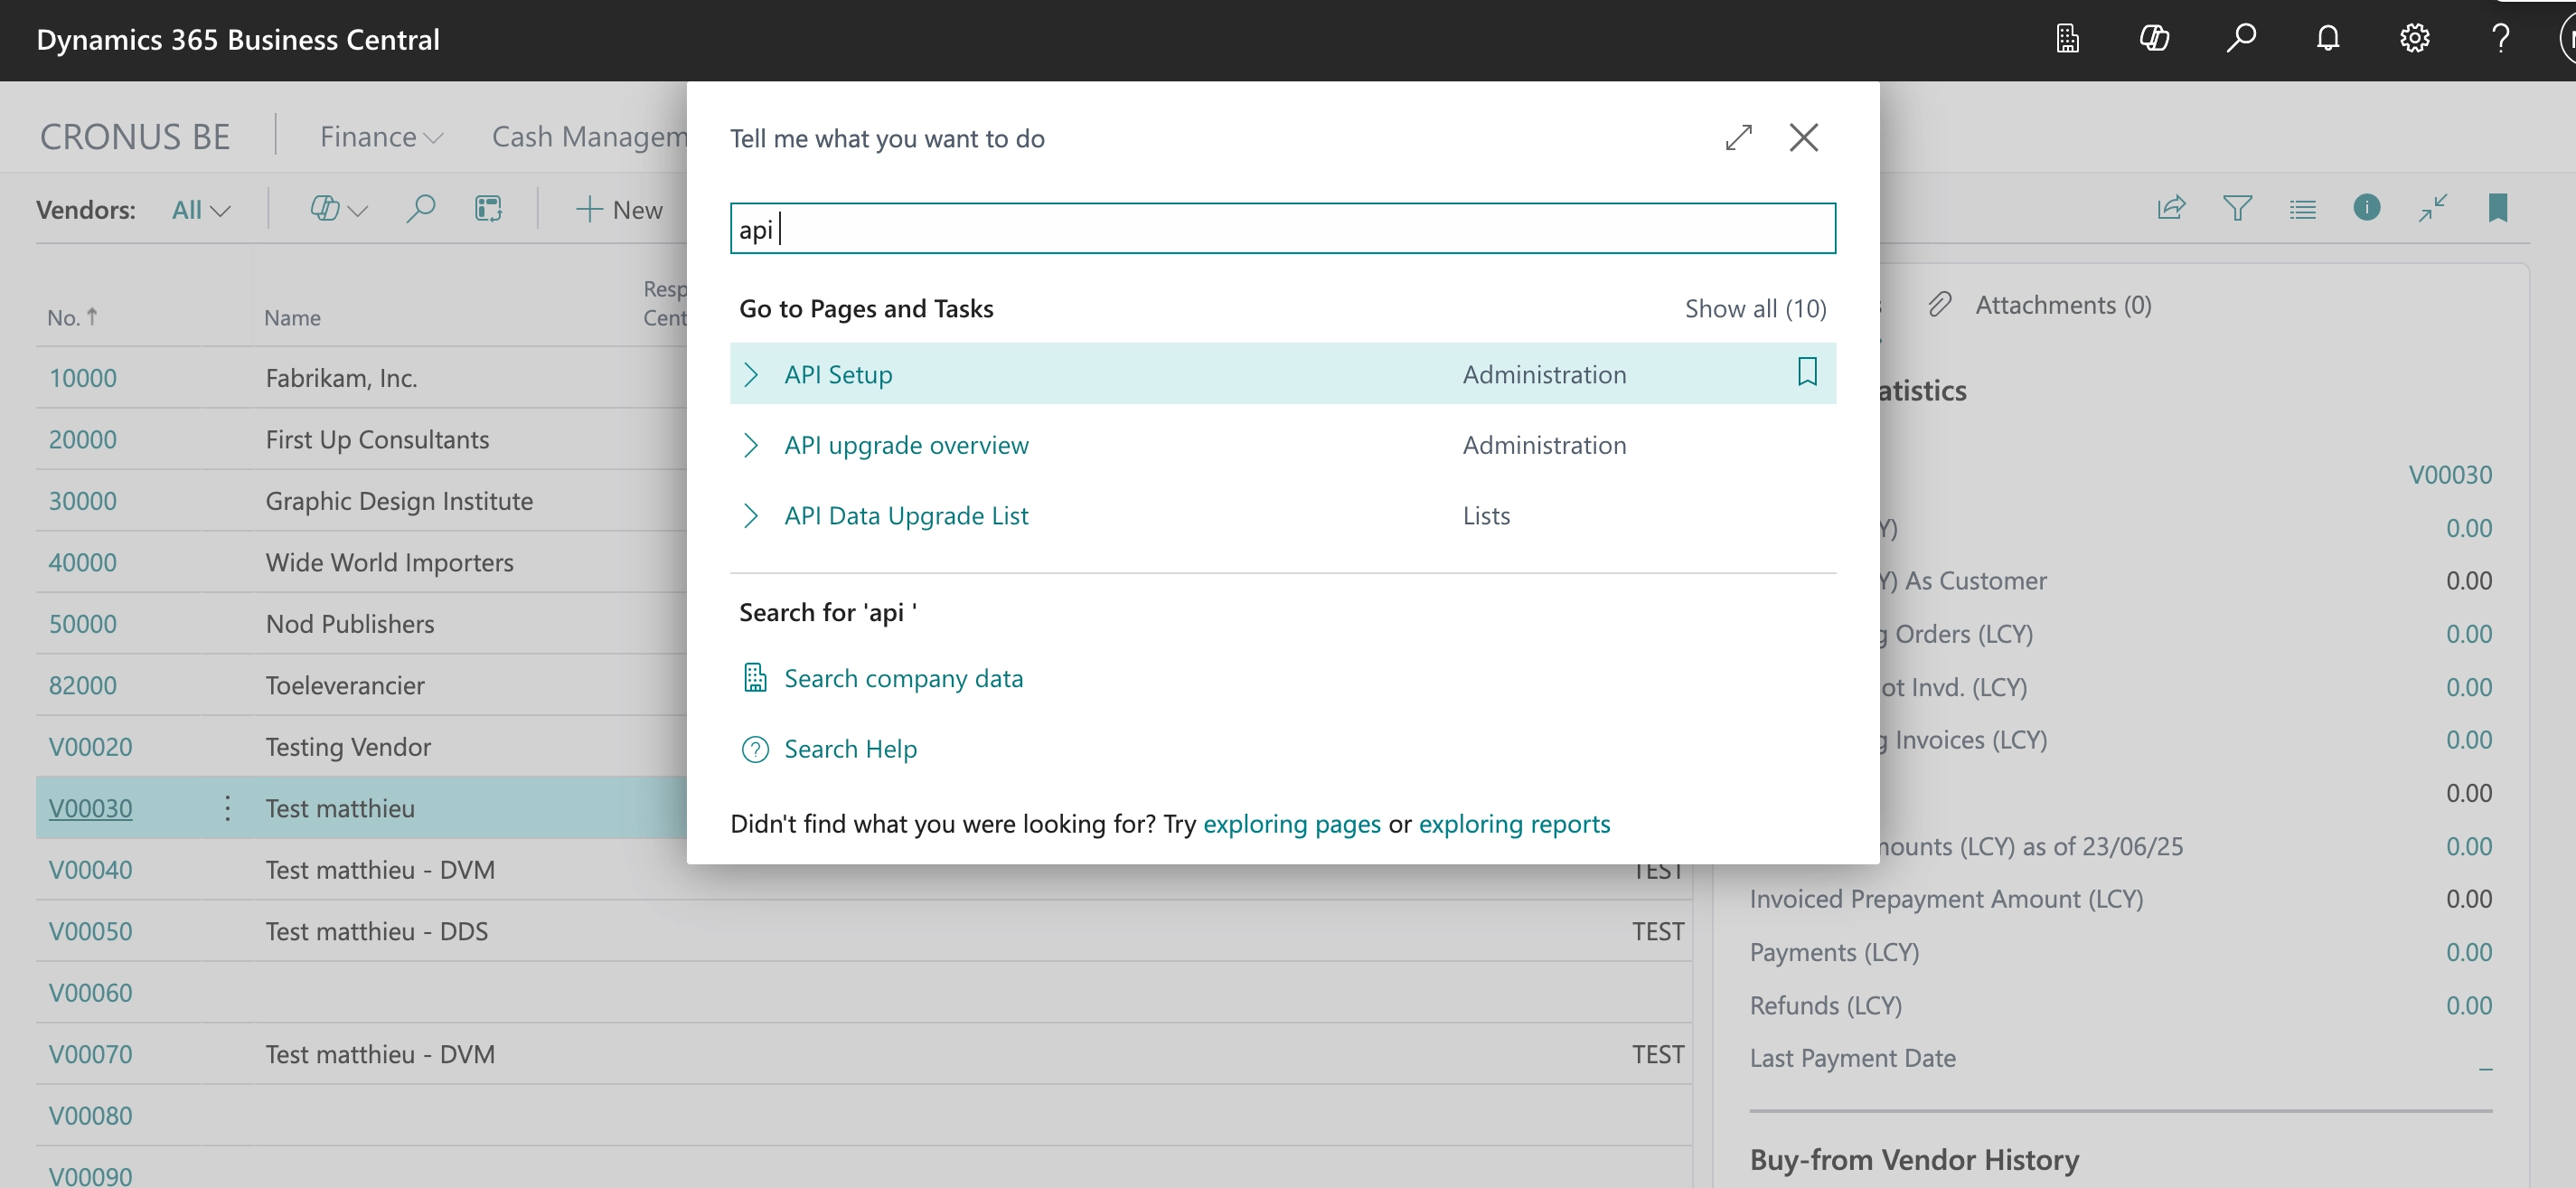
Table ID : 18 for Customers, 23 for Vendors.
Page ID :
Search "Customer" and choose "Customer Posting Group" for Customers.
Search "Vendor" and choose "Vendor Posting Group" for Vendors
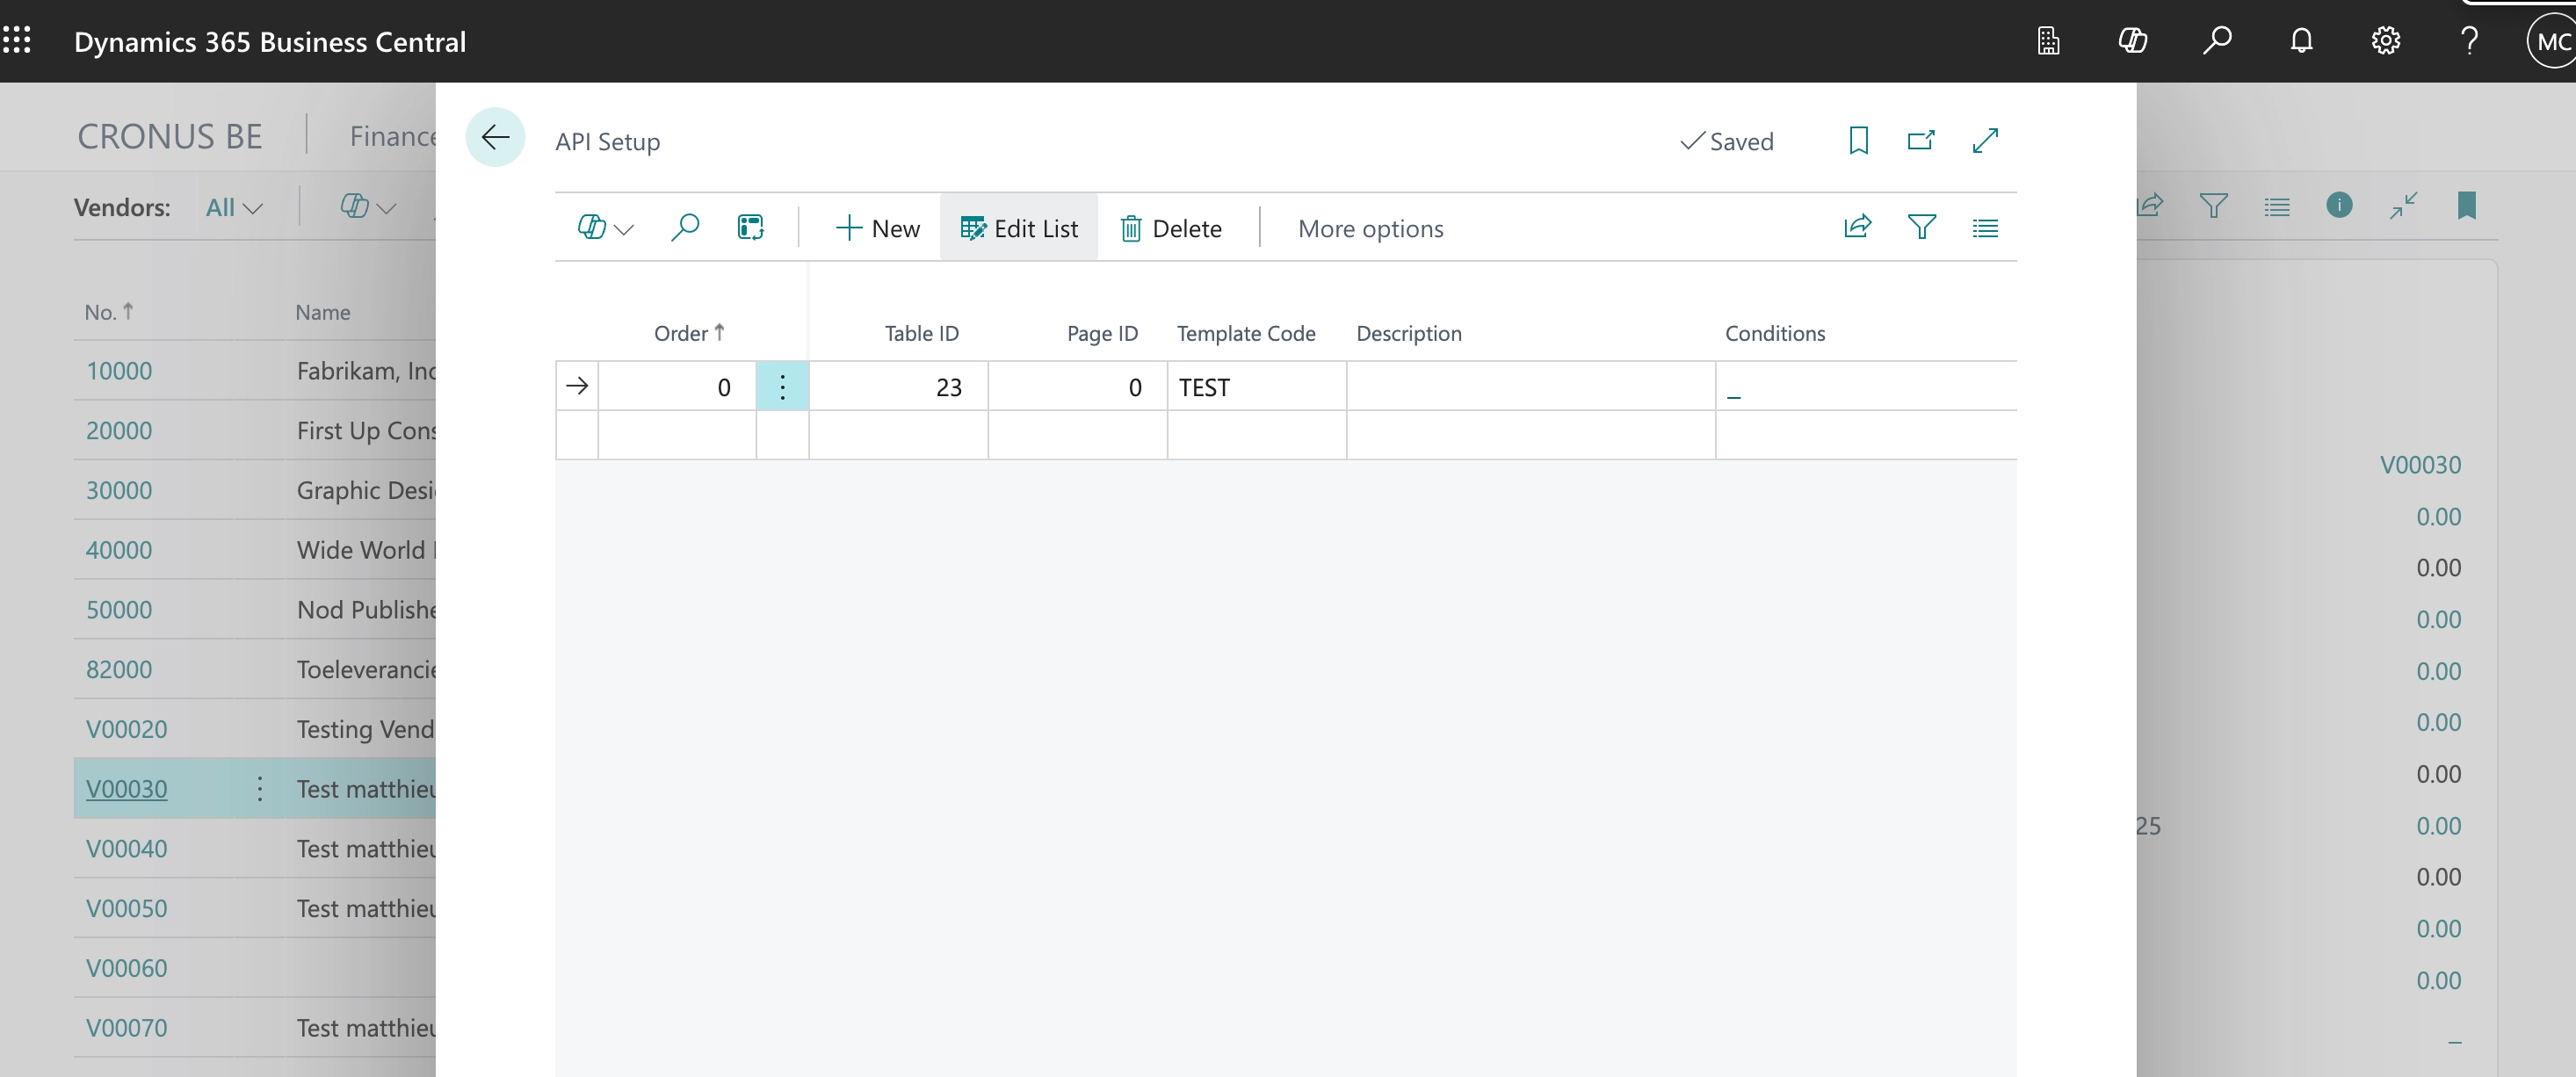
Each configuration template can be linked to an API Setup that can be triggered based on some conditions (e.g. specified country of the vendor). You can setup multiple configuration templates and link each template to a specific condition
VAT-EXEMPT INVOICING
This setup is for companies that do not charge VAT on any of their sales — for example under a full VAT exemption regime. It only supports full exemption: it does not cover companies with a mix of taxed and exempt sales.
Create a VAT Posting Setup entry
Chift does not create VAT configuration on your behalf. Before invoicing through Chift, you need a valid VAT Posting Setup entry in Business Central that represents your exempt rate.
Before you can combine them in VAT Posting Setup, make sure you have a dedicated VAT Business Posting Group (e.g. "NO VAT") and a dedicated VAT Product Posting Group (e.g. "EXEMPT GL") — create them if they don't already exist.
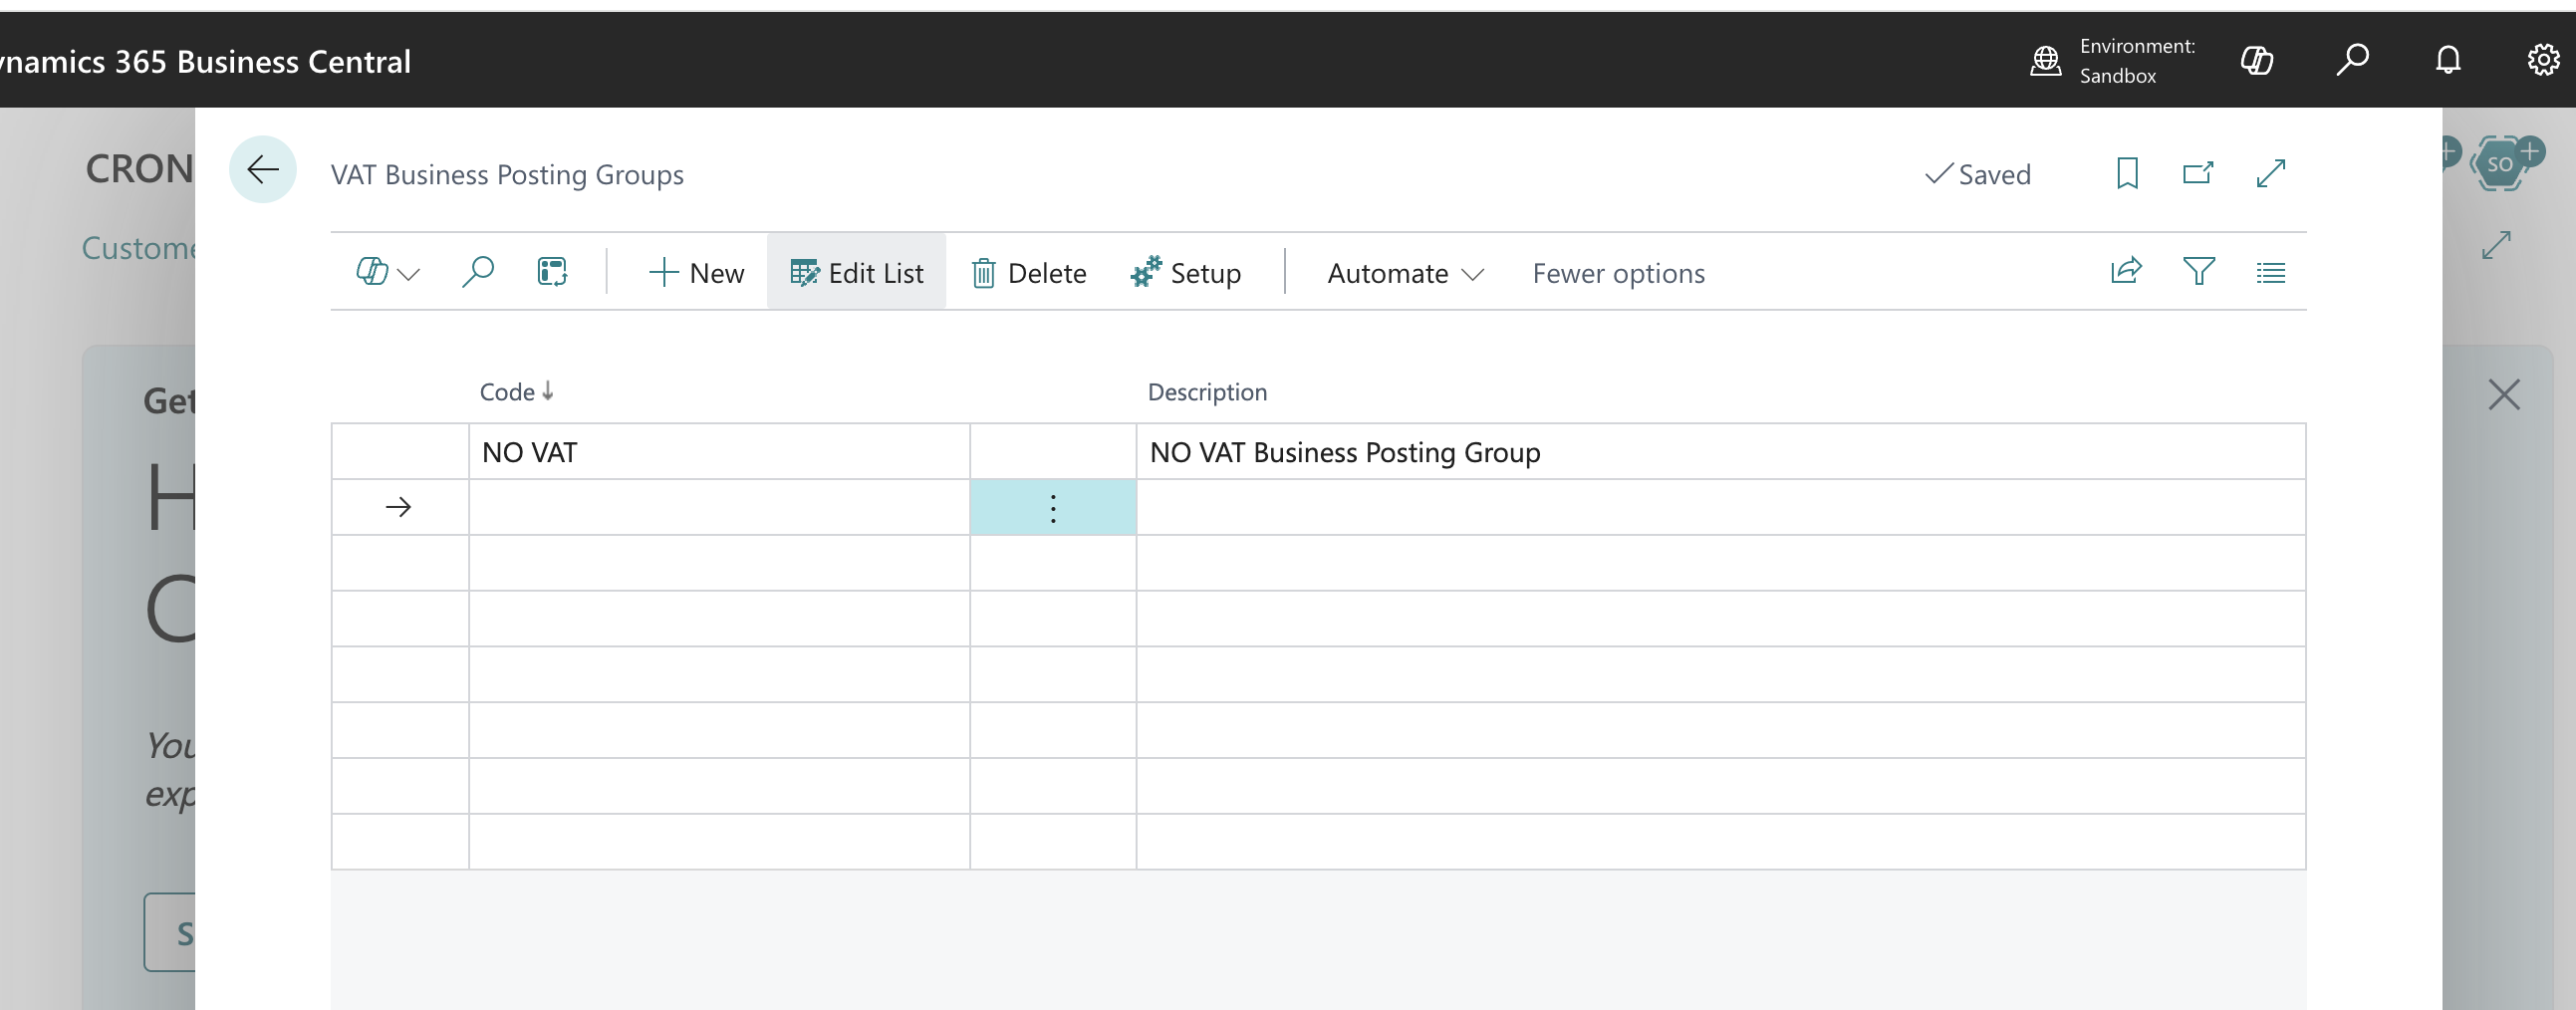
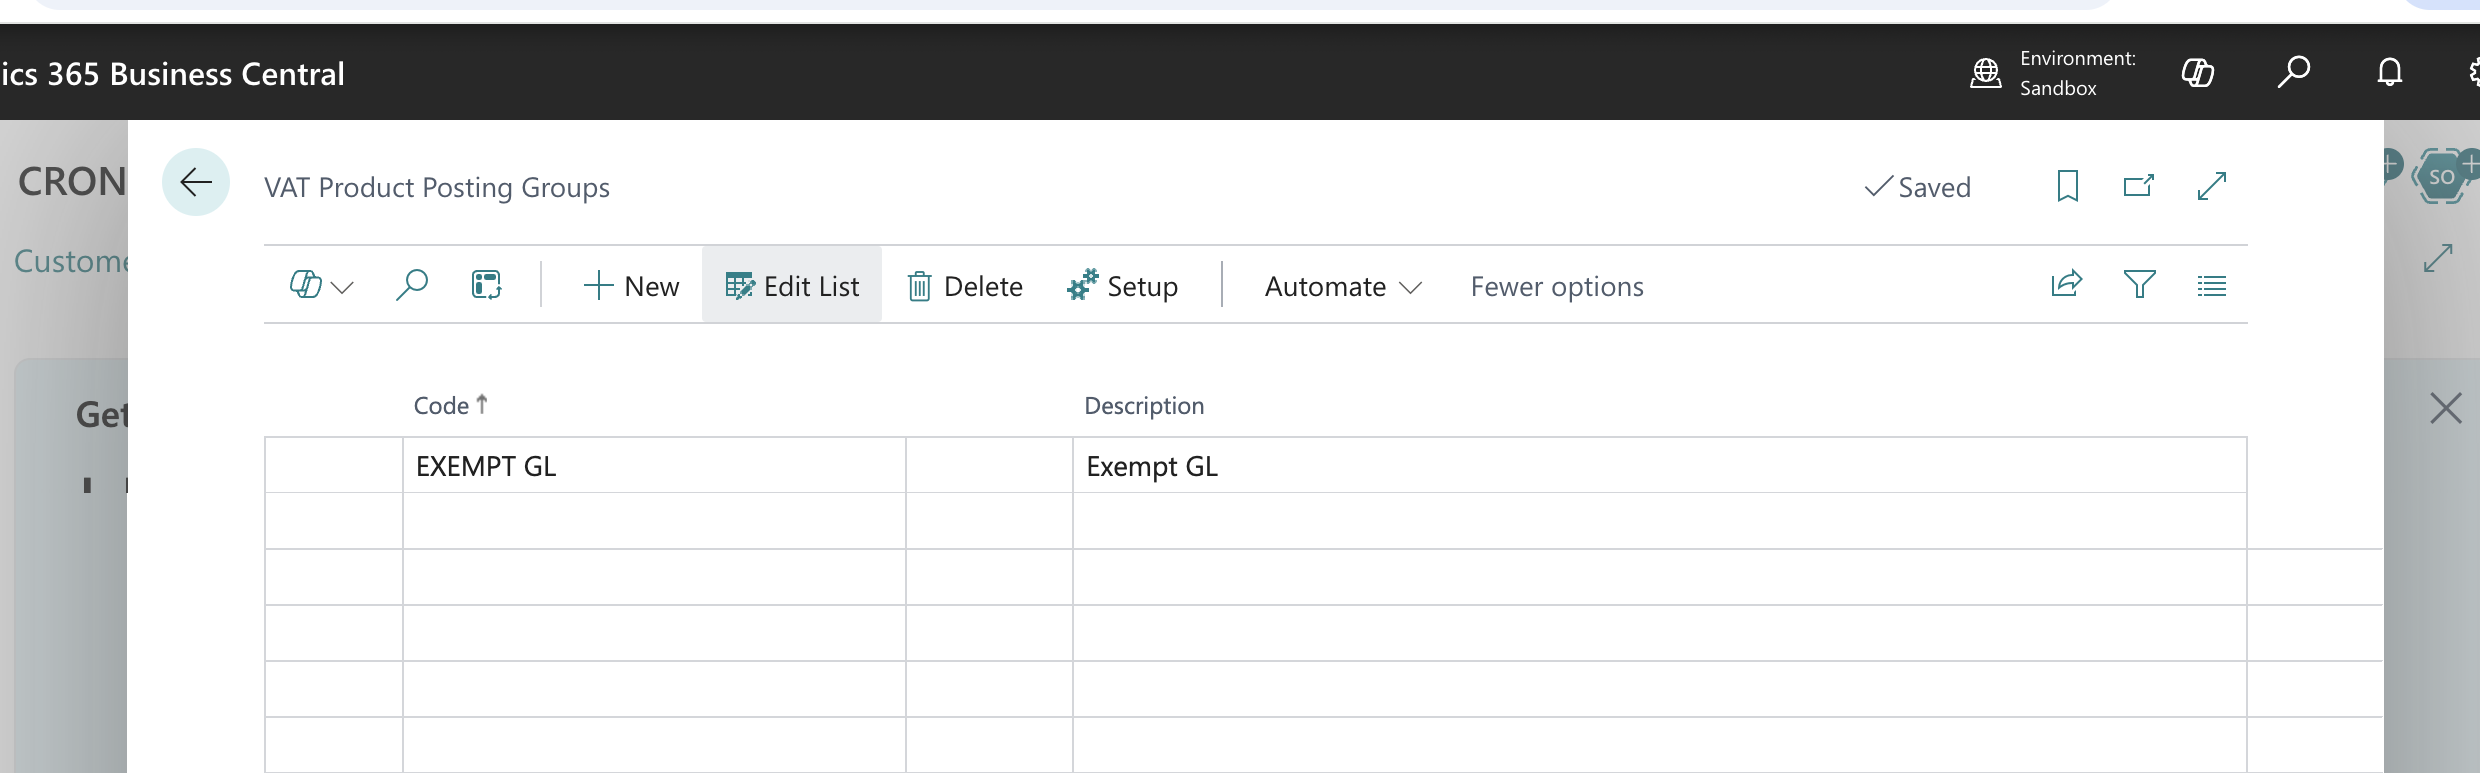
In Business Central, go to VAT Posting Setup and create a new line with:
Field | Value |
|---|---|
VAT Bus. Posting Group | Your chosen Business Posting Group assigned to the relevant customers/suppliers |
VAT Prod. Posting Group | Your chosen Product Posting Group linked to the ledger accounts used on invoices |
VAT % | 0 |
VAT Calculation Type | Normal VAT |
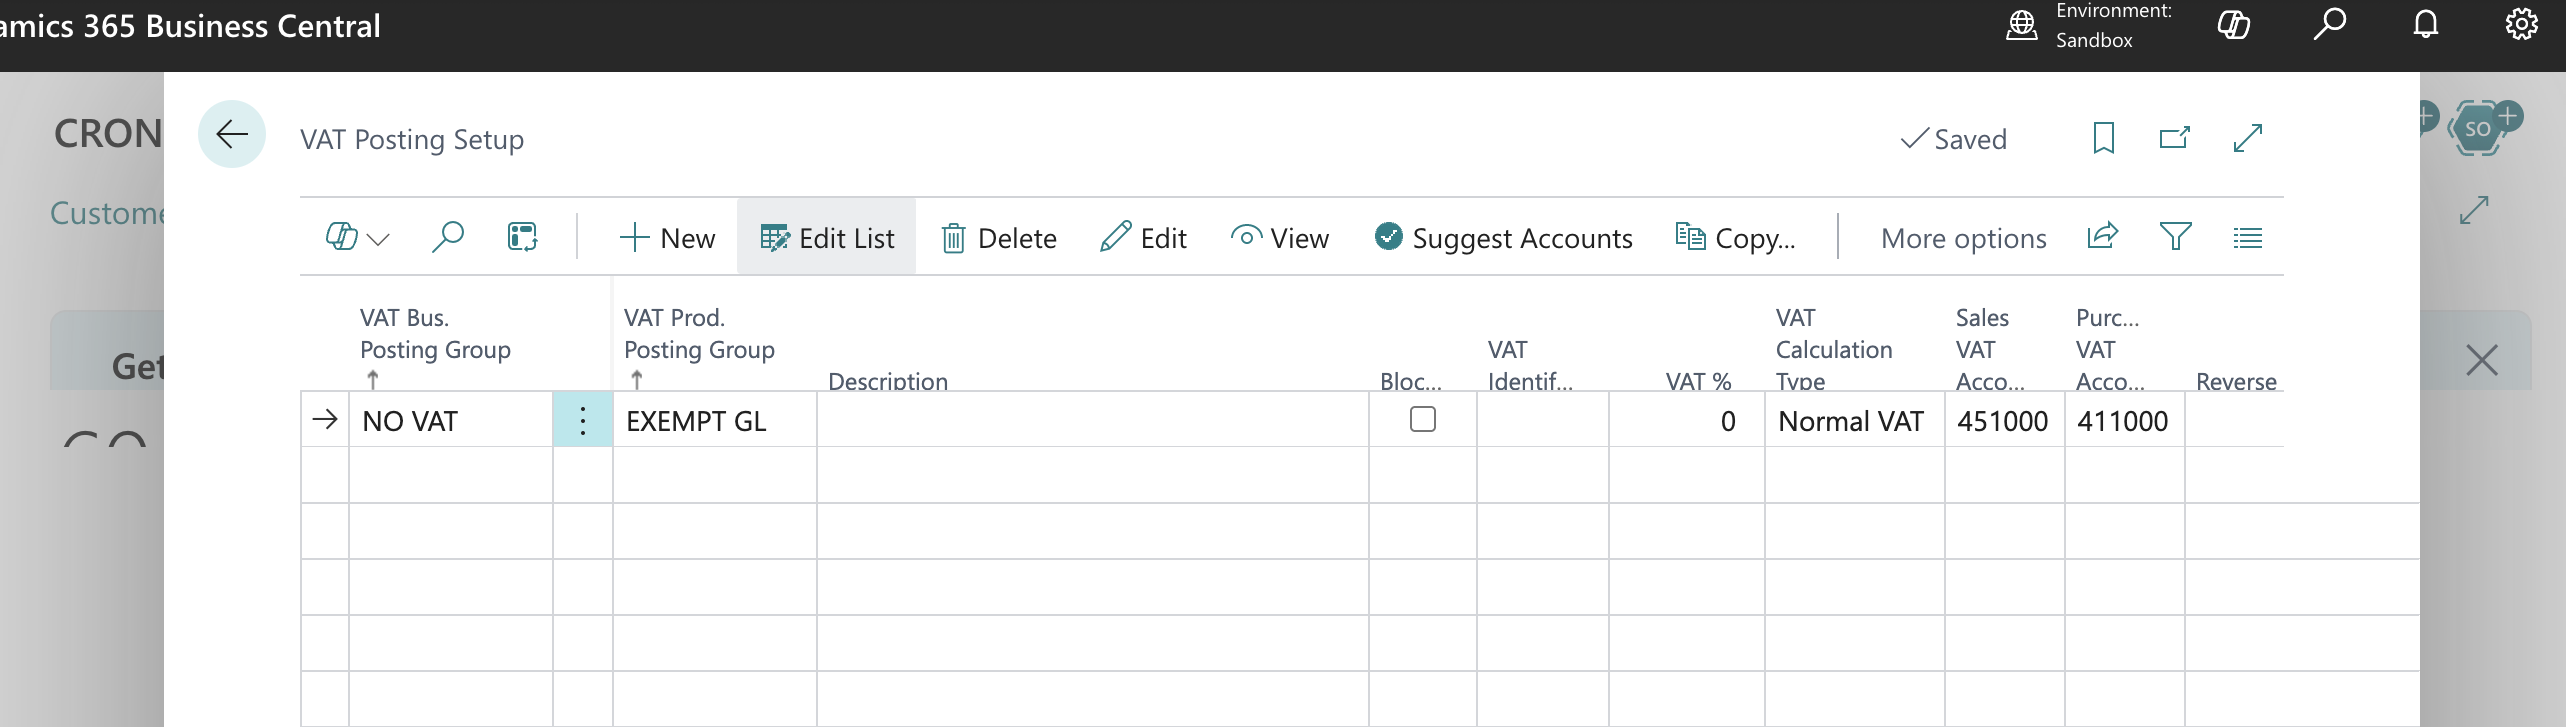
Setting the rate to 0% with Normal VAT as the calculation type tells Business Central to calculate VAT normally, just at a 0% rate — as opposed to types like Reverse Charge VAT or Sales Tax, which behave differently and are not covered by this exempt setup. This must be the only VAT Posting Setup line in Business Central — this setup does not support companies that also have taxed sales.