Netsuite
Last updated: August 5, 2026
🚨 PREREQUISITES
The following must be true in your NetSuite account before you start:
You have an Administrator role, or a role with the SuiteApp Marketplace permission (needed to install a bundle).
You have the Bundle ID provided by Chift :
703899(or by your provider, for a branded bundle).
Everything Chift needs — a script, a least-privilege role, the OAuth 2.0 integration record, and an attachments folder — is delivered by the bundle in one click. You never have to upload files, configure scripts manually, or copy a Client ID or Secret.
The whole setup is four steps: enable features → install the bundle → assign the role → authorize.
🛠 SETUP
You need to be logged in to your NetSuite account for the steps below.
☑ 1. Enable the right company features
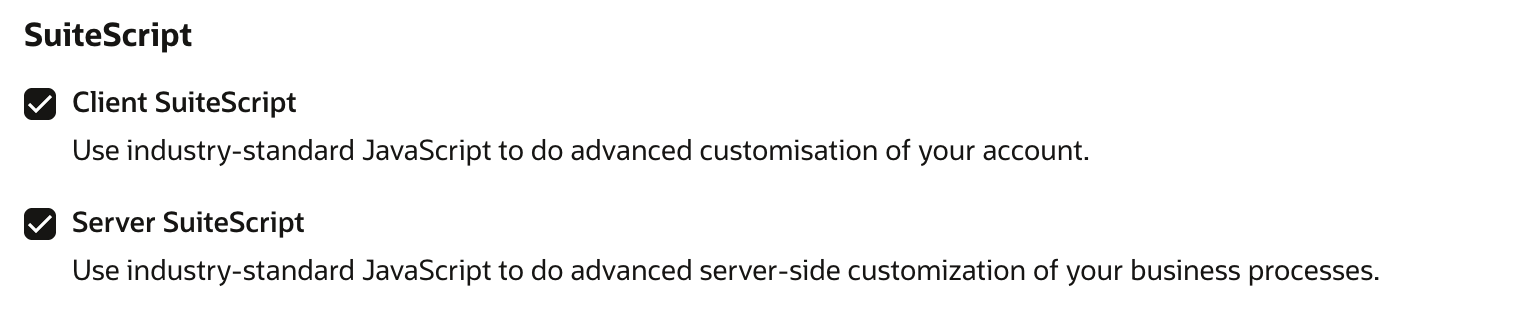
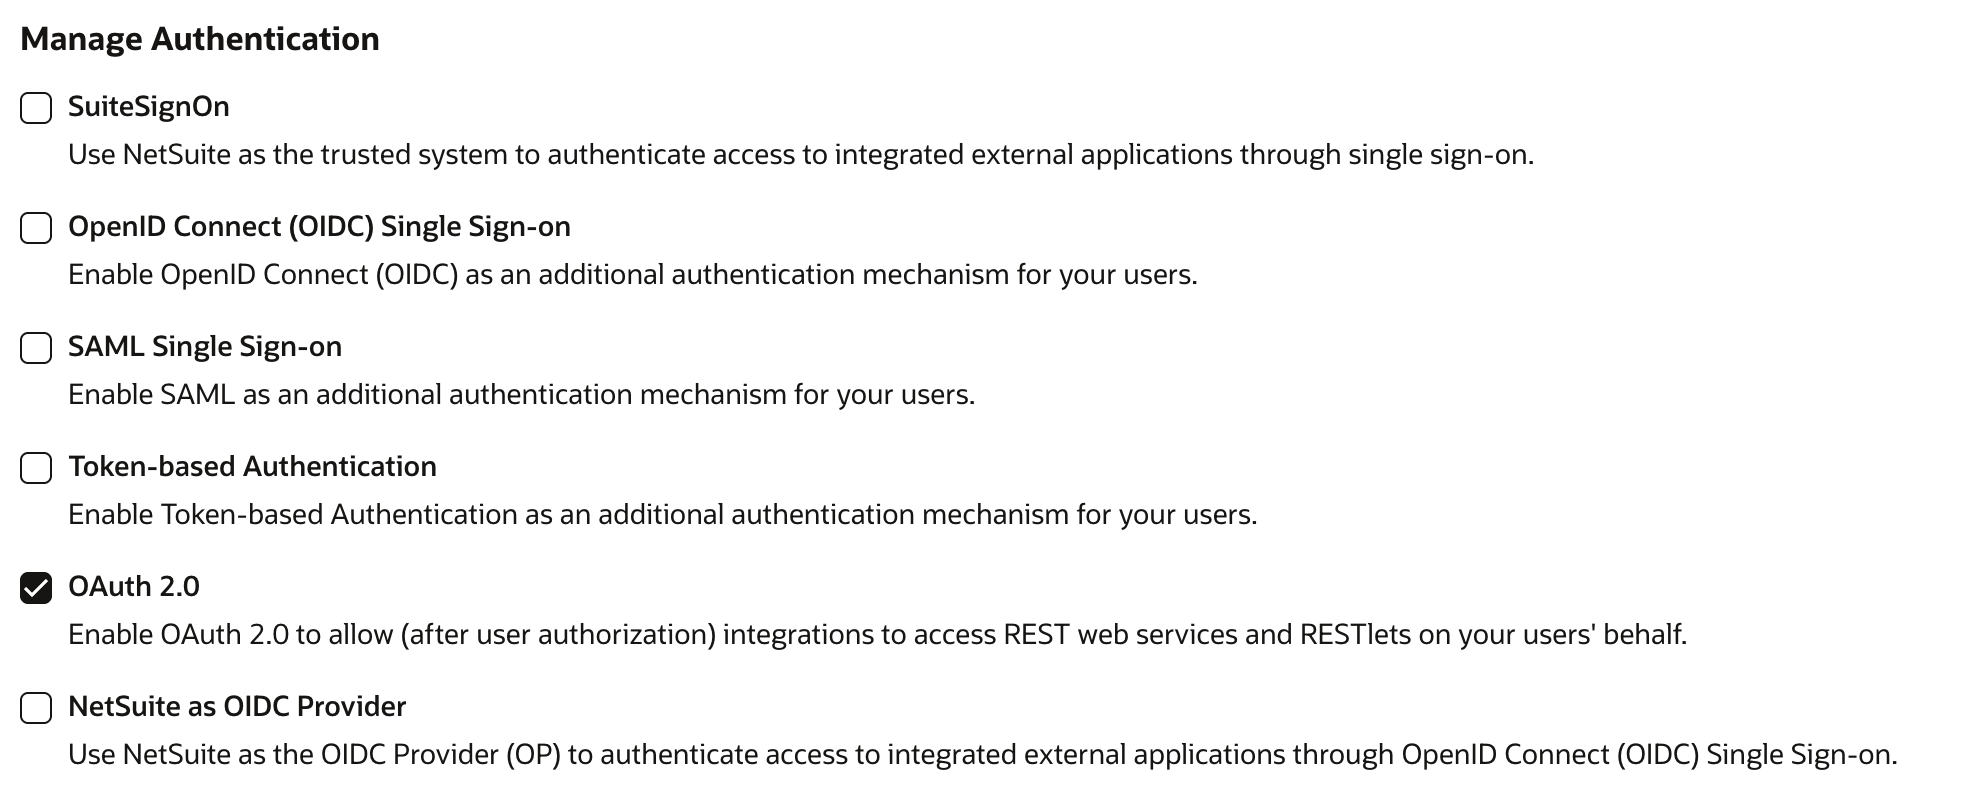
Go to Setup > Company > Enable Features > SuiteCloud tab. Enable each of the following, save, and accept every Terms of Service prompt.
⚠ This must be done before installing the bundle — without Server SuiteScript enabled, the bundled script cannot install.
SuiteScript → Client SuiteScript, Server SuiteScript
Manage Authentication → OAuth 2.0
SuiteTalk (Web Services) → REST Web Services

Custom Records → Custom Records
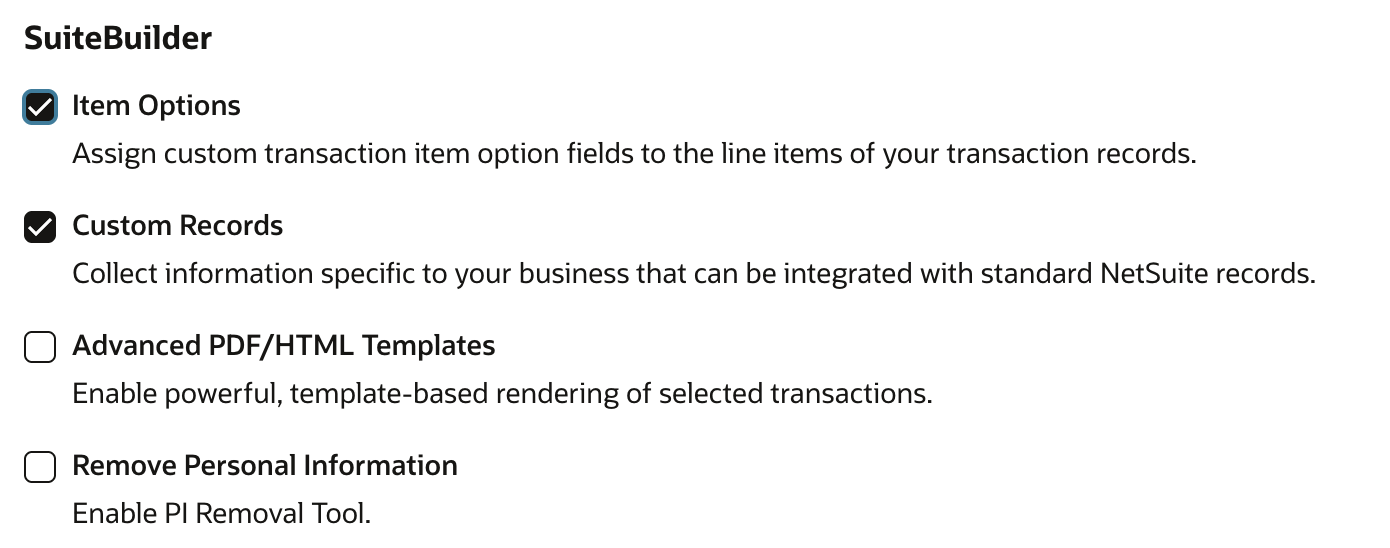
If your account uses custom segments as analytical dimensions, also enable SuiteCloud > Custom Segments (you will grant the matching permission on the role later; the permission only appears once the feature is on).
☑ 2. Install the Chift bundle
Go to Customization > SuiteBundler > Search & Install Bundles, enter the Bundle ID 703899, review the list of objects, and click Install.
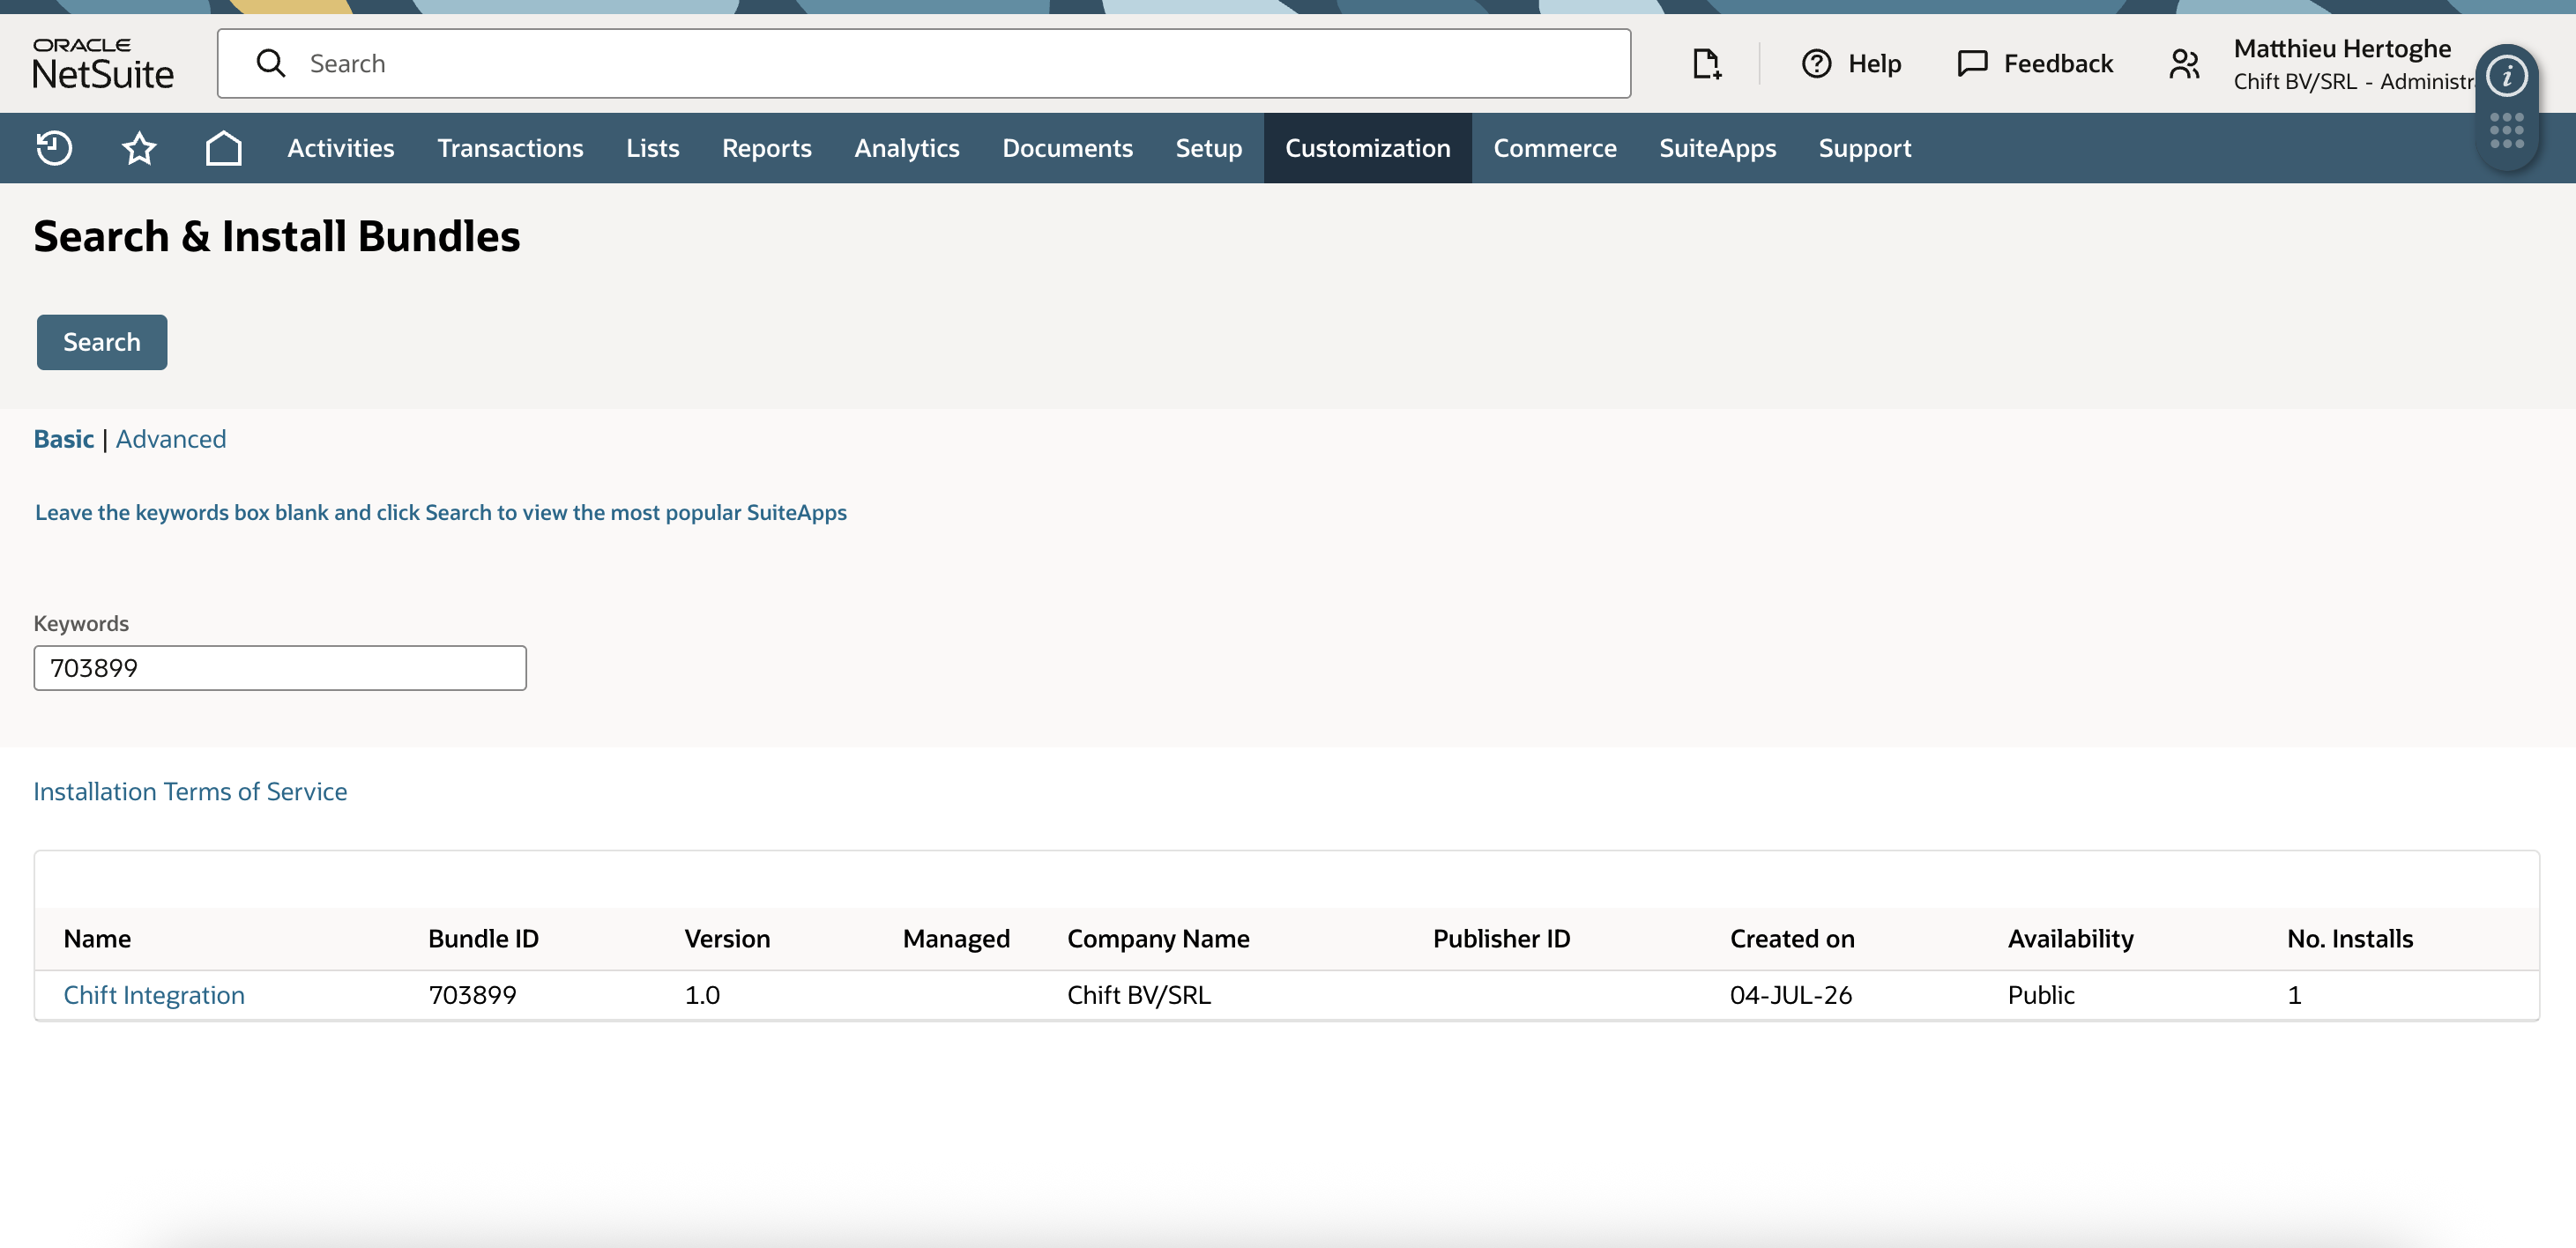
The script and its deployment, the Chift Integration role, the integration record, and the Chift Attachments folder are all installed in one click.
To remove the bundle later: Customization > SuiteBundler > List of Installed Bundles → select the bundle → Uninstall.
☑ 3. Assign the Chift Integration role (and re-login)
You can do this now or at connection time. Assigning the role up front is cleanest, but if it isn't set here, the user can still select (or switch to) the right role at the NetSuite consent screen during connection — see Check the role at connection in the Connection section below.
The bundle installs the role definition, but does not assign it to a user. Assign it to the user who will connect to Chift.
Assign the role via Setup > Users/Roles > Manage Users > the user > Access subtab > add Chift Integration > Save.
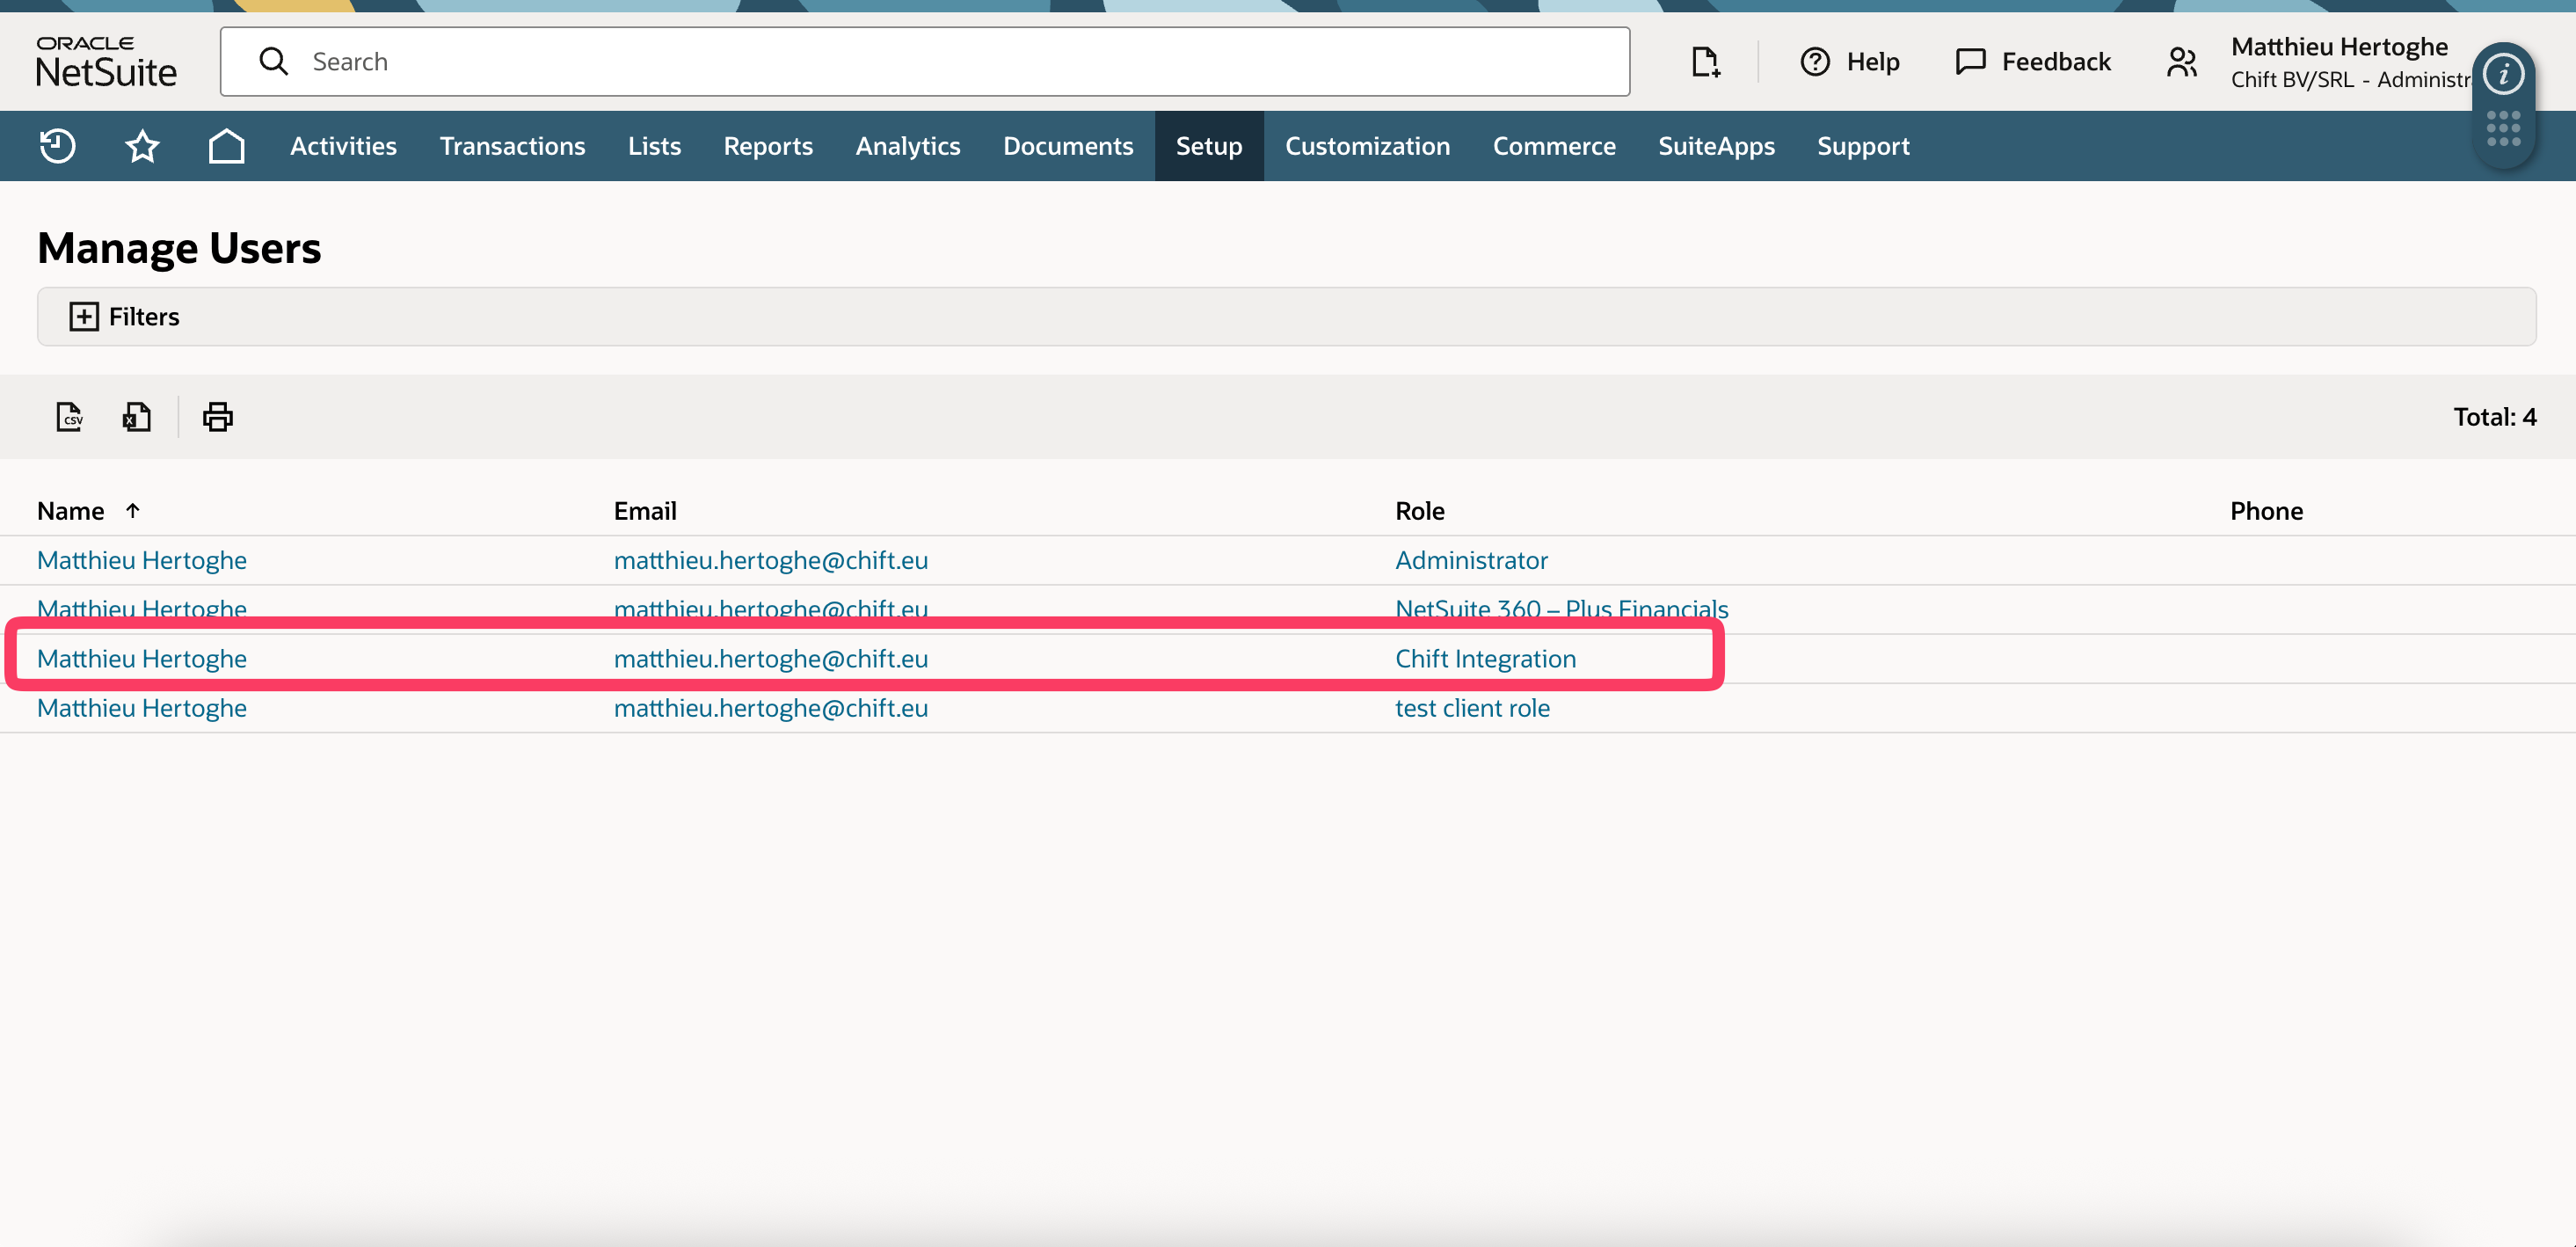
✅ Recommended: use a dedicated integration user. Create or pick an employee whose only role is Chift Integration (no Administrator, no other role). This is what keeps the connection least-privilege at runtime.
⚠ If using your own role instead of the bundled ones : Add the Manage own OAuth 2.0 Client Credentials certificates permission (under Setup) to it. Without it, the connection still works, but it stays on the standard OAuth flow and needs re-authorizing roughly every 30 days — with this permission, it moves to certificate-based (machine-to-machine) authentication and never expires.

⚠ You MUST log out and back in after assigning the role. NetSuite caches roles per session, so a newly assigned role only becomes selectable after the user logs out and logs back in. If you skip this, the role won't appear at the consent screen in the next step.
⚡️ CONNECTION
In Chift, start the NetSuite connection and follow the steps.
Step 1: Choose a name for your connection.

Step 2: Fill in your NetSuite Account ID.

Your Account ID is at the beginning of your NetSuite URL, e.g. https://1234567.app.netsuite.com → Account ID is 1234567. For sandbox accounts, replace the dash in the URL (sb-) with an underscore (sb_) — e.g. sb-12345 is entered as sb_12345. (NetSuite doc)
Step 3: Click on authorize. When asked, please enter your credentials (associated to the app) to connect your Netsuite account.

🚨 Connect with the role you want Chift to use — not as Administrator. The connection runs with whatever role the user authorizes with. If an Administrator connects, it runs with full administrator access. Log in as the user carrying the scoped role you assigned in Setup step 3 (read + write, read-only, or your own role).
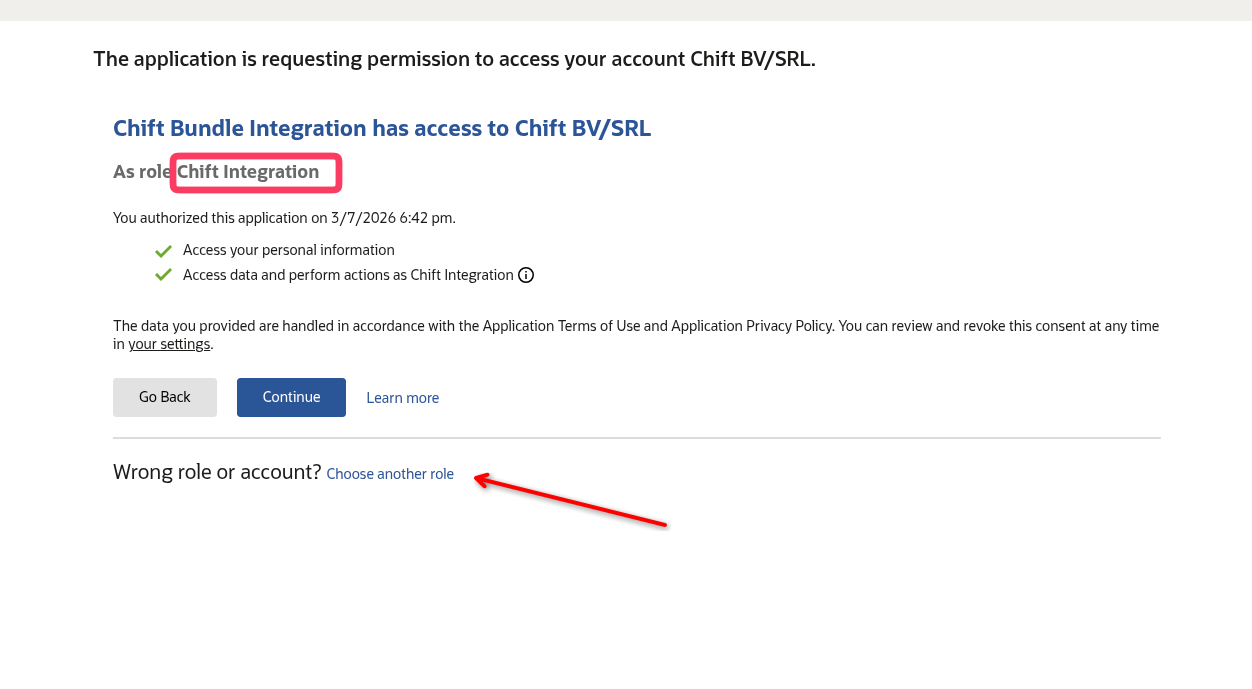
Check the role at connection. At the consent screen, NetSuite shows the role the connection will use. If the right role wasn't assigned during preparation — or the wrong one is preselected — check it here and switch to the correct role before confirming.
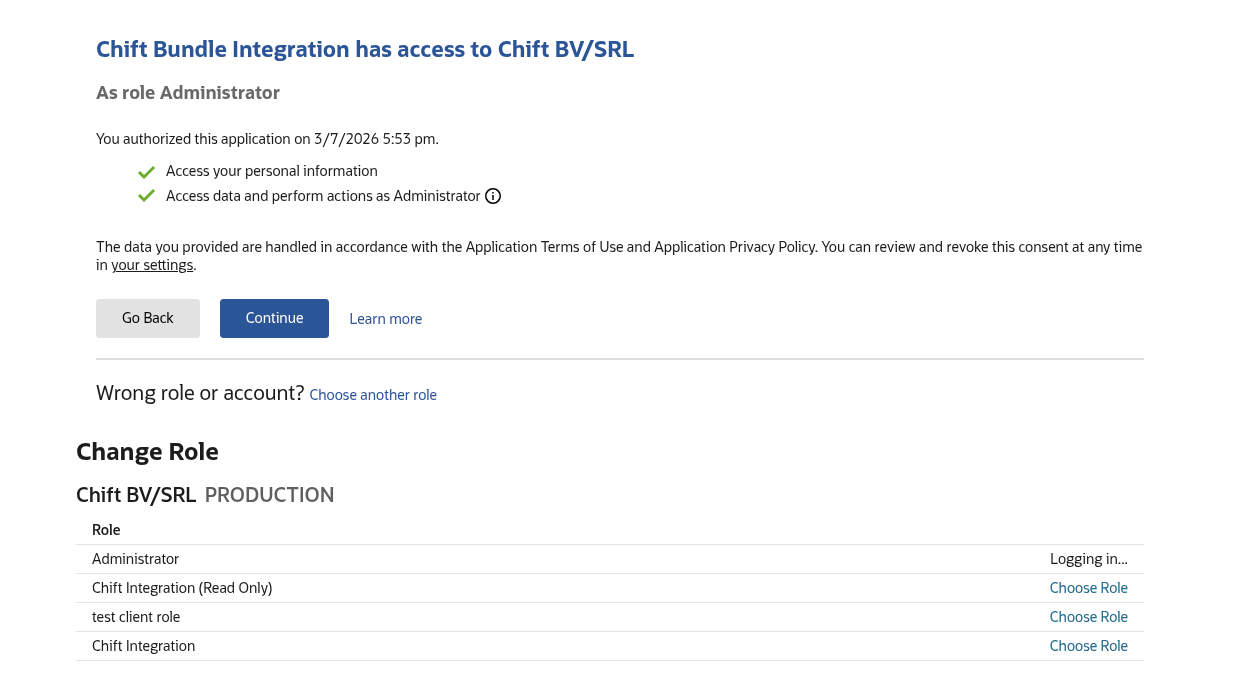
Press Continue and yhat's it — no Client ID, Client Secret, or RESTlet URL to enter. Standard accounting data and the script-backed features (attachments; bank transactions where applicable) all run over the same OAuth 2.0 connection.
ℹ GOOD TO KNOW
Roles & permissions.
The bundle ships two roles — Chift Integration (read + write) and Chift Integration (Read Only). You can also connect with your own NetSuite role scoped to your needs; in that case reach out to your software provider from which you are initiating this connection from, to know what is minimal set of permissions required for the scope of your integration with Netsuite.
🚨 Staying on machine-to-machine authentication (no monthly reconnects).
Whichever role you connect with — bundled or your own — it needs the Manage own OAuth 2.0 Client Credentials certificates permission (under Setup on the role's permission list) for the connection to move to certificate-based authentication and stop requiring reconnection every ~30 days. The bundled Chift Integration roles already carry it. If you're using your own role, add it manually:
You'll also need Client Credentials (Machine To Machine) Grant ticked on the NetSuite integration record itself (same screen as the REST Web Services and RESTlets scope checkboxes) — this only applies if you're using your own integration record rather than the Chift bundle.
Without both, the connection keeps working normally, it just stays on the standard flow and needs re-authorizing about once a month.
OneWorld (multi-subsidiary) accounts.
The Chift Integration role ships with Subsidiary Restrictions = All so the connector can see every subsidiary. If this is changed to User Subsidiary, or if the user's Include Sub-Subsidiaries preference is off (Home > Set Preferences > Restrict View), child subsidiaries won't appear in Chift. Re-login after changing either.
Attachments folder.
The bundle ships a Chift Attachments File Cabinet folder as the default target for stored attachments. You can point Chift at another folder in the post-connection settings. Do not rename the bundled folder — Chift matches it by the exact name Chift Attachments.
Bank transactions.
Importing bank transactions requires the third-party ZoneReconcile (Zone & Co) SuiteApp to be installed on your account, and the Chift Integration role to have access to its bank record types. Attachments and all standard accounting features do not depend on this.
🧯 TROUBLESHOOTING
Symptom | Cause | Fix |
|---|---|---|
Connection keeps asking for reconnection every ~30 days even though everything else is set up correctly | Custom role is missing | Add the permission to the role and/or tick the grant on the integration record, then run Test Connection |
| You connected as Administrator instead of the | Reconnect as the dedicated integration user (Connection step 3). |
The | Role assigned but the session wasn't refreshed | Log out and back in as the integration user (Setup step 3), then retry. |
Subsidiary list shows only the parent (OneWorld) | Role's Subsidiary Restrictions = User Subsidiary, or Include Sub-Subsidiaries is off | Set Subsidiary Restrictions = All on the role, enable Include Sub-Subsidiaries, then re-login. |
The | Folder was renamed | Keep the exact name |
Bundle won't install ("script cannot be deployed") | Server SuiteScript / Custom Records feature not enabled | Complete Setup step 1 before installing. |
A specific endpoint returns a 403 at runtime | The role is missing that transaction/list permission | Grant the missing permission on the |